How to Install a Reverse Camera in a Car
To install a reverse camera in your car, first choose a model compatible with your vehicle and display. A reverse camera helps improve safety and visibility while backing up.
Access the rear panels to locate the reverse light wiring. Tap power wires carefully, and route the video cable securely toward the dashboard.
Mount the camera near the license plate, aligning the angle precisely. Then connect it to your monitor or head unit.
Finally, test image quality in varied lighting and verify guide lines align accurately. Following these steps ensures a reliable setup, with further details available for optimizing performance.
Key Takeaways
- Choose a compatible reverse camera considering wired vs. wireless options, mounting location, and power requirements for your vehicle model.
- Prepare the vehicle by accessing rear panels, locating reverse light wiring, and organizing connectors for power and video cable routing.
- Mount the camera securely near the license plate or rear bumper, ensuring proper angle alignment and legal compliance.
- Wire the camera by tapping into reverse light power, securing connections with quality connectors, and routing cables to avoid damage or interference.
- Install and configure the monitor or head unit display, adjust settings for clear visuals, and test camera performance in various lighting conditions.
Tools and Materials You’ll Need
What tools and materials do you need to install a reverse camera in your car? First, gather essential items: a reverse camera kit, including the camera and monitor, electrical wiring, connectors, and mounting brackets.
You’ll also need basic tools: a drill with appropriate bits, wire strippers, electrical tape, and a multimeter to test connections. Two-word ideas like “power source” and “signal cable” help clarify components. Avoid unrelated topics such as unrelated car repairs or audio system upgrades.
Methodically, ensure you have zip ties for cable management and a fuse tap for safe power access. Precision in selecting materials and tools prevents installation errors. Preparing these items upfront streamlines the process, allowing you to focus on a successful, professional-quality reverse camera setup.
Choosing the Right Reverse Camera for Your Car
You’ll need to select a reverse camera type that suits your driving needs, such as wired or wireless models. Make sure the camera you choose is compatible with your car’s make and model to ensure proper installation and functionality. Checking specifications like power requirements and mounting options will help you make an informed decision.
Types of Reverse Cameras
How do you determine which reverse camera suits your vehicle and driving needs? You start by understanding the primary camera types, balancing functionality with reverse camera aesthetics. Consider these key categories:
Wired cameras: Offer reliable connections and consistent image quality but require more complex installation.
Wireless cameras: Simplify installation and reduce clutter, though they may experience occasional signal interference.
Mirror-integrated cameras: Combine the camera with your rearview mirror, enhancing aesthetics and minimizing dashboard space.
Each type presents distinct advantages depending on your vehicle’s design and your personal preferences. Use discussion ideas around installation complexity, image resolution, and mounting options to narrow your choice.
Focus on technical compatibility and aesthetics to select the reverse camera that seamlessly integrates with your car’s style and enhances your driving safety.
Compatibility With Vehicle Models
When selecting a reverse camera, ensuring compatibility with your specific vehicle model is essential for peak performance and ease of installation. Start by reviewing compatibility considerations such as mounting locations, power connections, and video output types.
Different vehicles may require unique wiring harnesses or connectors, so verify if model specific adapters are necessary. These adapters facilitate seamless integration without modifying factory wiring, maintaining vehicle integrity.
Additionally, confirm that the camera’s dimensions and mounting style align with your car’s design to prevent fitment issues. Consult your vehicle’s manual or manufacturer resources for precise specifications.
Preparing Your Vehicle: Accessing Panels and Wiring
Where exactly do you start when preparing your vehicle for installing a reverse camera? Begin by gathering the necessary resources, including the vehicle’s wiring diagrams and panel removal tools. Proper budgeting for tools and materials ensures you won’t face delays mid-installation.
Next, methodically access the panels and wiring:
Carefully remove interior panels around the rear hatch or trunk using plastic pry tools to avoid damage. Locate the reverse light wiring harness, crucial for tapping the camera’s power supply. Trace wiring routes to plan cable management, ensuring wires won’t interfere with moving parts.
Work systematically to avoid errors. Label disconnected connectors and keep screws organized. This preparation sets a solid foundation before mounting the camera, streamlining the entire installation process.
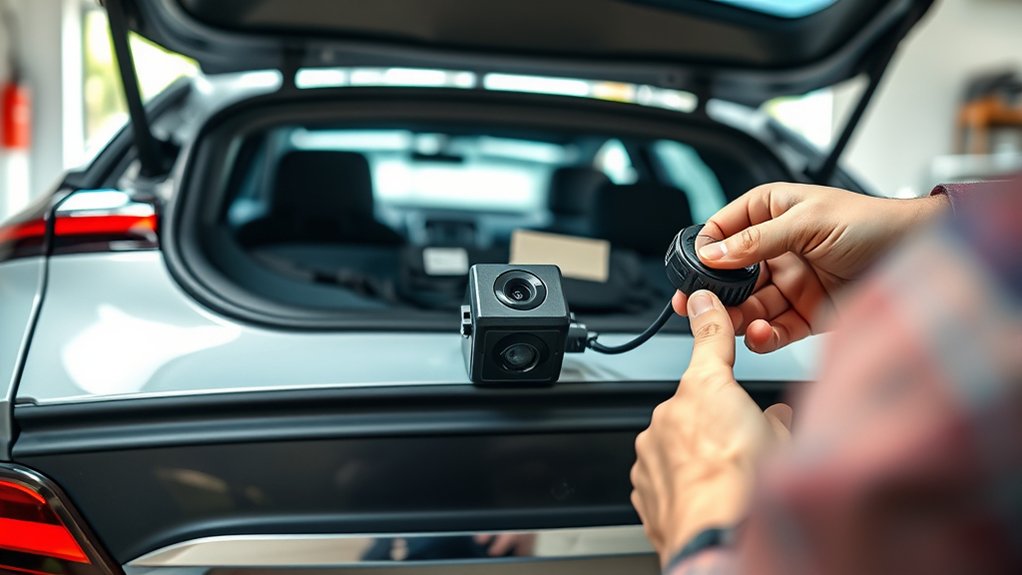
How to Mount Your Reverse Camera
First, identify an ideal location for your reverse camera, typically near the license plate, ensuring an unobstructed rear view. Next, align the camera mount securely using screws or adhesive, depending on your vehicle’s surface and camera design. Finally, double-check the camera angle and stability before proceeding to the wiring stage.
Choosing Camera Placement
How do you determine the best spot to mount your reverse camera for maximum effectiveness? Start by considering the camera’s field of view, similar to how a camera obscura projects an image, ensuring the lens captures a wide, undistorted perspective. Avoid placing it too high or low; a rooftop viewfinder analogy helps—too high reduces detail, too low limits range.
Focus on these key factors:
- Position near the license plate or rear bumper center for balanced coverage.
- Ensure the lens angle captures the ground behind without obstruction.
- Avoid areas prone to dirt accumulation or exposure to direct elements.
Choosing the optimal location ensures accurate image projection, crucial for safe reversing. This methodical approach guarantees the camera delivers clear, reliable visuals without blind spots.
Securing the Camera Mount
When securing your reverse camera mount, what methods ensure a stable and durable installation? Start by selecting a mounting location that aligns with your previously chosen placement, ensuring the camera has an unobstructed rear view. Use screws, bolts, or high-strength adhesive pads designed for automotive use to fasten the mount firmly.
Confirm the mount’s alignment and angle before tightening to avoid image distortion. Secure all cables to prevent strain or disconnection. Properly mounting the camera supports safe driver onboarding by providing reliable visual feedback, reducing accident risks.
Additionally, ensure your installation complies with local legal requirements regarding camera placement and visibility. By following these precise steps, you guarantee a robust setup that maintains vehicle integrity and promotes both safety and legal compliance throughout your reverse camera system.
Wiring Your Reverse Camera
Where do you connect the wires to guarantee your reverse camera functions correctly? You’ll tap into the car’s reverse light wiring to power the camera only when reversing, which avoids unrelated safety risks and preserves aesthetics orientation by preventing unnecessary wiring clutter.
First, identify the positive and negative wires of the reverse light harness. Then, connect the camera’s power wires accordingly, using solder or quality connectors to ensure a stable connection. Finally, route the video cable toward the front, securing it with clips or ties.
Identify reverse light wires, connect camera power securely, and route video cable forward with proper fastening.
Keep these points in mind:
- Use a multimeter to verify reverse light wires.
- Avoid interference by separating power and video cables.
- Protect all connections with heat shrink tubing or electrical tape.
This method ensures reliable operation and a clean installation.
Installing and Configuring the Reverse Camera Monitor
Why is proper installation and configuration of the reverse camera monitor critical? Because the monitor serves as your primary interface with the camera feed, its placement and setup directly impact visibility and safety.
Start by selecting a location that avoids glare and distractions. Common design considerations include dashboard mounting or integration into the rearview mirror. Secure the monitor firmly, ensuring stable power and signal connections.
Next, configure settings such as brightness, contrast, and guidelines alignment to match your vehicle’s dimensions accurately. Be mindful of potential drawbacks like screen latency or incompatibility with existing infotainment systems.
Address these by consulting the manufacturer’s specifications and using compatible components. A meticulous approach here ensures reliable, clear visuals critical for reversing safety and overall system effectiveness.
Testing Your Reverse Camera for Proper Operation
How can you ensure your reverse camera functions accurately before hitting the road? Begin by conducting a comprehensive test under various lighting conditions to verify image clarity and sensor responsiveness. Check for wireless interference by observing signal stability; unexpected flickers or loss of connection often indicate interference issues. Finally, confirm the camera’s alignment and monitor display synchronization.
Focus on these critical checks:
- Test the camera during daylight and low-light scenarios to assess image quality.
- Evaluate the wireless signal for disruptions that may affect real-time video feed.
- Verify that the guide lines and camera angle correspond accurately to the vehicle’s rear.
Performing these steps methodically guarantees reliable reverse camera operation and enhances safety during reversing maneuvers.
Frequently Asked Questions
Can a Reverse Camera Be Connected to a Smartphone Instead of a Monitor?
Yes, you can connect a reverse camera to your smartphone using wireless display options, ensuring the camera has waterproof ratings.
Check legal requirements and insurance impact, especially if installing on a motorcycle, to maintain compliance and safety.
Are Reverse Cameras Waterproof and Weather-Resistant?
Yes, most reverse cameras undergo waterproof testing and feature weather resistance ratings like IP67 or IP68. You’ll find these ratings guarantee reliable performance against water, dust, and harsh weather, so your camera stays durable outdoors.
How Does a Reverse Camera Affect Car Insurance Premiums?
Wondering if a reverse camera affects your insurance premium impact? Typically, it doesn’t directly lower premiums but may help meet legal requirements, reducing accident risk.
Always notify your insurer to ensure accurate coverage and potential discounts.
Can I Install a Reverse Camera on a Motorcycle?
You can install a reverse camera on a motorcycle, though it’s an invalid topic compared to car systems. Avoid unrelated ideas; focus on mounting, wiring, and power supply specifics to assure proper integration and reliable operation.
What Are the Legal Requirements for Reverse Cameras in Different Countries?
Like navigating a maze, legal compliance for reverse cameras varies globally. You’ll need to meet specific regulatory standards, such as viewing angle or display requirements, set by each country’s transport authority to ensure your system’s lawful use.
Conclusion
Installing a reverse camera might seem complex, but with the right tools and clear steps, it becomes straightforward. While wiring and mounting require precision, the safety and convenience gained are invaluable. You go from guessing distances blindly to confidently navigating tight spots.
By methodically following each step, you ensure flawless operation and long-term reliability. In the end, a little effort transforms your car into a smarter, safer machine—proof that technology truly simplifies driving.
Installing a reverse camera is a valuable upgrade that enhances your driving experience and safety.