How Do Jumper Cables Work
You use jumper cables to transfer electrical current from a charged battery to a dead one, giving it enough power to start your car’s engine. Jumper cables work by creating a temporary connection between the two batteries, allowing electricity to flow safely.
First, connect the positive terminals, then the negative to the donor battery, and finally a grounded metal surface on the dead car. This sequence ensures safety and prevents sparks.
This safely powers the starter motor, allowing the alternator to recharge the battery once running. Understanding this process helps prevent damage and ensures a reliable jump start—explore further for safe connection techniques and troubleshooting.
What Are Jumper Cables and Why They Matter
What exactly are jumper cables, and why should you keep them in your vehicle? Jumper cables are insulated wires with clamps designed to connect the dead battery of your car to a live battery from another vehicle or power source. Their primary function is to transfer electrical current efficiently, enabling your vehicle’s battery to regain enough charge to start the engine.
Maintaining battery health is critical; jumper cables provide a quick solution when a battery’s charge drops below operational levels due to factors like cold weather or extended inactivity. By using jumper cables correctly, you prevent unnecessary strain on your battery and electrical system, prolonging their lifespan.
Keeping them handy ensures you can respond immediately to battery failure, minimizing downtime and avoiding costly towing services.
How a Car Battery Powers Your Car
Understanding how a car battery powers your vehicle helps clarify why jumper cables are necessary when the battery fails. Your car battery stores chemical energy and converts it into electrical energy to initiate power delivery.
A car battery converts stored chemical energy into electrical power to start your vehicle and keep it running.
When you turn the ignition, the battery supplies a high current to the starter motor, enabling the engine to crank. This initial surge is critical because the starter requires substantial power to overcome engine resistance.
Besides starting the engine, the battery stabilizes voltage to protect sensitive electronics and powers accessories when the engine is off. The power delivery from the car battery is a controlled flow of electrons through the vehicle’s electrical system, ensuring all components receive the energy they need.
Without this reliable power source, your vehicle wouldn’t start or operate correctly.
What Happens When a Car Battery Dies
When your car battery dies, it means the battery’s charge has been fully depleted, disrupting the electrical system. This loss prevents essential components from receiving power, causing the starting system to fail. Without sufficient voltage, your engine won’t crank, leaving you stranded until power is restored.
Battery Power Drain
How exactly does a car battery lose its charge and leave you stranded? When you turn your key, the battery delivers power to the starter motor, which cranks the engine. This process demands a high current, rapidly draining battery reserves.
Over time, repeated starts and electrical loads degrade battery health by depleting active materials inside the cells. Additionally, if the vehicle’s charging system isn’t working properly, the battery doesn’t replenish its charge while driving.
Parasitic drains, such as interior lights or electronic devices left on, also consume power even when the engine’s off. When battery capacity falls below the level needed to activate the starter motor, the car won’t start.
Understanding this power drain helps you diagnose battery failure and decide when to recharge or replace it.
Electrical System Impact
A dead car battery doesn’t just prevent the engine from starting; it disrupts the entire electrical system. When your battery fails, you’ll notice several immediate impacts:
- Electronic components like lights, dashboard displays, and infotainment systems stop functioning.
- Safety systems such as airbags and ABS might become inactive or unreliable.
- Power windows and door locks may lose operation, affecting vehicle security.
- Battery safety risks increase, including potential leaks or corrosion, which can harm other electrical parts.
Additionally, insurance considerations come into play if electrical failures cause accidents or damage. Understanding these effects helps you prioritize battery maintenance and respond promptly to failures, ensuring your vehicle’s electrical system remains reliable and safe. Jumper cables can restore power, but addressing root causes is essential for long-term vehicle health.
Starting System Failure
Why does your car refuse to start despite turning the key or pressing the ignition button? This issue often signals starting system failure caused by a dead or severely discharged battery.
When the battery lacks sufficient voltage, it can’t provide the necessary electrical current to power the starter motor and ignition system. Poor battery maintenance, such as neglecting regular charging or failing to inspect terminals for corrosion, accelerates battery failure.
To prevent this, follow strict battery maintenance routines and acquire proper safety training to handle electrical components safely. Jumper cables temporarily restore power by connecting your battery to a live source, allowing the starter motor to engage.
Understanding starting system failure helps you diagnose issues quickly and ensures you take appropriate, safe action when faced with a dead battery.
How Jumper Cables Work
Have you ever wondered what happens when you connect jumper cables between two car batteries? When you do this, you’re essentially providing a direct electrical path from the charged battery to the dead one, bypassing unrelated topic areas like the vehicle’s electronics or off topic ideas such as external power sources. Here’s how it works:
- The jumper cables transfer electrical current from the donor battery to the dead battery.
- This current recharges the dead battery enough to power the starter motor.
- The starter motor engages, turning the engine over.
- Once the engine runs, the alternator takes over to recharge the battery.
How to Connect Jumper Cables Safely
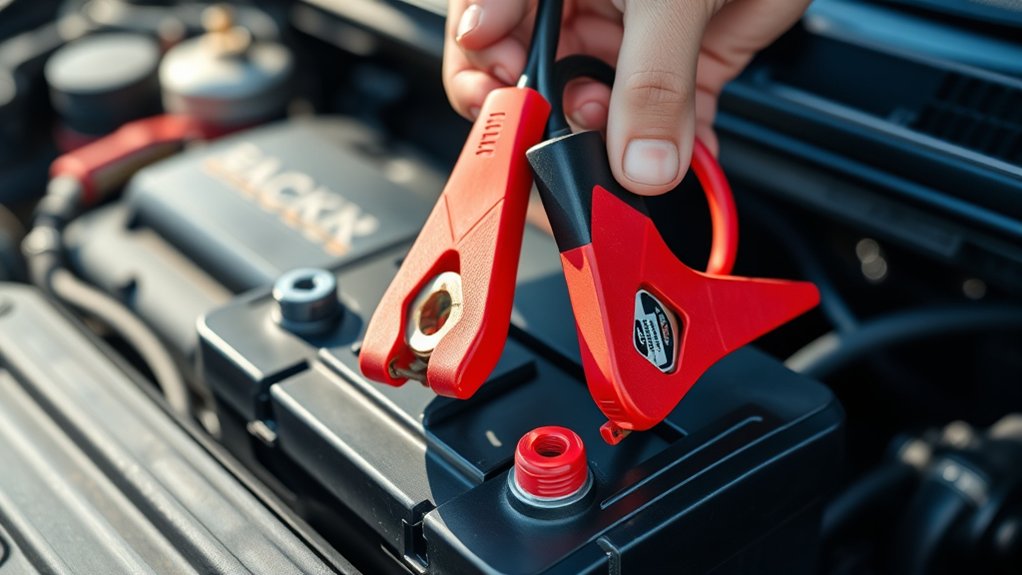
Understanding how jumper cables transfer current is important before you start connecting them. To ensure jump start safety, first park the vehicles close but not touching, turn off both engines, and engage parking brakes.
Locate the roadside kit in your vehicle for emergency tools and follow its guidelines. Begin by attaching one red clamp to the positive terminal of the dead battery, then connect the other red clamp to the positive terminal of the donor battery.
Next, connect one black clamp to the negative terminal of the donor battery. Finally, attach the remaining black clamp to a grounded, unpainted metal surface on the dead vehicle’s engine block, never on the battery itself. This sequence minimizes sparks and reduces risk, ensuring a safe transfer of current.
Why Cable Order Matters When Jump Starting
You need to connect jumper cables in a specific sequence to guarantee safe and effective power transfer. Attaching cables in the wrong order can cause sparks, damage electrical components, or create a short circuit. Understanding the proper cable connection sequence reduces these risks and protects both vehicles.
Proper Cable Connection Sequence
A specific sequence must be followed when connecting jumper cables to guarantee safety and effectiveness. This order respects battery chemistry and charging basics, preventing sparks and ensuring proper current flow.
Follow these steps:
- Connect the red positive (+) clamp to the dead battery’s positive terminal.
- Attach the other red positive (+) clamp to the live battery’s positive terminal.
- Connect the black negative (–) clamp to the live battery’s negative terminal.
- Attach the remaining black negative (–) clamp to an unpainted metal surface on the dead car’s engine block, away from the battery.
This sequence minimizes risk by controlling electron flow based on battery chemistry principles and prevents voltage spikes that could damage components or cause injury.
Risks of Incorrect Order
Why does the order of connecting jumper cables matter so much? Connecting cables in the wrong sequence can cause dangerous sparks, electrical shorts, or even battery explosions.
When you skip proper steps, you risk damaging sensitive vehicle electronics, which can lead to costly repairs. Managing the connection order efficiently saves you time management headaches and prevents unexpected expenses, aligning with practical budgeting tips for vehicle maintenance.
First, connect the positive terminals to avoid reverse polarity. Next, attach the negative cable to the donor car’s battery and finally to a grounded metal surface on the dead car. This sequence minimizes risk and ensures a stable current flow.
Neglecting this order compromises safety and wastes both time and money, defeating the purpose of a quick, effective jump start.
Common Mistakes to Avoid When Using Jumper Cables
How can improper use of jumper cables compromise both your safety and the effectiveness of the jump-start? Using cables with damaged cable insulation or insufficient heat resistance can cause short circuits or melting, risking injury and vehicle damage.
Damaged or low-quality jumper cables risk short circuits, melting, injury, and vehicle damage during jump-starts.
Avoid these common mistakes:
- Connecting cables in the wrong order, which can cause sparks or battery damage.
- Using cables with frayed or cracked insulation, as it reduces safety and conductivity.
- Attaching clamps to painted or rusty surfaces, preventing proper electrical contact.
- Letting cables touch each other during the process, which can create dangerous electrical arcs.
How to Know If Your Jump Start Worked
When can you be certain that your jump start was successful? First, your vehicle’s engine should start promptly once the jumper cables connect the batteries. Listen for a steady, strong ignition sound rather than sputtering or clicking noises.
Check that dashboard indicators, such as battery and oil lights, turn off after the engine runs for a few seconds. Maintain battery safety by avoiding contact with moving engine parts and ensuring cables remain securely attached during the process.
After starting, allow the engine to run for several minutes to recharge the battery. Keep toolkit essentials like gloves and safety glasses on hand for protection.
If your vehicle runs smoothly without stalling, you can be confident the jump start worked effectively and your battery is receiving charge.
What to Do If Jumper Cables Fail
If your jumper cables fail to start the vehicle, first double-check all cable connections to ensure they’re secure and correctly placed. If the connections are sound but the engine still won’t turn over, consider alternative jump-starting methods like using a portable jump starter. Taking these steps can help you troubleshoot and resolve the issue efficiently.
Check Cable Connections
Why won’t your jumper cables work despite proper setup? Often, the problem lies in the cable connections. To ensure effective battery testing and maintain car safety, follow these steps precisely:
- Confirm that red (positive) clamps connect to the positive terminals on both batteries.
- Verify black (negative) clamps attach to the negative terminal of the donor battery and a grounded metal part on the dead car, not the battery.
- Inspect clamps for corrosion or dirt that can obstruct current flow; clean them if necessary.
- Check cable wires for damage or breaks that reduce conductivity.
Proper connections guarantee a stable circuit for power transfer. Always double-check before attempting to start the car to prevent electrical hazards or ineffective jump-starts.
Alternative Jump-Starting Methods
How can you revive a dead battery when jumper cables don’t deliver the needed power? First, consider alternative charging methods such as a portable battery charger or a jump starter pack. These devices provide controlled current flow tailored to the battery’s chemistry, optimizing charging efficiency and safety.
Understanding battery chemistry is essential. Lead-acid batteries, for example, require a specific voltage and current profile to prevent damage during charging. If jumper cables fail, a solar charger designed for automotive batteries might be effective, especially for slow, steady charging.
Additionally, some vehicles support push-starting (manual transmission only), leveraging kinetic energy to start the engine without external power. Always test the battery’s voltage and state of charge before attempting alternative jump-starting to ensure the method suits your battery’s condition.
How to Maintain Your Jumper Cables for Long-Term Use
Although jumper cables are built to endure tough conditions, you’ll ensure their reliability by performing regular inspections and proper storage. Maintaining your jumper cables involves following key steps to prevent damage and corrosion, ensuring long-term use.
- Safe Storage: Coil cables loosely to avoid kinks and store them in a dry, cool place.
- Corrosion Prevention: Clean clamps regularly with a wire brush and apply a corrosion inhibitor.
- Inspect Insulation: Check the cable insulation for cracks or wear that could cause shorts.
- Test Clamps: Ensure clamps maintain firm grip and clean contact surfaces for optimal conductivity.
Frequently Asked Questions
Can Jumper Cables Damage Modern Car Electronics?
Think of jumper cables as a lightning bolt, powerful yet potentially destructive. If you don’t follow jumper cable safety, you increase electronics risk, possibly frying sensitive circuits in modern cars. Always connect carefully to protect your vehicle’s systems.
Are There Alternatives to Traditional Jumper Cables?
Yes, you can use alternative charging devices like portable jump starters or wireless jump start systems. These offer safer, more convenient power boosts without traditional cables, reducing risks to your car’s electronics during emergency starts.
How Long Can a Jump-Started Car Run Before Recharging?
Once you start your jump-started car, it can run about 20-30 minutes before needing a recharge. To avoid start/stop safety issues and charging nuisance, drive steadily to let the alternator fully restore battery power.
Can Jumper Cables Work on Motorcycles or Boats?
Yes, you can use jumper cables on motorcycles or boats, but you must follow battery safety guidelines and ensure compatible charging equipment.
Always connect cables correctly to avoid damage or injury during the jump-start process.
What Are the Best Jumper Cable Brands or Types?
You’ll want heavy-duty jumper cables with pure copper conductors for fast, efficient power transfer. Brands like NOCO and Energizer excel here. Avoid aluminum cables; they resist current flow, reducing jump-start performance greatly.