How Do You Disconnect Jumper Cables
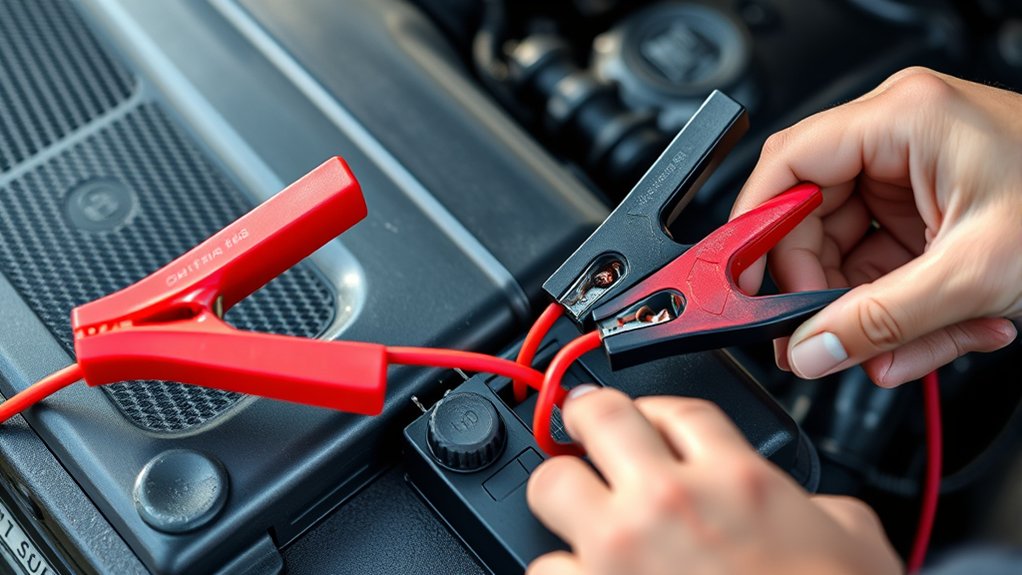
To disconnect jumper cables safely, first make sure both vehicles are off. Disconnecting jumper cables correctly is crucial to avoid sparks and injury. Always start by removing the black clamp from the negative terminal of the dead battery, then the negative clamp from the donor battery.
Next, take off the red clamp from the donor battery, followed by the red clamp from the dead battery. Keep the clamps apart to avoid sparks. Wear gloves and avoid leaning over the battery.
Following these steps prevents damage and injury. You can explore more detailed safety tips and storage advice next.
Why It’s Important to Disconnect Jumper Cables Safely
Why should you disconnect jumper cables safely? Disconnecting jumper cables improperly can cause short circuits, sparks, or damage to vehicle electronics.
To minimize risk, always follow safe routing practices by ensuring cables are laid out to avoid contact with moving engine parts or hot surfaces. This prevents insulation damage and potential electrical hazards.
Before handling cables, use glove usage to protect your hands from accidental shocks or burns. Gloves also improve grip, reducing the chance of cable slips that could cause arcing.
When disconnecting, remove cables in the correct sequence without jerking or pulling on the wires. Prioritize safety by maintaining control over cable positioning throughout the process.
Following these technical steps ensures you avoid injury and protect your vehicle’s electrical system.
Which Jumper Cable Should You Disconnect First?
Although it may seem straightforward, disconnecting the correct jumper cable first is essential to prevent electrical hazards. Following the proper disconnect order ensures you minimize risk of sparks and protect both vehicles’ electrical systems.
Always adhere to safety steps by removing cables from the dead battery vehicle first.
| Disconnect Order | Action |
|---|---|
| 1 | Remove negative clamp from dead battery |
| 2 | Remove negative clamp from live battery |
| 3 | Remove positive clamp from live battery |
| 4 | Remove positive clamp from dead battery |
This sequence prevents accidental short circuits. By prioritizing the negative cable on the dead battery, you reduce the chance of electrical shock or damage. Stick to this disconnect order as a crucial safety step every time you finish jump-starting.
Step-by-Step Guide to Disconnecting Jumper Cables Safely
A successful and safe disconnection of jumper cables requires following a specific sequence and handling each clamp carefully. First, turn off both vehicles to reduce car maintenance noise and electrical flow.
Safe jumper cable removal starts with turning off both vehicles to minimize noise and electrical risks.
Begin by removing the black clamp from the negative terminal of the previously dead battery. Next, detach the black clamp from the negative terminal of the donor battery.
Then, remove the red clamp from the positive terminal of the donor battery, followed by the red clamp from the positive terminal of the dead battery. Always place the clamps where they won’t touch each other or metal surfaces to prevent sparks.
Dispose of any damaged batteries properly; wrong battery disposal can cause environmental harm. Following these steps ensures safety and prevents damage during disconnection.
How to Avoid Sparks and Handle Jumper Cables Safely
How should you handle jumper cables to prevent sparks and ensure safety? Avoid dangerous myths like disconnecting cables in any order or touching clamps together. Follow these precise steps:
- Always disconnect the negative (-) cable last to minimize spark risks.
- Keep metal objects away from the battery terminals to avoid accidental short circuits.
- Never lean directly over the battery while disconnecting cables; batteries can emit flammable gases.
- Wear insulated gloves and eye protection to reduce injury risks and comply with legal issues regarding safe handling.
What to Do If You See Smoke or Smell Burning
Proper handling of jumper cables considerably reduces the risk of sparks and accidents, but if you notice smoke or smell burning during the process, act immediately. First, stop all electrical activity by disconnecting the cables carefully, starting with the negative terminal.
Avoid touching the metal clamps together or to any grounded metal surface. The presence of smoke or a burning smell indicates a smoke hazard, often caused by overheating or a short circuit. Move away from the vehicle to prevent inhalation of toxic fumes and minimize fire risk.
Inspect the cables and battery for damage once cooled, but do not attempt repairs yourself. If the smoke or burning smell persists, call emergency services or a professional mechanic. Prioritize safety and never ignore these warning signs.
How to Store Jumper Cables After Use
Where you store your jumper cables can substantially impact their longevity and performance. To guarantee proper storage practices, follow these steps:
- Coil the cables neatly without twisting to prevent internal wire damage.
- Use a durable storage bag or container to protect cables from moisture and dust.
- Apply labeling tips by attaching a tag indicating cable length and gauge for quick identification.
- Store the container in a cool, dry place away from direct sunlight and extreme temperatures.
When to Call a Professional Instead of Disconnecting Jumper Cables
When should you skip disconnecting jumper cables yourself and call a professional instead? You should consider when to hire professionals if you’re unfamiliar with proper cable handling, if the vehicles show signs of electrical damage, or if the battery terminals are corroded or damaged.
Avoiding common mistakes such as improper cable removal order or touching clamps together is critical; if you feel uncertain, a trained technician can prevent damage to your vehicle’s electrical system. Additionally, if your car still won’t start after a jump, contacting a professional is advisable to diagnose underlying issues.
Calling an expert ensures safety and prevents costly repairs, especially when you lack experience in safely disconnecting jumper cables under complex or hazardous conditions.
Safety Tips to Prevent Injury When Disconnecting Jumper Cables
How can you protect yourself from electrical shock or burns while disconnecting jumper cables? Prioritize portable safety and follow these steps to ensure safe handling during inventive jumpstarts:
- Turn off both vehicles immediately to cut power and avoid sparks.
- Always remove the negative (black) clamp first to minimize short circuit risk.
- Keep your hands dry and use insulated gloves to prevent electrical shocks.
- Avoid touching metal surfaces with clamps or cables during disconnection.
Frequently Asked Questions
Can Jumper Cables Damage My Car’s Battery?
Yes, improper use of jump cables can damage your battery by causing terminal corrosion or electrical surges. Always follow jump cables safety guidelines to prevent damage and ensure proper connection and disconnection to protect your battery’s health.
How Long Should I Wait Before Disconnecting Jumper Cables?
Like a ticking clock guarding jump start risks, you should wait at least 5 minutes after the engine starts before disconnecting jumper cables. This ensures wiring safety and stable voltage, preventing sparks or electrical damage.
Are There Different Types of Jumper Cables for Various Vehicles?
Yes, jumper cables compatibility varies by vehicle size and battery type. You should choose cables with appropriate gauge and length, and always inspect for battery terminal corrosion to ensure a safe, efficient connection during jump-starting.
Can I Use Jumper Cables in Cold Weather?
You’re braving the chill, and yes, you can use jumper cables in cold weather. Just guarantee careful battery handling. Wear gloves, avoid sparks, connect positive then negative, and disconnect in reverse to keep safety and efficiency intact.
What Are Common Signs of a Dead Car Battery?
You’ll notice dead battery symptoms like slow engine crank, dim headlights, and dashboard warning lights. Check charging indicators. If your multimeter reads below 12.4 volts, your battery likely needs charging or replacement immediately.