How to Replace Brake Pads and Rotors
You start the process of how to replace brake pads and rotors by securely lifting your vehicle with wheel chocks and jack stands. Remove the wheel using a lug wrench, then visually inspect and measure the pad thickness. Replace the brake pads if they are below 3 mm.
Next, loosen the rotors with penetrating oil if they are stuck. Detach the caliper bolts and carefully compress the caliper piston. Clean the hub to ensure proper rotor seating.
Align and secure the new rotor, then fit the new brake pads. Torque all bolts to the manufacturer’s specifications.
Finally, test the braking performance to complete the process. Detailed steps follow to ensure precision and safety.
Key Takeaways
- Inspect brake pads and rotors for wear, replacing pads below 3 mm thickness and rotors with grooves or warping.
- Secure vehicle with wheel chocks and jack stands. Use penetrating oil to safely remove old rotors without damage.
- Clean hub and mounting surface thoroughly using a wire brush and brake cleaner to ensure proper rotor installation.
- Align and mount the new rotor, securing it loosely first. Then verify smooth rotation before final tightening.
- Compress caliper piston, fit new pads correctly, reinstall caliper, torque bolts to specs, and test braking performance.
How to Tell When Your Brake Pads and Rotors Need Replacing
How can you accurately determine when your brake pads and rotors need replacing? First, focus on measurable signs rather than relying on irrelevant humor or weather chatter as diagnostic tools. Listen for consistent squealing or grinding noises, which indicate worn pads or damaged rotors.
Check pad thickness visually; if it’s below 3mm, replacement is necessary. Inspect rotors for grooves, scoring, or warping. Uneven surfaces cause vibration during braking. Also, monitor braking performance: increased stopping distance or a spongy pedal feel signals potential issues.
Avoid confusing casual comments or distractions unrelated to vehicle condition. By prioritizing these precise indicators, you ensure safety and optimal brake function without the guesswork that irrelevant humor or weather chatter might introduce.
Tools You’ll Need to Replace Brake Pads and Rotors
To replace your brake pads and rotors, you’ll need a set of essential hand tools like wrenches and a socket set. Don’t forget safety equipment such as gloves and eye protection to prevent injury. Additionally, specialized brake tools like a caliper piston compressor will make the job more efficient and accurate.
Essential Hand Tools
A reliable set of essential hand tools will make replacing brake pads and rotors more efficient and safe. You’ll need a sturdy lug wrench or breaker bar to remove wheel lug nuts, and a socket set with ratchet to detach caliper bolts precisely.
A C-clamp or brake caliper tool helps compress the caliper piston evenly. Flathead and Phillips screwdrivers assist in removing retaining clips or dust covers. Don’t forget a torque wrench to tighten bolts to manufacturer specifications, ensuring safety and performance.
While hand tools facilitate mechanical tasks, integrating proper safety equipment is critical to protect yourself during the process. Keep your workspace organized, and inspect all tools for wear or damage before starting.
Using the right hand tools guarantees effective brake service and reduces the risk of injury or component damage.
Safety Equipment Needed
Proper safety equipment is essential when replacing brake pads and rotors to protect you from injury and exposure to hazardous materials. You’ll need to equip yourself with the following:
- Safety gloves to shield your hands from sharp edges, brake dust, and chemicals.
- Eye protection such as goggles or safety glasses to prevent debris or brake fluid from entering your eyes.
- Dust mask to avoid inhaling brake dust, which can be harmful.
- Wheel chocks to securely block the wheels, ensuring the vehicle doesn’t move during brake work.
While wheel alignment isn’t part of this immediate process, it’s crucial to check afterward for proper tire wear and safe handling. Always prioritize safety before starting, and double-check all equipment before lifting the vehicle or removing components.
Specialty Brake Tools
Replacing brake pads and rotors requires specific tools designed to handle the unique demands of brake systems. You’ll need specialty tools like a brake caliper compressor to retract pistons without damaging seals, and a torque wrench to ensure bolts meet exact specifications.
A brake pad spreader helps evenly separate pads, while a socket set and ratchet handle hardware removal efficiently. Don’t forget a brake fluid bleed kit if your brake lines need bleeding after replacing components. It prevents air from compromising hydraulic pressure.
Using the right specialty tools not only speeds up the job but also guarantees proper installation and safety. Avoid using general tools that can cause damage or improper fitment; investing in these precise instruments ensures your brake system performs reliably after service.
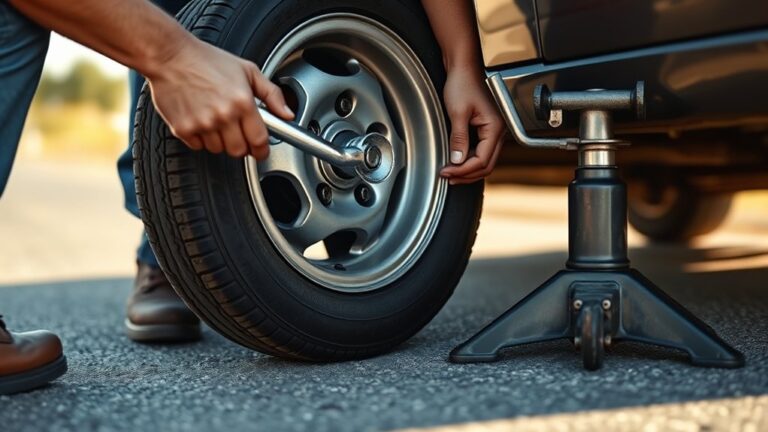
Safely Lift Your Vehicle for Brake Pad and Rotor Replacement
How do you safely lift your vehicle to ensure stability while working on brake pads and rotors? This step is critical, so keep key talking points and safety reminders in mind.
- Park on a level surface and engage the parking brake to prevent rolling.
- Use wheel chocks on the opposite wheels for additional security.
- Position the jack at the manufacturer’s recommended lift points to avoid damage.
- Once lifted, place jack stands under solid frame sections and lower the vehicle onto them. Never rely solely on the jack.
These steps guarantee a stable, secure setup, minimizing risks during brake service. Following these safety reminders ensures you maintain control and avoid accidents, setting a solid foundation before moving to wheel removal.
How to Remove the Wheel and Access the Brake Assembly
Once your vehicle is securely supported on jack stands, you can begin removing the wheel to access the brake assembly. Start by loosening the lug nuts with a wrench before lifting the wheel off completely. Set the wheel aside carefully to avoid damage.
With the wheel removed, you’ll have full access to the brake components. This is also a good time to inspect the brake fluid level and perform a brake fluid check to ensure proper system function.
Remember, after reassembly, you might need to verify wheel alignment to maintain safe driving dynamics.
| Step | Details |
|---|---|
| 1. Loosen lug nuts | Use a lug wrench before lifting |
| 2. Lift the wheel | Remove wheel carefully |
| 3. Set wheel aside | Avoid scratches or damage |
| 4. Inspect brake fluid | Check level and condition |
| 5. Access brake assembly | Ready for pad and rotor work |
How to Take Off Old Brake Pads and Rotors
Before proceeding, start by loosening the lug nuts to guarantee the wheel is secure. Next, carefully remove the caliper assembly to access the brake pads without harming the brake line. Finally, detach the old rotor by sliding it off the hub, making sure it’s free of any rust or debris.
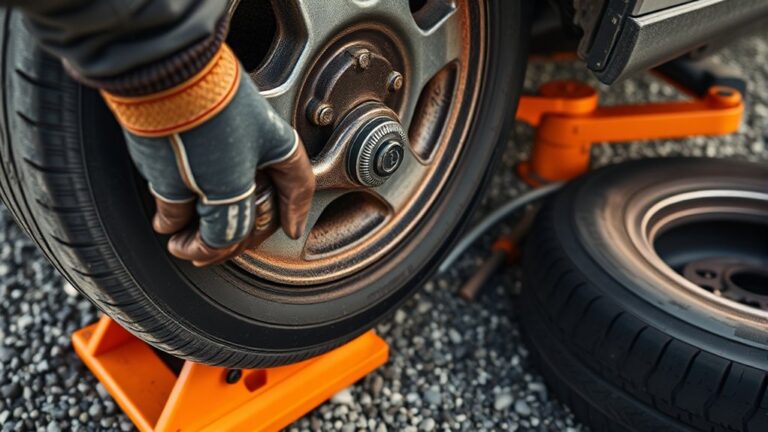
Loosen Lug Nuts
Where should you begin when removing old brake pads and rotors? Start by loosening the lug nuts on the wheel you’re working on. This step is crucial because trying to loosen them with the car fully lifted can be dangerous.
To do this effectively:
- Use a lug wrench that fits snugly on the lug nuts to avoid stripping.
- Apply firm, steady pressure counterclockwise to loosen each nut.
- Don’t remove the lug nuts completely yet; just break their initial tightness.
- Avoid distractions like unrelated topic discussions or random chatter that can compromise safety and focus.
Loosening lug nuts while the vehicle is still on the ground provides stability, ensuring you can safely lift the car next. This practical approach prepares you precisely for the next steps.
Remove Caliper Assembly
After loosening the lug nuts and safely lifting the vehicle, you can remove the wheel to access the brake components. Locate the caliper bolts securing the caliper assembly to the bracket. Use the appropriate socket to remove these bolts carefully.
Once the bolts are out, gently slide the caliper off the rotor without stressing the brake line. Support the caliper with a hanger or hook to avoid strain and prevent damage to the brake hose. Avoid letting the caliper hang freely.
Inspect the caliper pistons for corrosion and apply caliper grease to the guide pins to ensure smooth operation during reassembly. Be mindful of brake fluid management; avoid compressing the brake piston unnecessarily, as this can cause fluid overflow or damage to the master cylinder reservoir.
Detach Old Rotor
How do you effectively detach the old rotor without causing damage? Follow these steps carefully to avoid issues or an unrelated topic slipping into your process:
- Remove any retaining screws or clips securing the rotor to the hub.
- Tap the rotor gently with a rubber mallet, focusing on even impacts to break corrosion bonds.
- If the rotor won’t budge, spray penetrating oil and let it sit to loosen rust.
- Pull the rotor straight off; avoid twisting motions that could warp it.
Don’t let a random discussion distract you here. Precision is key. Avoid forcing the rotor off, as this risks damaging the hub or braking components. With careful technique, you’ll detach the old rotor smoothly, preparing for a clean installation of new parts.
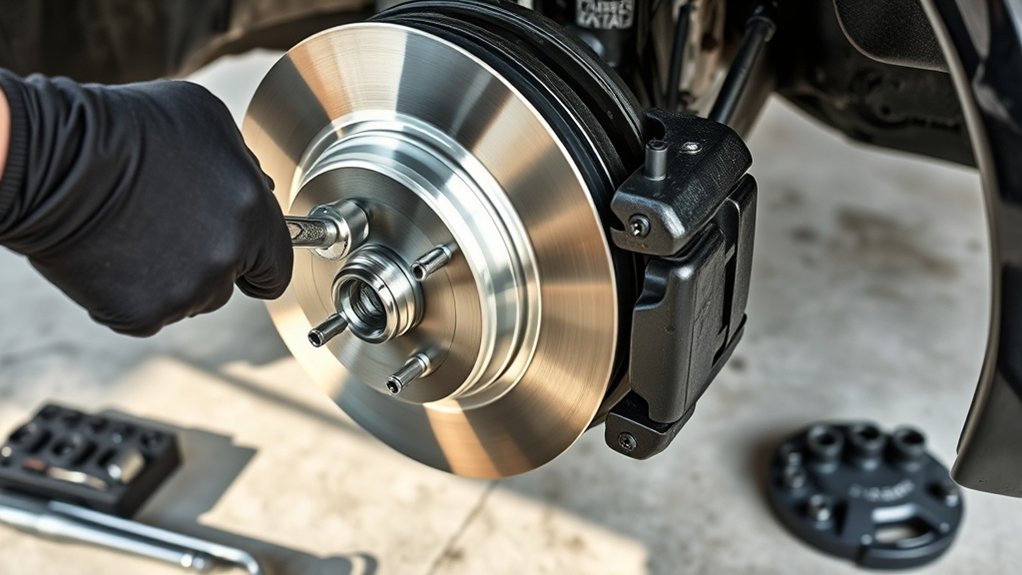
How to Inspect Brake Pads and Rotors for Wear and Damage
Why should you regularly inspect your brake pads and rotors? Consistent inspection ensures optimal braking performance and prevents costly damage. Start by visually examining the brake pads through the caliper for thickness; replace them if they’re below 3mm.
Regularly inspect brake pads and rotors to maintain braking performance and avoid expensive repairs.
Check rotors for scoring, cracks, or warping. Use a micrometer to measure rotor thickness against manufacturer specs. Uneven wear or grooves indicate rotor replacement.
While inspecting, note brake fluid color. Dark or contaminated fluid suggests system issues that could affect braking. Also, assess for rust or corrosion which can affect vehicle aesthetics and brake efficiency.
Proper inspection helps maintain safety, preserves vehicle aesthetics, and avoids brake failure. Always prioritize precision during this step to guarantee reliable, safe vehicle operation.
How to Install New Brake Rotors Correctly
Before installing new brake rotors, you’ll need to clean and prepare the wheel assembly to ensure a proper fit. Make sure to align the rotor accurately on the hub and mount it securely. Finally, tighten all fasteners to the manufacturer’s specifications to prevent any movement or issues during operation.
Preparing the Wheel Assembly
Once you’ve removed the old brake components, you’ll need to thoroughly clean the wheel hub and mounting surface to guarantee proper rotor installation. Any debris or rust can prevent the rotor from seating flush, affecting wheel alignment and tire balance.
Follow these steps:
- Use a wire brush or abrasive pad to remove rust and contaminants.
- Apply brake cleaner to dissolve grease or oil residues.
- Inspect the hub for damage or warping; replace if necessary.
- Ensure the mounting surface is dry and smooth before proceeding.
This precise preparation ensures the rotor sits perfectly, avoiding vibrations and uneven wear. Taking these steps will maintain optimal wheel alignment and tire balance, critical for safe and effective braking performance.
Aligning and Mounting Rotors
How do you guarantee the new brake rotor fits perfectly on the wheel hub? Start by cleaning the hub surface thoroughly to remove rust and debris, ensuring full contact.
Next, align the rotor’s center hole precisely with the hub’s center to maintain rotor trueness. This prevents wobbling during rotation. Use the mounting screws or lug nuts to loosely secure the rotor, allowing slight adjustments.
Verify the rotor’s rotational balance by spinning it manually; it should rotate smoothly without lateral runout or vibration. If your rotor includes balance weights, ensure they’re intact and correctly positioned.
Proper alignment and mounting are critical to avoid premature wear and maintain braking efficiency. This precise setup prepares you for securing the rotor firmly in the next step.
Securing Rotors Properly
Where should you focus your attention to secure the brake rotor correctly? Proper rotor securing depends on precise rotor alignment and firm mounting to avoid wobble and premature wear. Follow these steps:
- Position the rotor flush against the hub, ensuring no debris disrupts rotor alignment.
- Install rotor retaining screws or clips if your vehicle uses them, tightening them to factory torque specs to hold the rotor firmly without distortion.
- Hand-thread the wheel bolts or lug nuts to keep the rotor securely in place during wheel installation.
- After mounting the wheel, torque lug nuts in a star pattern to evenly distribute pressure, maintaining rotor alignment and preventing uneven rotor wear.
How to Fit New Brake Pads and Reassemble the Brakes
Why is proper alignment essential when fitting new brake pads? Misaligned pads cause uneven wear, reduce braking efficiency, and increase noise.
Start by compressing the caliper piston using a suitable tool to create space for the new pads. Position the pads correctly in the caliper bracket, ensuring the friction surface faces the rotor.
Reinstall the caliper, tightening bolts to manufacturer torque specs to avoid loosening during a driving excursion. Check that all hardware, including clips and pins, is secure.
After reassembly, rotate the tires to balance wear and maintain optimal performance. Proper alignment and secure reassembly prevent premature pad wear and ensure consistent braking response, reducing the risk of vibration or noise during operation.
This precision is critical before moving on to brake adjustment and testing.
How to Adjust and Test Your Brakes After Replacement
When should you adjust your brakes to guarantee peak performance after replacing pads and rotors? Right after installation, to ensure safety and efficiency. Follow these budget friendly, non technical jargon steps:
- Pump the brake pedal several times to seat the pads against the rotors firmly.
- Check the brake fluid level and top it off if needed to maintain hydraulic pressure.
- Adjust the brake caliper bolts if you notice uneven pad contact or noise.
- Perform a low-speed test drive in a safe area to confirm smooth braking without vibrations or pulling.
These steps fine-tune your brake system, ensuring optimal stopping power. Proper adjustment prevents premature wear and costly repairs, making your brake replacement both effective and economical.
Avoid These Common Brake Replacement Mistakes
How can you ensure your brake replacement goes smoothly without costly setbacks? First, avoid common disposal myths. Never discard old rotors or pads in regular trash. Instead, follow local hazardous waste protocols to prevent environmental damage and comply with regulations.
Next, don’t skip cleaning caliper slides or lubricating contact points; neglecting these can cause uneven pad wear. Also, resist the urge to mix standard pads with performance upgrades without assessing compatibility. Mismatched components reduce braking efficiency and safety.
Finally, always torque bolts to manufacturer specifications to prevent warping or loosening. By systematically addressing these technical details, you’ll maintain optimal brake function and extend component lifespan, ensuring your replacement effort delivers reliable, safe stopping power without unnecessary complications.
Brake Maintenance Tips to Extend Pad and Rotor Life
What steps can you take to maximize the lifespan of your brake pads and rotors? Proper maintenance is key. Follow these essential tips:
- Regularly check and replace brake fluid to maintain hydraulic efficiency and prevent corrosion within the braking system.
- Perform tire rotation every 6,000 to 8,000 miles to ensure even wear on brake components and tires, promoting balanced braking performance.
- Avoid aggressive braking; gradual stops reduce heat buildup, minimizing pad glazing and rotor warping.
- Inspect pads and rotors during routine service for early signs of wear or damage, addressing issues before they escalate.
Frequently Asked Questions
How Long Do Brake Pads and Rotors Typically Last?
You’ll find pad lifespan usually ranges between 30,000 to 70,000 miles, depending on driving habits.
Rotor wear lasts longer, often 50,000 to 70,000 miles, but regular inspection ensures optimal braking performance and safety.
Can I Replace Brake Pads Without Replacing Rotors?
Yes, you can replace brake pads without replacing rotors if rotors pass noise diagnostics and show minimal wear. Follow repair intervals closely to avoid uneven pad wear, ensuring optimal braking performance and safety during maintenance.
What Are the Signs of Warped Brake Rotors?
About 30% of brake failures stem from warped rotors. Warped rotors signs include vibration during braking and noise.
Follow brake rotor inspection requirements by measuring thickness and runout to detect uneven wear or warping accurately.
How Much Does Professional Brake Pad and Rotor Replacement Cost?
You’ll typically pay $300 to $700 for professional brake pad and rotor replacement, depending on high performance or maintenance free parts.
Choosing premium materials ensures durability and optimal braking, minimizing future maintenance and enhancing safety.
Are Ceramic or Metallic Brake Pads Better for My Car?
Choosing between ceramic vs metallic pads depends on your driving style: ceramic pads offer quieter, cleaner braking with less wear, while metallic pads provide better heat dissipation and durability under heavy use.
They give you precise control and safety.
Conclusion
Replacing your brake pads and rotors is like tuning a finely crafted instrument—precision and care keep the performance flawless. By recognizing wear, using the right tools, and following each step methodically, you guarantee your vehicle stops safely and smoothly.
Avoid shortcuts that risk your safety, and maintain your brakes regularly to extend their life. With proper attention, your braking system will remain a reliable partner on every journey.
When it comes to ensuring your vehicle’s safety and performance, replacing your brake pads and rotors is essential. Taking the time to do it right means your brakes will be ready to respond when you need them most.