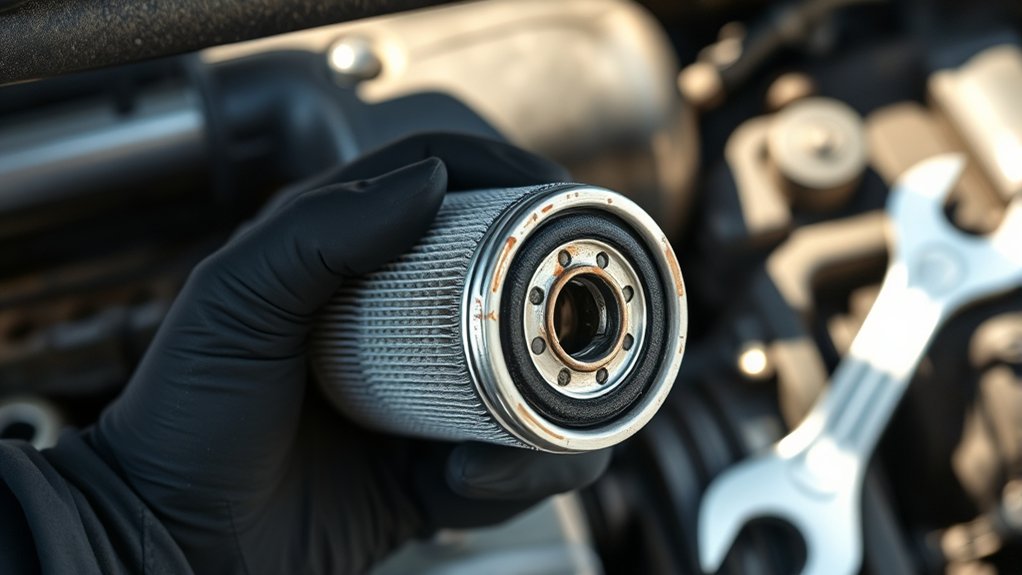
How to Remove Oil Filter
To remove your oil filter, first park your vehicle on a flat surface and let the engine cool completely.
Wearing gloves and safety glasses is important to protect yourself from hot oil and debris.
Position a drain pan beneath the oil filter to catch any spills.
Use an oil filter wrench to loosen the filter by turning it counterclockwise.
Once loosened, unscrew it by hand while keeping it upright to avoid spilling oil.
After removal, check and clean the mounting surface thoroughly before installing a new filter.
If the oil filter is stuck, apply penetrating oil or use special tools designed for stubborn filters.
Proper preparation and care will make the removal process smoother.
Keep following for precise steps on installation and proper disposal.
Key Takeaways
- Wear gloves and safety glasses, and position an oil catch pan beneath the oil filter before removal.
- Use an oil filter wrench to loosen the filter by turning it counterclockwise with steady pressure.
- Unscrew the filter by hand once loosened, keeping it upright to avoid spilling oil.
- Inspect and clean the mounting surface, removing any leftover gasket material before installing a new filter.
- If the filter is stuck, apply penetrating oil, wait 10–15 minutes, and avoid excessive force to prevent damage.
Tools Needed for Oil Filter Removal
To get started with removing an oil filter, you’ll need to gather the right tools to make the process efficient and safe. Essential tools include an oil filter wrench, a drain pan, gloves, and rags. The wrench provides the necessary grip to loosen stubborn filters, while the drain pan catches residual oil to prevent spills.
Gloves protect your hands from hot oil and grime. If you’re considering oil filter alternatives, such as reusable filters, ensure you have appropriate tools for their specific removal process. After removal, prioritize eco friendly disposal by placing used filters and oil in designated recycling containers.
Proper handling reduces environmental impact and complies with local regulations. Having these tools ready ensures a smooth, responsible oil filter removal.
Preparing Your Car Before Removing the Oil Filter
After gathering the necessary tools, focus on preparing your car to guarantee safe and effective oil filter removal. Begin by parking your vehicle on a flat, stable surface and engage the parking brake to prevent movement.
Next, allow the engine to cool for at least 30 minutes to minimize the risk of burns from hot oil or engine components. Identify and clear the work area around the oil filter, removing any debris or obstacles.
Use jack stands if you need to elevate the car, never rely solely on a jack. These preparation steps reduce potential hazards such as slipping, burns, or accidental vehicle shifting. Proper preparation ensures a safer environment, allowing you to remove the oil filter efficiently in the next stage.
How to Remove the Oil Filter Safely
How exactly do you remove the oil filter without causing spills or injuries? First, wear gloves and safety glasses to protect yourself from hot oil and flammable liquids. Position an oil catch pan beneath the filter to collect any residual oil and prevent oil spills.
Use a proper oil filter wrench to loosen the filter by turning it counterclockwise, applying steady pressure without jerking. Once loose, carefully unscrew it by hand, keeping it upright to minimize dripping. Avoid sudden movements that could cause oil to splash, which poses fire hazards due to flammable liquids.
After removal, inspect the mounting surface for leftover gasket material to ensure a proper seal when installing the new filter. Clean any spilled oil immediately to maintain a safe, slip-free workspace.
Troubleshooting Oil Filter Removal Issues
Even with proper technique and tools, you might encounter stubborn oil filters that resist removal. Start by revisiting oil change basics: ensure the engine is cool to avoid burns and use an appropriate filter wrench to maximize grip.
If the filter won’t budge, apply penetrating oil around its base and wait 10-15 minutes to loosen rust or grime. Avoid using excessive force, which can damage the filter housing.
Discussion ideas include double-checking that the filter is not cross-threaded or overtightened from previous changes. If the filter is severely stuck, gently tapping it with a rubber mallet can help break the seal.
In extreme cases, specialized removal tools or professional assistance may be necessary to prevent damage and ensure safe removal.
Tips for Installing a New Oil Filter
Where should you start when installing a new oil filter? Begin by applying a thin layer of clean oil to the filter’s rubber gasket. This guarantees a proper seal and prevents leaks.
Next, screw the filter onto the engine by hand until the gasket contacts the mounting surface. Then, tighten it according to the manufacturer’s torque specifications, usually a three-quarter to one full turn beyond contact. Avoid using tools for initial tightening to prevent damaging the gasket.
Before installation, use effective cleaning methods to remove any dirt or debris from the mounting surface. This step is essential to maintain peak fuel efficiency by ensuring proper oil circulation and filtration.
Following these precise steps will help you install the oil filter correctly and keep your engine running smoothly.
How to Dispose of Your Old Oil Filter Properly
You need to handle your old oil filter carefully to prevent environmental contamination. Check your local disposal regulations to assure compliance with hazardous waste guidelines. Proper disposal protects ecosystems and keeps you within legal requirements.
Environmental Impact Awareness
Why is proper disposal of your old oil filter essential for the environment? Oil filters contain residual oil and heavy metals that can contaminate soil and water if improperly discarded. Following environmental policy ensures you minimize pollution risks and comply with regulations.
Many programs offer recycling incentives, encouraging you to return used filters to authorized collection points. Recycling recovers valuable metals and safely processes hazardous materials, reducing landfill burden and environmental harm.
You should drain the filter thoroughly before disposal to limit residual oil leakage. By adhering to these practices, you support sustainable waste management and help prevent toxic substances from entering ecosystems.
Proper disposal is not only a legal responsibility but also a critical step in protecting natural resources and promoting environmental stewardship.
Local Disposal Regulations
Proper disposal starts with understanding local regulations that govern oil filter waste. You need to familiarize yourself with discard regulations specific to your area, as improper disposal can violate hazardous waste rules and result in penalties.
Many regions classify used oil filters as hazardous waste due to residual oil contamination. Check with your local waste management authority or environmental agency to learn accepted disposal methods. Typically, you must drain the filter thoroughly before recycling or disposal.
Some locations require you to take used filters to designated collection centers or hazardous waste facilities. Never discard oil filters with regular trash or down drains, as this risks environmental contamination.
Following local discard regulations ensures compliance and protects ecosystems from oil pollutants. Always document your disposal process if required by local hazardous waste rules.
Frequently Asked Questions
How Often Should I Change My Oil Filter?
You should change your oil filter every 3,000 to 7,500 miles, depending on your vehicle and oil type. Discussing irrelevant topics or unrelated subjects won’t help maintain your engine’s optimal performance. Stay precise and consistent.
Can I Use Any Oil Filter for My Car Model?
You can’t use any oil filter; compatibility depends on your car’s make and model. Using unrelated concepts or irrelevant topics like generic filters risks poor fit, leaks, or engine damage.
Always choose manufacturer-specified filters.
What Are the Signs of a Faulty Oil Filter?
You’ll notice signs of debris in your engine oil, reduced oil pressure, and unusual engine noises, clear indicators of filter failure. These symptoms show your oil filter isn’t trapping contaminants effectively, risking engine damage if ignored.
Is It Necessary to Change the Oil Filter Every Oil Change?
Yes, you should change the oil filter with every oil change. The oil filter traps contaminants, so consistent filter replacement ensures engine protection and optimal performance.
This prevents sludge buildup and maintains oil flow efficiency.
Can a Clogged Oil Filter Damage My Engine?
Don’t let the grass grow under your feet; a clogged oil filter reduces filtration efficiency, degrading engine performance and causing contaminants to circulate. This can lead to increased wear, overheating, and ultimately, severe engine damage.
Conclusion
By carefully collecting the correct tools, confidently preparing your car, and cautiously removing the oil filter, you can smoothly solve stubborn situations. Staying steady and sensible safeguards your safety and spares your system.
Swiftly swapping in a sturdy new filter seals success, while smartly sorting and safely sending off the spent filter supports sustainability. Remember, mastering methodical maintenance maximizes motor longevity and minimizes mishaps.
Keep calm, carry out each step clearly, and conquer your car care challenge. Properly removing the oil filter is key to ensuring your vehicle runs smoothly and efficiently.