How to Use Everstart Maxx Battery Charger
To use the Everstart Maxx battery charger, first ensure your vehicle is off and parked in a well-ventilated area. Clean the battery terminals and check electrolyte levels if applicable.
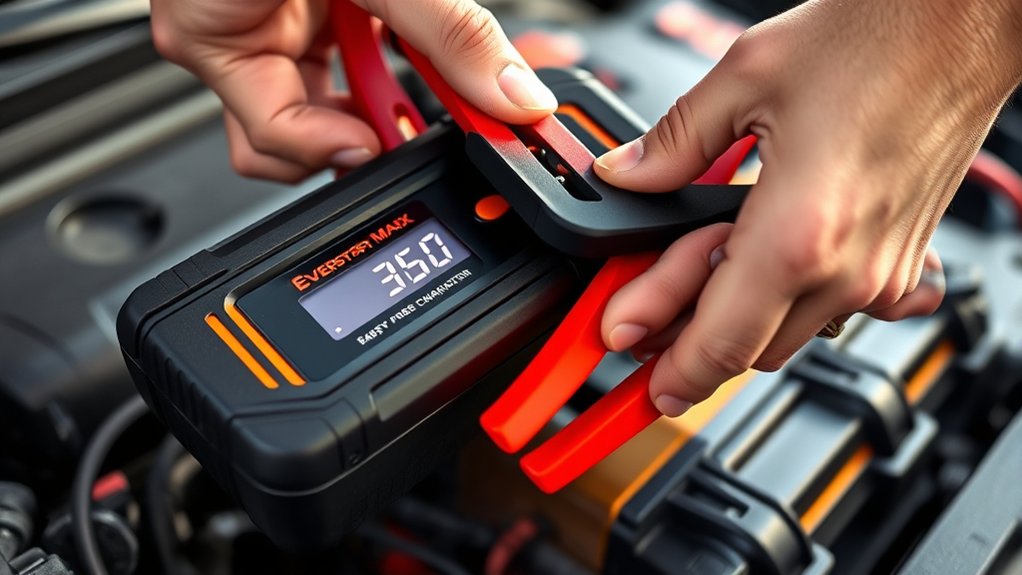
Unplug the charger before connecting the clamps—attach the red clamp to the positive terminal and the black clamp to a clean metal surface on the vehicle.
Select the proper charging mode based on your battery’s condition, then monitor the charging indicators closely. Proper clamp removal and troubleshooting steps help maintain safety and performance.
More details will guide you through each step precisely.
Preparing Your Vehicle and Battery for Everstart Maxx Charging
Before you begin charging with the Everstart Maxx, how should you prepare your vehicle and battery? First, ensure your vehicle is turned off and parked in a well-ventilated area to prevent gas buildup.
Ensure your vehicle is off and parked in a well-ventilated area before charging with the Everstart Maxx.
Locate the battery and clean the terminals using a wire brush if corrosion is present, improving connection efficiency. Avoid discussing the wrong topic like general vehicle maintenance or irrelevant content unrelated to battery prep.
Check the battery’s electrolyte level if it’s not sealed; top off with distilled water if necessary. Securely disconnect any accessories that may draw power, preventing interference.
Confirm the battery voltage matches the charger’s specifications. These precise steps prepare your vehicle and battery correctly, optimizing charging effectiveness and safety before you proceed with the Everstart Maxx.
Setting Up Your Everstart Maxx Charger Safely
How do you guarantee a safe setup when using your Everstart Maxx charger? First, ensure you’re working in a dry, well-ventilated area free from sparks or flames. Avoid any unrelated topic distractions during setup to maintain focus.
Inspect the charger cables and clamps for damage before proceeding. Position the charger on a stable surface to prevent tipping.
Remember, two word discussion ideas like “safety precautions” and “proper grounding” emphasize the importance of following manufacturer instructions precisely. Confirm the unit is unplugged before connecting clamps.
Wear protective gear such as gloves and eye protection to shield against acid splashes. Avoid placing the charger near metal objects.
Connecting the Everstart Maxx Battery Charger to Your Vehicle
First, locate the positive (+) and negative (-) terminals on your vehicle’s battery. Make sure the charger is unplugged before attaching the clamps to prevent sparks. Connect the positive clamp to the positive terminal and the negative clamp to the negative terminal, following safety protocols.
Identifying Battery Terminals
Where do you connect the Everstart Maxx Battery Charger to guarantee proper operation? You must identify the battery terminals precisely: the positive terminal is marked with a plus (+) sign, and the negative with a minus (–) sign. Misidentifying them can cause damage or safety hazards. Avoid confusing discussion ideas or unrelated topics like general automotive maintenance.
| Terminal Type | Symbol | Location Tips |
|---|---|---|
| Positive | + | Usually red, marked “+” |
| Negative | – | Usually black, marked “–” |
| Terminal Cap | N/A | Remove if present |
| Corrosion | N/A | Clean before connecting |
| Cable Color | N/A | Red for positive, black for negative |
Always confirm terminal polarity before proceeding to ensure correct charger connection.
Safe Connection Procedures
Before connecting the Everstart Maxx Battery Charger to your vehicle, ensure the engine is off and the charger is unplugged. First, identify the battery terminals clearly to avoid confusion with any unrelated topic like vehicle electronics.
Attach the red positive clamp to the battery’s positive terminal firmly. Next, connect the black negative clamp to a clean, unpainted metal surface on the vehicle’s frame, away from the battery, to prevent sparks.
Avoid attaching the negative clamp directly to the negative terminal, as this can cause hazardous reactions. Double-check all connections for stability before plugging in the charger.
This methodical approach prevents short circuits and ensures safe charging. You might think a random idea like reversing clamps is harmless, but it risks damage or injury. Always follow these precise steps.
How to Choose the Right Charging Mode on the Everstart Maxx
Selecting the correct charging mode on the Everstart Maxx ensures best battery performance and longevity. You’ll find modes tailored for different battery types and states: standard charge for regular use, rapid charge for quick replenishment, and maintenance mode to sustain battery health over time.
Use maintenance mode when the battery’s not in active use, preventing overcharge and sulfation during charger storage. Rapid mode suits emergency situations but avoid frequent use to prevent battery wear.
Always match the mode to your battery’s specifications and current condition for optimal battery maintenance. Refer to your battery’s manual if unsure.
Choosing the right mode minimizes risk of damage, extends battery life, and maximizes efficiency, ensuring your Everstart Maxx charger operates safely and effectively.
Monitoring the Charging Process With Your Everstart Maxx Charger
You’ll want to monitor the Everstart Maxx charger’s indicator lights closely to interpret charging status accurately. Regularly check the battery voltage levels to confirm proper charge progression. Also, guarantee the charger maintains a secure connection throughout the process to prevent interruptions.
Understanding Indicator Light Signals
How do the indicator lights on your Everstart Maxx charger communicate the battery’s status? These lights provide real-time feedback during charging, so you can monitor progress without guessing.
A solid green light means the battery is fully charged and ready for use. A blinking red light indicates the charger has detected a problem, such as a faulty connection or battery issue, unrelated topic for troubleshooting. A steady red light shows the charger is actively charging.
Avoid confusing these signals with a random concept; each light has a specific meaning designed to keep you informed. Understanding these indicators helps you respond quickly, ensuring safe and efficient charging.
Don’t overlook this essential communication tool, as it prevents damage and extends your battery’s lifespan.
Checking Battery Voltage Levels
When should you check your battery’s voltage during the charging process with the Everstart Maxx charger? You should monitor the voltage gauge periodically to assess the battery’s state and ensure optimal charging.
Begin checking once the charger is connected and power is on, then at intervals of 15 to 30 minutes. This helps you track voltage increases and avoid overcharging. Accurate voltage readings reflect battery health and charging progress. Stable voltage near 12.6 volts indicates a fully charged battery.
If the voltage remains low or fluctuates significantly, it signals potential battery issues requiring attention. By regularly observing the voltage gauge, you maintain control over the charging cycle and protect the battery from damage, enhancing its lifespan and reliability.
Ensuring Proper Charger Connection
A secure and correct connection between the Everstart Maxx charger and your battery is essential for effective monitoring and safe charging. Follow these steps to ensure proper connection and optimize your charging process:
- Attach the positive clamp to the battery’s positive terminal firmly. Loose contacts disrupt charging.
- Connect the negative clamp to the negative terminal or a grounded metal surface to prevent sparks.
- Confirm clamps do not touch each other or any metal part during setup to avoid shorts.
- Power on the charger and observe indicator lights to verify two word status updates, guiding your monitoring.
These discussion ideas help you maintain a reliable connection and detect issues early. Proper connection ensures accurate charging data and prevents hazards during the charging cycle.
Safely Disconnecting the Everstart Maxx Battery Charger
Why should you disconnect the Everstart Maxx Battery Charger carefully? Disconnecting improperly can cause sparks, damage the battery, or harm the charger. Always turn off and unplug the charger first.
Then, remove the negative (black) clamp before the positive (red) clamp to prevent short circuits. Follow disposal considerations and recycling guidelines when handling battery components to protect the environment.
| Step | Action | Reason |
|---|---|---|
| 1 | Turn off and unplug charger | Prevents electrical hazards |
| 2 | Remove negative clamp first | Avoids sparks and short circuits |
| 3 | Remove positive clamp last | Ensures safe disconnection |
Following these steps ensures safety and prolongs charger life.
How to Troubleshoot Common Everstart Maxx Charging Issues
Properly disconnecting your Everstart Maxx Battery Charger minimizes risks, but occasional charging problems can still arise. To troubleshoot effectively, follow these steps:
- Verify battery placement: Ensure the clamps are correctly connected to the battery terminals and firmly attached.
- Check charger settings: Confirm you’ve selected the right charging mode compatible with your battery type.
- Inspect cables and connections: Look for corrosion, frayed wires, or loose connections that may disrupt current flow.
- Monitor engine warming: If charging while the engine runs, ensure adequate ventilation to prevent overheating, which can impair charging efficiency.
Addressing these issues will help you quickly resolve common charging faults and maintain optimal battery performance with your Everstart Maxx charger.
Frequently Asked Questions
How Long Does the Everstart Maxx Battery Charger Last?
You can expect the Everstart Maxx battery charger’s long term durability to last several years with proper use. Regular maintenance tips, like keeping connections clean and storing it in a dry place, help extend its lifespan.
Can the Everstart Maxx Charger Be Used on Motorcycles?
You know what they say, “Better safe than sorry.” You can use the Everstart Maxx charger for motorcycle charging if the battery compatibility matches.
Always verify voltage and type to avoid damaging your motorcycle battery.
Is the Everstart Maxx Charger Compatible With All Battery Types?
The Everstart Maxx charger isn’t compatible with all battery types; it supports primarily 12-volt lead-acid batteries, including flooded, AGM, and GEL. Always verify compatibility with your specific battery type before charging to guarantee safety and efficiency.
Does the Everstart Maxx Charger Have a Warranty?
Think of the Everstart Maxx warranty as your safety net in high-wire acts like lithium compatibility and solar charging. Yes, it comes with a limited warranty, protecting you against defects and ensuring reliable performance under varied conditions.
Can the Charger Operate in Cold Weather Conditions?
Yes, the charger operates in cold weather but charging efficiency decreases below freezing. You’ll notice slower charge rates and longer cycle times.
For ideal performance, use it above 32°F to maintain proper charging efficiency.