How to Reset Ryobi Battery Charger
To reset your Ryobi battery charger, start by unplugging it and waiting about five minutes. Inspect and clean the charger and battery terminals to remove any dirt or corrosion.
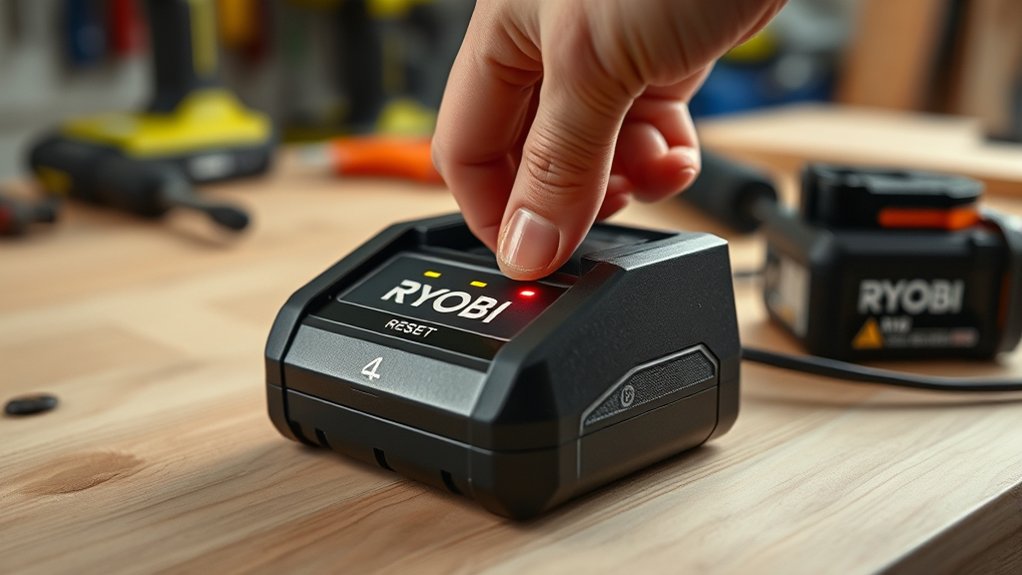
Then plug the charger back in, insert the battery, and check the LED lights for proper charging signals. If your charger has a reset button, hold it down for five seconds before reconnecting power.
If problems persist, you can explore more detailed troubleshooting and maintenance steps to get it working smoothly again.
Key Takeaways
- Unplug the Ryobi charger from the power source and wait about 5 minutes before reconnecting to initiate a basic reset.
- Inspect and clean charger terminals and battery contacts to ensure proper connection and eliminate errors before resetting.
- Press and hold the reset button for 5 seconds if your charger model includes one to perform a manual reset.
- Remove and reinsert the battery after power cycling to reset the charger and check LED indicators for charging status.
- For a hard reset, unplug the charger, remove the battery, wait approximately 10 minutes, then reconnect power and reinsert the battery.
How To Identify When Your Ryobi Charger Needs a Reset
How can you tell when your Ryobi charger needs a reset? Watch for two word ideas like “no charge” or “error light.” These signs often indicate the charger isn’t functioning properly.
If your charger’s LED blinks in an unusual pattern or refuses to start charging, it’s a clear signal to consider a reset. Avoid getting distracted by unrelated issues, such as battery age or tool compatibility, which don’t always require resetting the charger.
Don’t fall into random speculation about internal damage without checking simple indicators first. By focusing on these clear signs, you can quickly identify when the charger needs attention.
Recognizing these symptoms helps you avoid unnecessary troubleshooting steps and prepares you for the right fix.
Simple Steps To Reset Your Ryobi Battery Charger
To reset your Ryobi battery charger, start by power cycling it—unplug, wait, then plug it back in. Next, inspect all charger connections to guarantee they’re secure and clean. Finally, perform a manual reset if your model supports it to clear any errors.
Power Cycle Charger
Power cycling your Ryobi battery charger can help fix common issues. Start by unplugging the charger from the power source. Leave it disconnected for about 5 minutes to allow the internal components to reset.
This pause helps improve power efficiency and supports the charger’s thermal management system by preventing overheating. After the wait, plug the charger back in, then insert the battery.
Power cycling clears minor faults that can disrupt charging and restores ideal operation. This simple step often resolves problems like charging delays or error indicators.
Inspect Charger Connections
After power cycling your Ryobi battery charger, the next step is to check the charger connections. Start by unplugging the charger from the power outlet to ensure DIY safety. Inspect the power cord for any visible damage, cuts, or fraying.
Next, examine the connection points between the charger and the battery pack. Make sure the terminals are clean, free of corrosion, and properly aligned. Dirty or loose connections can disrupt the charging process and affect battery chemistry, potentially damaging the cells.
Use a dry cloth or a soft brush to clear away any debris. Once everything looks secure and clean, reconnect the charger and battery. Confirm that the charger’s indicator lights respond as expected before moving on.
Proper inspection helps maintain safe and efficient charging.
Perform Manual Reset
A manual reset can often resolve common issues with your Ryobi battery charger. To perform one, first unplug the charger from the power source. Wait for about 10 seconds to let the internal circuits discharge completely.
Then, press and hold the reset button, if available, for 5 seconds. If your model lacks a reset button, simply plug the charger back in after the wait. This process helps recalibrate the charger’s system, ensuring it functions properly.
For digital nomads relying on green energy solutions, maintaining your charger’s performance is essential. A manual reset prevents downtime and maximizes efficiency, supporting your eco-friendly lifestyle. Regular resets can also prolong your charger’s lifespan, helping you stay powered up wherever you work.
Why Reset Your Ryobi Charger To Fix Charging Issues
You might face common charging problems like the charger not recognizing the battery or failing to start. Resetting your Ryobi charger can clear errors and restore proper function. This simple step often improves performance and gets your batteries charging correctly again.
Common Charging Problems
Why won’t your Ryobi charger power up or properly recharge the battery? Common charging problems can disrupt battery safety and affect tool ergonomics, making your work less efficient.
Here are three frequent issues you might face:
- Dirty or Corroded Contacts: Dirt or corrosion on battery or charger contacts can block the connection, preventing proper charging.
- Overheated Battery: If your battery overheats, the charger may refuse to charge to protect battery safety.
- Internal Charger Faults: Sometimes, the charger’s internal circuitry malfunctions, causing inconsistent charging or no charge at all.
Resetting your Ryobi charger often resolves these problems by clearing errors and restoring proper function, ensuring your tools stay safe and ergonomic to use.
Benefits of Resetting
Resetting your Ryobi charger clears error codes and corrects minor faults that cause charging interruptions. When you reset, you eliminate glitches that may prevent the charger from recognizing the battery, helping you avoid unnecessary downtime.
This simple step also prevents you from chasing irrelevant topics or off topic solutions that don’t address the real issue. Instead of wasting time troubleshooting unrelated problems, resetting refocuses the charger’s system to its default state.
It’s a quick, effective way to resolve common errors without extra tools or technical knowledge. By resetting, you guarantee the charger can communicate properly with the battery, reducing frustration and improving reliability.
How Reset Improves Performance
How does resetting your Ryobi charger boost its performance? When your charger acts up, resetting clears internal errors, which often cause charging problems. It removes any irrelevant topic or unrelated concept the charger’s system might be stuck on, restoring normal function.
Here’s why resetting helps:
- Clears error codes Resetting wipes stored faults that block charging.
- Restarts the charging cycle It refreshes the system, allowing proper battery detection.
- Prevents overheating and overcharging Reset stabilizes the charger’s control, improving safety and longevity.
How To Perform a Hard Reset on Your Ryobi Charger
Wondering how to revive your Ryobi charger when it stops working properly? Performing a hard reset can often fix issues quickly. First, unplug the charger from the power source. Remove any battery from the charger.
Wait for about 10 minutes. This pause clears the charger’s memory and resets its internal system. Avoid letting unrelated topics or random thoughts distract you during this process, as timing is key.
After waiting, plug the charger back in without inserting a battery. Let it power up for a minute, then insert the battery. This hard reset helps the charger recalibrate and resolve minor glitches.
If your charger still doesn’t function correctly, consider checking other troubleshooting steps or professional help, but this reset often solves common problems efficiently.
How To Fix Common Ryobi Charger Error Lights
When you see error lights on your Ryobi charger, it’s important to understand what each code means. You can troubleshoot common issues by matching the light patterns to their causes. Let’s go over how to identify and fix these error signals quickly.
Understanding Error Light Codes
Why does your Ryobi charger flash certain error lights, and what do they mean? These lights help you quickly identify issues related to battery chemistry, USB charging, or connection problems. Understanding these signals ensures you can address problems effectively.
Here are the most common error light codes:
- Flashing Red Light: Indicates incompatible battery chemistry or a faulty battery.
- Alternating Red and Green: Shows a USB charging error or improper power source.
- Solid Red Light: Means the battery is too hot or too cold for safe charging.
Troubleshooting Charger Issues
Recognizing error light codes is just the first step to resolving Ryobi charger issues. If your charger shows a blinking red light, disconnect it immediately and check your battery for damage.
Damaged batteries must be handled with care. Follow proper battery disposal guidelines to avoid hazards. Sometimes, simply removing and reinserting the battery can reset the charger.
If the error persists, try cleaning the battery terminals and ensure the charger’s contacts are free of dirt or corrosion. For persistent faults, consult your charger’s manual to identify specific error codes.
If your charger or battery is under warranty, consider filing a warranty claim instead of attempting repairs yourself. Following these steps helps you troubleshoot common Ryobi charger error lights safely and effectively.
How To Clean and Inspect Your Ryobi Charger
A clean and well-maintained Ryobi charger ensures optimal performance and safety. Regular cleaning and inspection are key DIY maintenance steps to keep your charger functioning properly. Follow these cleaning tips:
- Unplug the charger before you start cleaning to avoid electrical hazards. Use a dry cloth to wipe the exterior, removing dust and debris gently.
- Inspect the charger terminals for corrosion or damage. If you see any buildup, carefully clean it with a cotton swab dipped in isopropyl alcohol.
- Check the power cord and plug for cracks or fraying. Replace the cord if damaged to prevent safety risks.
How To Test Your Ryobi Charger After Resetting
How can you confirm that your Ryobi charger is working correctly after a reset? First, ensure your battery matches the charger branding and correct battery chemistry (NiCad, Li-ion, etc.). Insert the battery and observe the LED indicators. A steady or blinking light usually signals charging activity.
Use this table to quickly assess your charger’s status:
| LED Color | Charger Status | Action Needed |
|---|---|---|
| Green | Fully Charged | Remove battery |
| Red | Charging | Wait until green |
| Blinking | Error Detected | Reset charger |
| Off | No Power/Connection | Check power source |
If the charger LED behaves as expected, your reset was successful. This method ensures your charger communicates effectively with your battery chemistry and charger branding.
Steps To Take If Your Ryobi Charger Won’t Recognize the Battery
If your Ryobi charger’s LED shows an error or doesn’t respond when you insert the battery, it may not be recognizing the battery properly. This can be frustrating, especially if you rely on your Ryobi tools for gas powered or landscape maintenance tasks. Here’s what you should do:
- Clean the contacts: Dirt or corrosion on the battery or charger contacts can prevent recognition. Wipe them gently with a dry cloth.
- Check battery compatibility: Ensure your battery matches the charger model; incompatible batteries won’t charge.
- Reset the charger: Unplug it for a few minutes, then plug it back in to reset the system.
Following these steps will often resolve recognition issues, helping you get back to your outdoor work quickly.
How To Prevent Future Charging Problems With Proper Care
Want to keep your Ryobi battery charger working smoothly and avoid future charging problems? Start by regularly vacuum cleaning the charger vents to prevent dust buildup, which can cause overheating and malfunction.
Store your charger and batteries in a dry, cool place to maintain optimal performance. Just like good kitchen organization keeps your tools easy to find and in good condition, organizing your charging area reduces the risk of damage or misplaced parts.
Always unplug the charger when it’s not in use to avoid electrical surges. Avoid exposing the charger to moisture or extreme temperatures.
Following these simple care tips will extend your charger’s life, ensuring your batteries charge efficiently every time.
When To Consider Replacing Your Ryobi Battery Charger
When should you think about replacing your Ryobi battery charger? It’s important to recognize when repairs or resets aren’t enough. Here are three clear signs:
- Incompatible Battery Design: If your charger no longer supports newer Ryobi battery designs, replacement is necessary to ensure proper charging and safety.
- Physical Damage or Wear: Cracks, exposed wiring, or other damage can compromise functionality and safety, making replacement the best option.
- Charger Aesthetics and Performance Decline: If your charger looks worn out or consistently fails to charge batteries efficiently despite resets and proper care, it’s time to invest in a new unit.
Replacing your charger ensures optimal performance and safety for your Ryobi tools. Don’t ignore these signs to avoid potential damage or hazards.
Frequently Asked Questions
What Types of Ryobi Batteries Are Compatible With the Charger?
You can charge Ryobi ONE+ 18V batteries with this charger, but avoid unrelated topic confusion like marketing strategy.
Stick to compatible 18V lithium-ion and Ni-Cd batteries to guarantee proper charging and avoid damaging your tools.
Can I Use My Ryobi Charger With Non-Ryobi Batteries?
You shouldn’t use your Ryobi charger with non-Ryobi batteries, as it risks damage and voids warranties.
Always follow the reset procedure carefully and observe safety considerations to prevent overheating or electrical hazards.
How Long Does a Full Charge Usually Take on a Ryobi Charger?
A full charge on a Ryobi charger usually takes about 1 to 2 hours. If it’s slow or won’t charge, try how to reset the charger.
Regular charger maintenance guarantees best charging times.
Is It Safe to Leave the Ryobi Charger Plugged in Overnight?
Is it safe to leave your Ryobi charger plugged in overnight? Sure, if you want to test your luck! But seriously, overnight charging is generally safe.
Just ensure your charger’s on a flat, ventilated surface to avoid overheating.
What Warranty Does Ryobi Offer on Their Battery Chargers?
Ryobi offers a 3-year warranty on their battery chargers, covering defects and product reliability issues.
You should register your charger and keep your receipt to ensure warranty details are easily accessible if you need service.
Conclusion
Resetting your Ryobi battery charger is like giving your tool a fresh start, much like rebooting a computer when it’s acting up. By following these simple steps, you can quickly solve common charging issues and get back to work without missing a beat.
Remember, proper care keeps your charger running smoothly. If problems persist, it might be time to replace it.
Stay proactive, and your Ryobi battery charger will stay ready for action.