How to Use Auto Battery Charger
To use an auto battery charger, first identify your battery type and specifications to ensure compatibility with the charger. Wearing insulated gloves and goggles is essential for safety.
Next, clean and inspect the battery terminals before connecting the positive clamp to the battery’s positive terminal. Attach the negative clamp to a grounded metal surface to complete the circuit safely.
Set the charger voltage and mode according to the battery’s condition. Monitor the charging process until the battery is fully charged.
Finally, turn off the charger and disconnect the clamps in reverse order. Following these steps helps protect both your battery and equipment. More details will guide you through safe operation and maintenance.
Identifying Your Car Battery Type and Specs
How do you determine the type and specifications of your car battery before using an auto battery charger? First, locate the battery label for essential details: voltage, capacity (Ah), and Cold Cranking Amps (CCA). Identifying whether your battery is lead-acid, AGM, or gel type is important because improper charging can cause irreversible battery damage.
Pay close attention to sealed versus vented designs. Vented batteries release gas emissions during charging, requiring ventilation to prevent hazards. Avoid using chargers unsuitable for your battery type, as it may lead to overcharging or undercharging, reducing battery life.
Confirm the battery’s state. If it’s severely sulfated or damaged, charging won’t restore it. Accurate identification guarantees you select the correct charging mode, voltage, and current settings, preventing irreversible battery failure and unsafe gas emissions during the process.
Essential Tools and Safety Gear for Charging
What tools and safety gear should you have ready before charging your car battery? First, ensure you have insulated gloves and safety goggles to protect against acid splashes and sparks. A wrench or socket set is necessary for disconnecting battery terminals safely.
Keep a battery terminal cleaner on hand to remove corrosion efficiently. A well-ventilated workspace with proper lighting supports safe operation. Integrate these items into your garage organization for quick access during upkeep routines.
Additionally, having a fire extinguisher rated for electrical fires nearby is critical. Avoid loose clothing and jewelry that risk short circuits. Preparing your tools and safety gear beforehand streamlines the charging process and minimizes hazards, helping you maintain a safe, organized environment for all battery upkeep routines.
How to Safely Connect Your Auto Battery Charger
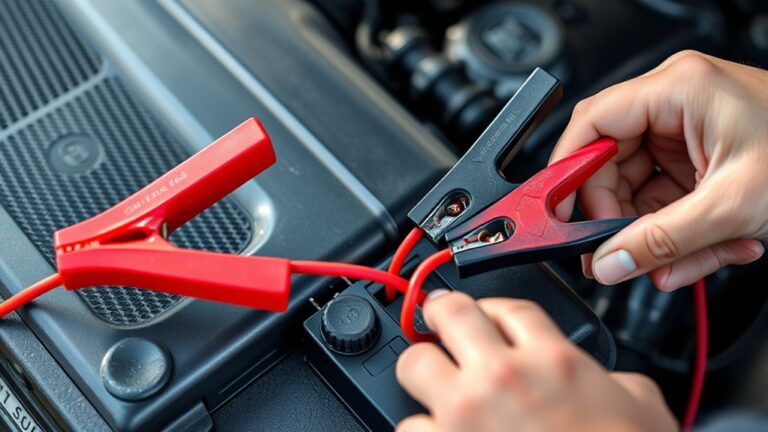
Before connecting your charger, make certain the battery terminals are clean and free of corrosion. Always attach the positive (red) clamp to the positive terminal first, then connect the negative (black) clamp to a grounded metal surface away from the battery. Following this sequence minimizes sparks and guarantees a safe charging process.
Preparing the Battery
Where should you start when preparing your car battery for charging? First, ensure the vehicle is off and parked in a well-ventilated area to avoid hazardous gas buildup. Follow these steps precisely:
- Inspect the battery terminals for corrosion or damage; clean them with a wire brush if necessary, avoiding contact with skin or eyes.
- Remove any metallic jewelry to prevent accidental short circuits, a common jump start pitfall.
- Check the battery case for cracks or leaks; if damaged, dispose of it properly through battery recycling programs to protect the environment.
These measures reduce risks and promote effective charging. Proper preparation prevents safety hazards and equipment damage, so take your time before proceeding to connect the charger.
Proper Charger Connection
After ensuring the battery is clean, intact, and safely prepared, you can proceed to connect the charger. Use cleaning brushes to remove corrosion from terminals before connecting to ensure a stable connection.
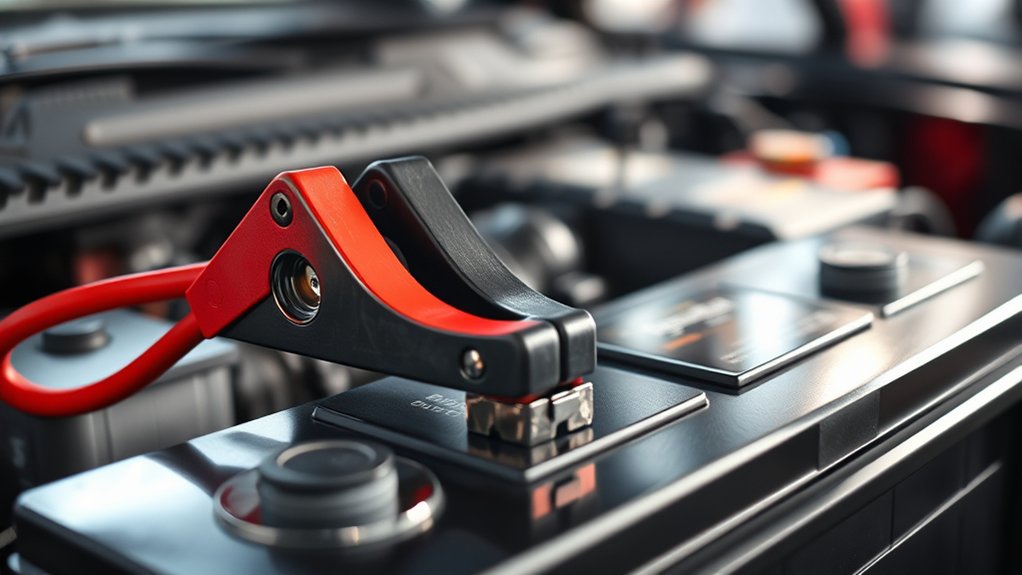
Attach the positive (red) clamp to the positive terminal first. Then, connect the negative (black) clamp to the vehicle’s chassis or designated grounding point, not directly to the battery’s negative terminal. This prevents sparks and reduces explosion risk.
Avoid common charging myths, such as reversing clamp polarity or charging a frozen battery, which can cause damage or injury. Double-check connections are secure and clamps don’t touch each other.
Finally, plug in the charger and set the appropriate charging mode. Following these steps guarantees a safe, effective charging process.
How to Choose the Right Charging Mode and Voltage
How do you determine the correct charging mode and voltage for your auto battery charger? Choosing the right settings is essential for battery maintenance and charging safety.
First, check your battery’s voltage rating, commonly 12V or 24V, and set the charger accordingly. Next, select the charging mode based on battery condition: use a slow or trickle mode for routine maintenance to prevent overcharging, and a rapid mode only for severely discharged batteries.
Finally, verify charger compatibility with battery type (lead-acid, AGM, gel) to ensure proper voltage regulation and avoid damage. Follow these steps precisely to optimize charging efficiency and extend battery life, while maintaining a safe charging environment.
Always consult your battery’s specifications before starting the process.
How Long Should You Charge Your Car Battery?
When do you know your car battery has charged long enough? Charging time largely depends on battery capacity, charger output, and battery condition. Avoid common charging myths like “overnight charging is always safe” or “charging longer improves battery aesthetics.” Overcharging can damage cells, reducing battery life and performance.
| Battery Capacity (Ah) | Charger Output (A) | Approx. Charging Time (hr) | Battery Type | Notes |
|---|---|---|---|---|
| 40 | 2 | 8-10 | Lead-Acid | Slow charge recommended |
| 60 | 4 | 6-8 | AGM | Moderate charge preferred |
| 70 | 6 | 4-6 | Gel | Avoid high current |
| 80 | 10 | 3-4 | Lead-Acid | Quick charge possible |
| 100 | 10 | 4-5 | AGM | Monitor closely |
Follow charger specs strictly to prevent battery damage.
How to Know When Your Battery Is Fully Charged
You can tell your battery is fully charged by checking the charger’s indicator light, which typically shifts from red to green. Alternatively, measure the battery voltage with a multimeter; a fully charged 12V battery should read about 12.6 to 12.8 volts. Monitoring these signals helps you avoid overcharging and ensures best possible battery performance.
Indicator Light Signals
Why should you pay close attention to the indicator lights on your auto battery charger? These lights provide essential feedback on charging status, helping you avoid overcharging or undercharging your battery.
Ignoring them can create a gap analysis problem, where you misjudge battery health by focusing on unrelated topics like charging time alone.
Here’s what to look for:
- Red Light Indicates the battery is charging; don’t disconnect yet.
- Green Light Signals the battery is fully charged and safe to disconnect.
- Flashing Light Warns of a fault, such as a poor connection or battery issue.
Voltage Measurement Methods
A reliable way to determine if your auto battery is fully charged involves measuring its voltage accurately. To do this, use a digital multimeter set to the DC voltage mode. Connect the multimeter probes to the battery terminals, red to positive and black to negative.
Read the voltage displayed; a fully charged 12-volt battery typically shows about 12.6 to 12.8 volts. If the reading is below 12.4 volts, the battery needs further charging. Understanding voltage conversion is essential here—battery voltage fluctuates based on charge state, temperature, and load.
Make sure the charger is disconnected for an accurate resting voltage measurement. By regularly using voltage measurement methods with a digital multimeter, you’ll precisely monitor your battery’s charge level and avoid overcharging or undercharging effectively.
How to Disconnect Your Charger Without Damage
When should you disconnect your auto battery charger to prevent damage? Disconnect your charger only after the battery has reached full charge or the charger indicates completion. Premature disconnection can reduce battery life or cause voltage spikes.
Disconnect your auto battery charger only once fully charged to avoid damage and voltage spikes.
Follow these steps for safe disconnection:
- Turn off the charger to stop current flow.
- Remove the negative (black) clamp first to minimize short-circuit risk.
- Remove the positive (red) clamp last to complete disconnection safely.
Handle used batteries responsibly by following proper battery recycling protocols to prevent environmental harm. Dispose of old or faulty chargers in accordance with local charger disposal regulations to avoid hazardous waste contamination. Proper handling extends battery and charger lifespan while ensuring environmental safety.
Fixing Common Problems With Your Battery Charger
How can you quickly identify and resolve issues with your auto battery charger? First, check the power source and connections; loose cables or a faulty outlet often cause charging failures.
Inspect the charger’s fuse and internal components for damage or corrosion. If the charger shows no signs of life, it may need professional repair or replacement.
Avoid deviating into unrelated topics like battery disposal here. Focus on charger-specific problems.
When the charger overheats or stops mid-cycle, ensure proper ventilation and verify the battery’s condition.
Maintaining Your Car Battery for Better Charging
To guarantee better charging, regularly clean your battery terminals to prevent corrosion buildup. Store your battery in a cool, dry place when not in use to maintain its charge capacity. Following these steps will extend battery life and improve charging efficiency.
Battery Cleaning Tips
Although your battery charger efficiently restores power, maintaining clean battery terminals is essential for ideal charging performance. Battery cleaning prevents corrosion buildup, ensuring optimal electrical contact and prolonging battery life.
Follow these steps to perform effective corrosion prevention:
- Disconnect the battery cables, starting with the negative terminal to avoid short circuits.
- Apply a mixture of baking soda and water to terminals, scrubbing with a wire brush to remove corrosion and debris.
- Rinse with clean water, dry thoroughly, and apply a thin layer of petroleum jelly or specialized terminal protector to inhibit future corrosion.
Regular battery cleaning enhances charger efficiency and prevents voltage drops caused by poor connections. Perform this maintenance routinely to maintain reliable charging and extend your battery’s lifespan.
Proper Storage Practices
Maintaining clean battery terminals sets the foundation for effective charging, but proper storage plays a significant role in preserving your car battery’s health when it’s not in use. For long term storage, ensure the battery is fully charged to prevent sulfation and capacity loss.
Disconnect the battery from your vehicle to avoid parasitic drains. Store the battery in a cool, dry storage environment, ideally between 32°F and 77°F (0°C to 25°C), to minimize self-discharge and chemical degradation. Avoid freezing temperatures and direct sunlight.
Use a smart battery maintainer or trickle charger to keep the battery at optimal charge levels during extended storage periods. Regularly check the battery voltage every month and recharge as needed to maintain performance and extend lifespan. Proper storage ensures your battery is ready for efficient charging and reliable use.
When to Replace Your Car Battery Instead of Charging
If your car battery frequently fails to hold a charge despite multiple attempts, it’s time to contemplate replacement rather than continued charging. Prolonged attempts waste time and risk further damage.
When deciding to replace, consider these indicators:
- Battery age exceeding 3-5 years with diminished performance.
- Visible corrosion, cracks, or leaks on the battery casing.
- Consistent low voltage readings after charging cycles.
Once replacement is necessary, focus on planning a battery recycling plan to dispose of the old battery responsibly. Recognizing environmental impact is essential. Car batteries contain hazardous materials that require proper recycling to prevent soil and water contamination.
Frequently Asked Questions
Can I Charge a Battery in Cold Weather?
Cold weather charging isn’t a walk in the park, but you can do it. Just remember, battery chemistry stability drops as temperatures fall, so charge slowly to avoid damage and maintain best performance during cold weather charging.
Are All Auto Battery Chargers Compatible With Electric Vehicles?
No, not all auto battery chargers work with electric vehicles. You must check compatibility limits since EV batteries have different voltages and chemistries.
Using an incompatible charger risks damage or inefficient charging. Always verify specs first.
How Often Should I Charge a Rarely Used Car Battery?
Think of your battery as a slowly deflating balloon; to prevent battery self discharge, you should perform infrequent charging every 3-4 weeks. This keeps the charge stable and extends your battery’s overall lifespan efficiently.
What Are the Environmental Impacts of Battery Charging?
You’ll face environmental impacts like energy consumption and greenhouse gas emissions during battery charging. Efficient chargers reduce waste, but improper disposal of batteries can harm ecosystems.
Managing charging practices helps minimize these adverse environmental impacts effectively.
Can a Battery Charger Damage Other Car Electronics?
Yes, a battery charger can damage electronics if incompatible or improperly used, especially in cold weather or with EVs. Rarely used batteries risk overcharging, increasing environmental impacts.
Always ensure charger compatibility to protect your car’s electronics.