How to Test a Battery Charger
To test your battery charger, start by visually inspecting it for any damage such as cracks, corrosion, or frayed cables. This initial check helps identify obvious issues that could affect performance.
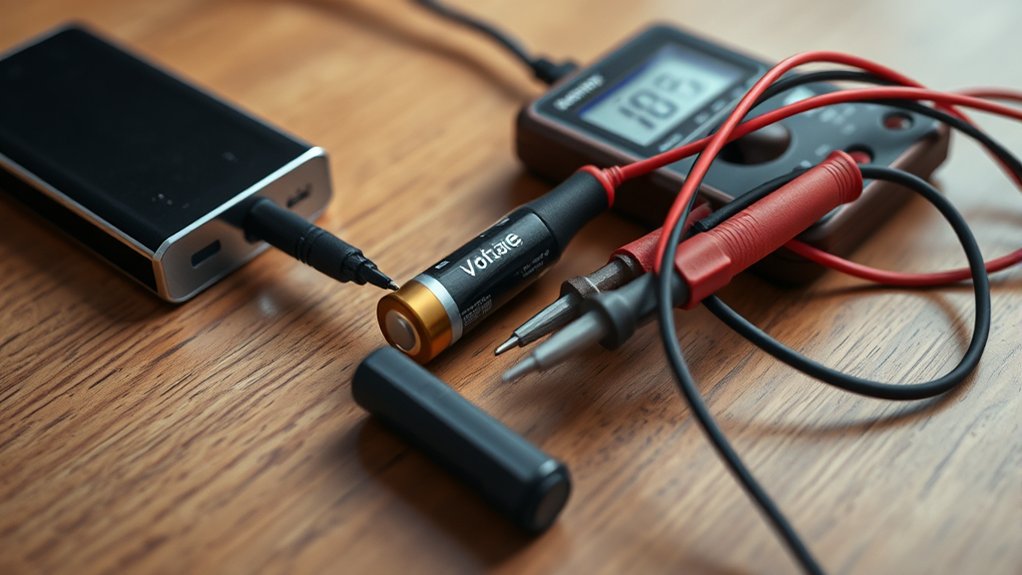
Next, use a multimeter to measure the voltage output at the terminals. Make sure the voltage matches the specified range for your battery type to ensure compatibility and safety.
Then, measure the current by connecting the meter in series during charging. Observe for stable voltage and consistent current under load, which confirms the charger is functioning properly.
Understanding these steps will help you diagnose charger problems effectively and safely. Following this process ensures your battery charger operates reliably.
How to Tell What Kind of Battery Charger You Have
Several key indicators help you identify the type of battery charger you have, including its voltage output, charging method, and compatibility with battery chemistries. Start by checking the charger’s label or specifications to determine voltage output, which must match your battery to maintain battery health and avoid damage.
Next, analyze the charging method, whether it’s trickle, fast, or smart charging, as this influences charging etiquette, preventing overcharging or undercharging. Also, verify if the charger supports specific chemistries like NiMH, Li-ion, or lead-acid, since mismatches degrade performance.
Understanding these parameters allows you to select the appropriate charger, ensuring optimal battery health and safety. Identifying charger type precisely is essential before proceeding with any testing or maintenance steps.
Which Tools Do You Need to Test Your Charger?
Once you’ve identified the type of battery charger you’re working with, gathering the right tools becomes necessary to accurately assess its performance. Essential tools include a multimeter to measure voltage and current output precisely, and a load tester to simulate real battery conditions.
Identifying your charger type and using precise tools like a multimeter and load tester ensures accurate performance assessment.
Avoid distractions like unrelated topic research or random ideas that don’t contribute to your goal. A digital clamp meter can also be useful for non-intrusive current measurements.
Additionally, an oscilloscope helps analyze waveform stability if your charger uses pulse charging technology. Having these tools ensures you collect reliable data for diagnosing charger functionality.
Skipping proper tools risks inaccurate readings, leading to erroneous conclusions about charger health. Stay focused on technical accuracy, and avoid diverging into unrelated topic areas or random ideas during testing.
How to Perform a Visual Inspection for Charger Damage
Start by examining the charger’s exterior for cracks, dents, or signs of overheating. Then, carefully inspect the cable and connector for frays, exposed wires, or corrosion. Finally, verify that all warning labels are intact and legible to ensure proper safety information is available.
Check Charger Exterior Condition
How can you quickly determine whether your battery charger is safe and functional before testing? Start with a thorough exterior inspection. Examine the charger’s casing for cracks, dents, or signs of overheating such as discoloration or melting. These defects can compromise internal components and pose safety risks.
Pay close attention to any corrosion or residue buildup around vents or seams, as this may indicate moisture intrusion. While you’re focusing on the charger body, note any visible cable wear near the entry points, but avoid detailed cable checks here. That’s for the next step.
Identifying physical damage early helps prevent electrical faults during testing and usage. A meticulous exterior inspection ensures you address obvious hazards before proceeding, maintaining both safety and charger performance reliability.
Inspect Cable And Connector
After confirming the charger’s exterior is intact, focus on the cable and connector for visible damage. Examine the cable thoroughly for signs of insulation wear, such as cracks, cuts, or fraying, which can expose internal wires and create safety hazards.
Pay close attention to areas near the connector and strain relief points, where stress commonly causes deterioration. Inspect the connector itself for corrosion damage, especially on metal contacts, which can impair electrical conductivity and charger performance.
Look for discoloration, rust, or residue buildup that signals corrosion. Also, verify that the connector pins are straight and securely attached, avoiding looseness or deformation.
Addressing these issues early prevents potential failures and ensures reliable charger operation. If you detect significant damage, consider replacing the cable or connector before proceeding with further testing.
Look For Warning Labels
While inspecting the charger for physical damage, pay close attention to warning labels that provide essential safety and usage information. These labels often indicate voltage limits, proper connection methods, and hazard alerts necessary for safe operation. Ignoring or overlooking them can lead to misuse and potential hazards.
Avoid distraction by irrelevant topics or random ideas unrelated to charger safety during your inspection. Confirm that all symbols and text are legible and intact; faded or missing labels might imply previous damage or tampering. Document any discrepancies for further evaluation.
This step is crucial because warning labels communicate manufacturer guidelines that protect both you and the device. Incorporating this analytical approach ensures your charger is reliable and safe before proceeding to functional tests.
How to Measure Output Voltage With a Multimeter
Where should you connect your multimeter to accurately measure the output voltage of a battery charger? Attach the multimeter probes directly to the charger’s output terminals, red to positive, black to negative, to ensure precise voltage readings.
Connect the multimeter probes directly to the charger’s output terminals, red to positive and black to negative.
Before measuring, verify that your multimeter’s calibration cadence is current to avoid inaccurate data. Set the multimeter to the appropriate DC voltage range based on the charger’s specifications.
Observe the reading for voltage stability; a steady output indicates proper charger function, while fluctuations may signal a fault. Record the voltage and compare it to the charger’s rated output voltage.
This method offers a reliable assessment of the charger’s voltage performance without interference from connected batteries or loads. Consistent calibration and careful probe placement are critical for accurate, repeatable measurements.
How to Safely Measure Charger Current Output
How can you safely measure the current output of a battery charger without risking damage to your equipment or injury? First, ensure the charger is disconnected from the battery to maintain battery safety.
Use a multimeter capable of measuring current and set it to the appropriate current range. Connect the meter in series with the charger’s output leads, never in parallel, to avoid short circuits.
Confirm all connections are secure before powering the charger. Monitor the reading carefully, noting that excessive current may indicate charger malfunction or poor charger calibration.
Always use insulated tools and wear protective gear to prevent electric shock. Following these precise steps will protect both you and your equipment while providing accurate current output measurements vital for effective charger testing.
How to Test a Battery Charger Using a Load Tester
After measuring the charger’s current output, you’ll want to verify its performance under load conditions. Using a load tester simulates the real-world demand on the charger, reflecting energy efficiency and the historical development of testing methods. Here’s how to proceed:
- Connect the load tester to the charger output terminals, ensuring polarity matches.
- Set the load tester to a current draw approximating the charger’s rated output.
- Observe the voltage drop and current stability while the load tester applies the load.
- Record the readings to assess if the charger maintains voltage within specifications under load.
This process reveals the charger’s ability to deliver consistent power efficiently, a critical metric shaped by decades of testing evolution and energy efficiency standards.
How to Interpret Your Charger Test Results
Once you complete your charger tests, interpreting the results accurately becomes essential to determine the charger’s condition and performance. Focus on voltage output, current consistency, and response under load.
If voltage remains stable and within manufacturer specs, the charger functions properly. Fluctuations or drops indicate potential issues. Avoid confusing these readings with an unrelated topic like battery capacity or unrelated electrical components. Stick strictly to charger-specific data.
Don’t let a random idea, such as ambient temperature effects, skew your analysis unless directly relevant. Cross-reference your results with standard parameters provided in the charger’s manual.
If measurements deviate significantly, consider recalibrating your test equipment or consulting technical support. Accurate interpretation ensures you identify faults early and maintain reliable charging performance.
How to Test a Car Battery Charger
To test a car battery charger effectively, start by checking the voltage output to guarantee it matches the charger’s specifications. Next, measure the charging current flow to confirm the charger delivers adequate power without fluctuation. Finally, inspect the charger connections for corrosion or looseness that could affect performance.
Checking Charger Voltage Output
How do you determine if your car battery charger is delivering the correct voltage? Start by ensuring device compatibility to avoid damaging your battery or charger. Follow these precise steps:
- Connect the charger to a fully discharged battery, observing all battery safety protocols.
- Use a reliable digital multimeter set to measure DC voltage.
- Measure the output voltage directly at the charger’s terminals while it’s connected.
- Compare the reading to the charger’s specified voltage range, typically between 13.8V and 14.4V for a 12V system.
If the voltage falls outside this range, the charger may malfunction or be incompatible with your battery. Regularly verifying output voltage helps maintain battery health and ensures safe, efficient charging.
Measuring Charging Current Flow
Why is measuring the charging current flow essential when testing your car battery charger? Accurate current measurement ensures the charger delivers the correct amperage, supporting optimal battery charging without overloading.
You’ll need a multimeter set to the appropriate current range, connected in series with the battery and charger. Monitor the current during the initial charging phase; a stable reading within manufacturer specifications confirms effective power regulation.
Deviations could indicate faulty circuitry or risks to charging safety, such as overheating or battery damage. Consistent current flow also reflects the charger’s ability to adjust output under varying battery conditions.
Inspecting Charger Connections
A thorough inspection of the charger connections is essential for ensuring reliable power transfer and preventing charging interruptions. Faulty or degraded connections can lead to insulation degradation and increase the overheating risk, compromising charger performance and safety.
To inspect effectively:
- Examine all cables for visible cracks, wear, or exposed wires indicating insulation degradation.
- Check the clamps or terminals for corrosion or loose fittings that impair conductivity.
- Verify that all connectors are firmly seated to minimize resistance and prevent overheating.
- Assess the entire length of the wiring for any heat discoloration or stiffness, signs of overheating risk.
How to Test a Phone or Small Device Battery Charger
When you need to verify the functionality of a phone or small device battery charger, measuring its output voltage and current is essential. Start by connecting a multimeter set to the appropriate DC voltage range to the charger’s output terminals. Confirm the voltage matches the device’s specified requirements.
To verify a charger, measure its output voltage with a multimeter ensuring it meets device specifications.
Then, use a dummy load or a compatible device to draw current while monitoring the charger’s output. Ensure the current stays within the rated range without significant voltage drop.
Avoid distractions by steering clear of irrelevant topics like unrelated concepts in battery technology. Focus strictly on direct electrical measurements and their interpretation.
This approach ensures you accurately assess a charger’s performance without conflating it with unrelated parameters or theoretical considerations that don’t impact practical functionality.
Common Charger Problems and How to Spot Them
Testing a charger’s output voltage and current gives you clear indicators of its basic function, but it doesn’t always reveal underlying issues. To spot common charger problems that affect battery health, you need to analyze several factors:
- Inconsistent Voltage Output: Fluctuations can stress the battery, reducing lifespan.
- Overheating: Excessive heat in the charger or battery signals inefficiency or internal faults.
- Slow Charging Rate: Indicates reduced charger capacity or internal resistance increase.
- Intermittent Connection: Loose contacts or damaged cables cause unstable current flow.
When to Repair or Replace Your Battery Charger
How do you determine whether to repair or replace your battery charger? Start by evaluating the fault’s nature and cost-effectiveness. If the charger exhibits minor issues like loose connections or worn cables, repairing is sensible.
However, extensive internal damage or recurring malfunctions often indicate replacement is more practical. Don’t confuse an irrelevant topic such as battery performance with charger failure; these are unrelated concepts.
Extensive internal damage or frequent issues usually mean replacing the charger is the smarter choice.
Assess the charger’s age, warranty status, and availability of replacement parts. If parts are obsolete or repair costs exceed half the price of a new unit, replacement is advisable.
Prioritize safety. Damaged chargers risk electrical hazards. By analyzing these technical factors, you’ll make an informed decision that balances reliability, cost, and operational efficiency without falling into the trap of addressing irrelevant topics or unrelated concepts.
Frequently Asked Questions
Can I Use a Solar Panel to Charge My Battery Instead?
You can harness the sun’s power with a solar panel to charge your battery off grid, but ensure battery safety by using proper charge controllers and monitoring voltage to prevent overcharging or damage. This guarantees efficient, reliable energy storage.
How Do Temperature Changes Affect Charger Performance?
You’ll notice temperature drift affects charger accuracy as ambient influence alters internal resistance and voltage regulation. Higher temperatures can reduce efficiency, while colder conditions may slow charging, so always calibrate chargers considering these thermal variations.
Are Wireless Chargers Less Reliable Than Wired Ones?
Imagine your phone slows charging on a wireless pad during use. You’ll find wireless reliability often lags behind wired efficiency due to energy loss and alignment issues, making wired chargers more consistent and technically superior for fast, stable charging.
What Safety Certifications Should a Good Battery Charger Have?
You should look for safety certifications like UL, CE, and FCC on a battery charger. These indicate rigorous certification testing, ensuring compliance with electrical safety standards.
They protect you from hazards during operation.
Can a Charger Damage a Battery if Left Connected Too Long?
Don’t throw caution to the wind. Leaving a charger connected too long can reduce battery longevity by causing overcharging.
Prioritize charging safety by using smart chargers with automatic shutoff to protect your battery’s health effectively.