How to Place Jumper Cables
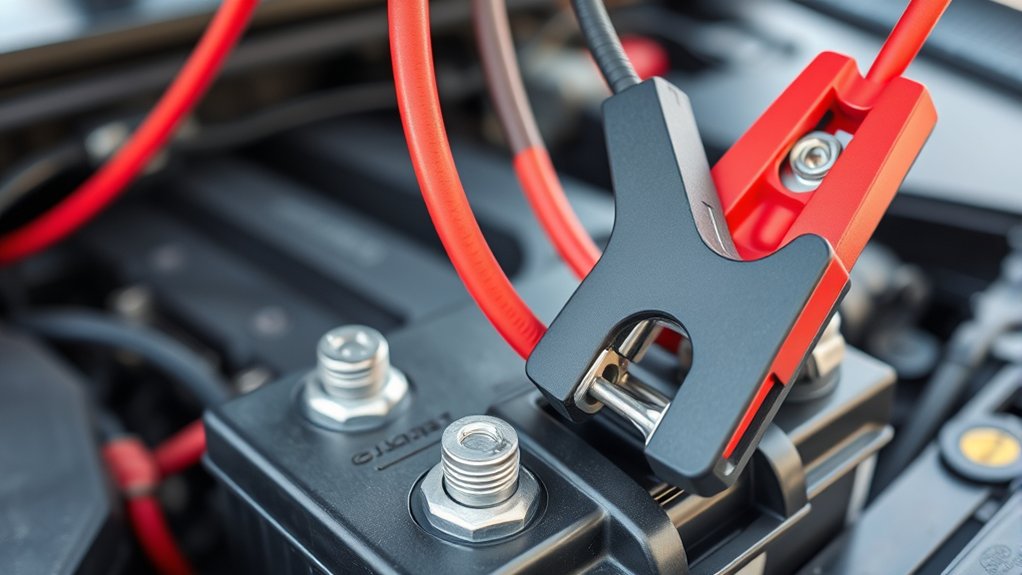
To place jumper cables correctly, start by connecting the red clamp to the positive terminal of the dead battery. Then, attach the other red clamp to the positive terminal of the donor battery.
Next, clamp the black cable to the donor battery’s negative terminal. Finally, ground the remaining black clamp to an unpainted metal surface on the dead vehicle.
Make sure all clamps are secured firmly to avoid sparks or damage. Following these steps guarantees a safe jump start—there’s more to learn for a smooth, risk-free process.
When to Use Jumper Cables
When should you use jumper cables? Use them when your vehicle’s battery is discharged and the engine won’t start despite a fully functional ignition system. Avoid common jump starting myths, such as thinking jumper cables can fix mechanical engine issues or that any battery issue requires a jump start.
Proper battery maintenance can prevent frequent dead batteries; routinely check terminals for corrosion and ensure the battery holds a charge. If your battery is completely drained or damaged, jumper cables provide a temporary power boost from a donor vehicle’s battery to start your engine safely.
Tools and Safety Gear You’ll Need
Which tools and safety gear should you gather before using jumper cables? Begin with a tools overview: you need a reliable set of jumper cables with insulated clamps rated for your vehicle’s battery voltage. Ensure the cables are free from damage or corrosion.
Next, assemble your safety gear checklist: wear safety goggles to protect your eyes from sparks or battery acid, and use insulated gloves to prevent electrical shocks. Have a flashlight handy if you’re working in low light.
Keep a fire extinguisher rated for electrical fires within reach. Avoid loose clothing or jewelry that could cause accidental contact with battery terminals. By preparing these tools and safety gear, you minimize risks and ensure a safe, effective jump-start process.
How to Position Vehicles for Jump Starting Safely
After gathering the proper tools and safety gear, you need to position the vehicles correctly to assure a safe and effective jump start. Park the vehicles facing each other or side by side, ensuring the batteries are within cable reach without stretching.
Keep at least 12 inches of clearance between the vehicles to avoid contact, which could cause sparks or damage. Engage both parking brakes and turn off engines, lights, and accessories to prevent electrical surges.
Avoid an unrelated topic or off topic discussion that might distract you during this critical step. Ensure both vehicles are in park or neutral, with automatic or manual transmissions respectively.
Proper positioning reduces risk and prepares you for attaching jumper cables safely, without confusion or hazards.
How to Attach Jumper Cables Correctly
How exactly do you attach jumper cables to guarantee a safe and effective connection? Proper technique respects jump start ethics and accounts for battery chemistry to prevent damage or injury.
Follow these steps precisely:
- Connect the red clamp to the positive (+) terminal of the dead battery.
- Attach the other red clamp to the positive (+) terminal of the donor battery.
- Connect the black clamp to the negative (–) terminal of the donor battery.
- Attach the final black clamp to an unpainted metal surface on the disabled vehicle, away from the battery, to avoid sparks.
This sequence prevents electrical shorts and respects battery chemistry, minimizing risks. By adhering to these guidelines, you observe jump start ethics and ensure both vehicles remain safe during the process.
What to Do Next After Connecting Jumper Cables
What comes next once you’ve connected the jumper cables correctly? First, ensure both vehicles remain in park or neutral with parking brakes engaged.
Next, start the engine of the donor car and let it run for a few minutes to transfer charge. While waiting, use finding methods such as checking the dashboard battery indicator to confirm power flow.
Afterward, attempt to start the dead vehicle. If it doesn’t start immediately, wait a few more minutes before retrying, considering fuel considerations like ensuring there’s enough fuel to support engine ignition.
Once the dead car starts, keep both vehicles running for several minutes to stabilize the battery. Finally, remove cables in reverse order of attachment to prevent sparks or damage.
Common Jump-Starting Mistakes to Avoid
Why do some jump-start attempts fail despite following basic steps? Often, it comes down to common errors you can easily avoid with proper car care and roadside etiquette. Here are four mistakes to watch out for:
- Connecting cables in the wrong order. Always attach positive terminals first, then negative, to prevent sparks and damage.
- Using damaged or low-quality jumper cables. Ensure cables are intact with solid clamps for a reliable connection.
- Failing to secure clamps firmly. Loose clamps cause poor contact, interrupting power flow.
- Neglecting to turn off all electronics before jump-starting. This protects both vehicles’ electrical systems.
Troubleshooting If Your Car Doesn’t Start
When your car doesn’t start after connecting jumper cables, start by confirming the connections are secure and correctly placed. If the engine still won’t turn over, move on to troubleshooting fuel delivery by checking the fuel pump and fuel filter for blockages or malfunctions.
Next, diagnose electrical faults by inspecting the battery terminals for corrosion, ensuring the alternator is charging correctly, and verifying the starter motor’s operation. Use a multimeter to test voltage continuity across key points.
If the issue persists, check the fuses and relays related to the ignition system. Keep in mind that a faulty ignition switch or immobilizer can also prevent starting. Following these steps methodically helps isolate the problem efficiently before considering professional assistance.
How to Disconnect Jumper Cables Safely
Start by removing the negative cable from both vehicles to reduce the risk of sparks. Make sure the cables don’t touch each other or any metal surfaces during disconnection. Finally, secure the cables away from engine components to prevent damage or accidental contact.
Remove Negative Cable First
Although it might seem straightforward, you must always remove the negative cable first to prevent electrical shorts or sparks. This step minimizes the risk of accidental grounding that can cause damage or injury.
Follow these precise actions to disconnect jumper cables safely:
- Identify the negative (-) clamp on both batteries to avoid confusion with positive clamps.
- Grasp the negative cable firmly without touching the positive or any metallic parts.
- Detach the negative clamp from the previously dead battery’s terminal first.
- Then remove the negative clamp from the booster battery’s terminal.
Avoid Cable Contact
Why must you avoid letting the jumper cables touch each other during disconnection? When the positive clamps connect, they create a direct short circuit, which can cause sparks, damage the vehicle’s electrical system, or injure you.
To prevent this, always separate the clamps immediately after disconnecting them from the battery terminals. Start by removing the negative cable first, then carefully detach the positive clamps without allowing contact.
This two word discussion ideas “cable contact” highlight the critical safety principle often overlooked. Avoid treating this step as an unrelated topic; it’s vital to safe jumper cable use. Maintaining strict control over cable positioning ensures you minimize risk and protect both yourself and your vehicle during the disconnection process.
Secure Cables Away
How do you ensure jumper cables remain secure and out of the way after disconnecting them? To secure cables away properly and avoid cable contact that could cause sparks or damage, follow these steps:
- Disconnect the cables in reverse order of connection, starting with the negative (-) clamp on the dead battery.
- Carefully coil each cable individually, preventing tangles and minimizing stress on the clamps.
- Store the coiled cables in a dry, insulated bag or container to protect them from moisture and contaminants.
- Position the stored cables away from sharp objects, heat sources, or moving parts to maintain cable integrity and safety.
Frequently Asked Questions
Can Jumper Cables Damage My Car’s Electrical System?
Yes, improper jumper cable use can cause electrical system risk. You must follow jumper cable safety protocols strictly to avoid voltage spikes or shorts that could damage your car’s electrical components or battery.
Are All Jumper Cables Compatible With Every Vehicle?
Think of jumper cables like puzzle pieces; they’re not all universal.
If you force incompatible connectors, you risk sparks or damage.
Always check compatibility and follow safety precautions to protect your vehicle’s electrical system precisely and securely.
How Long Should I Wait Before Attempting to Start the Car?
You should wait about 3 to 5 minutes after connecting cables before starting the car. During this time, perform an equipment check and guarantee you’re staying safe by avoiding contact with moving parts or sparks.
Can I Jump-Start a Car in Extreme Weather Conditions?
Yes, you can jump-start a car in extreme weather, but you must follow safety precautions carefully. Wear insulated gloves, avoid metal contact, and guarantee cables connect correctly to prevent sparks or damage from cold temperatures or moisture.
What Is the Lifespan of a Good Set of Jumper Cables?
You can expect a good set of jumper cables with durable insulation and a proper cord gauge to last around 3 to 5 years, depending on usage and storage conditions.
Regularly inspect for wear and damage.