How to Tell if Battery Charger Is Working
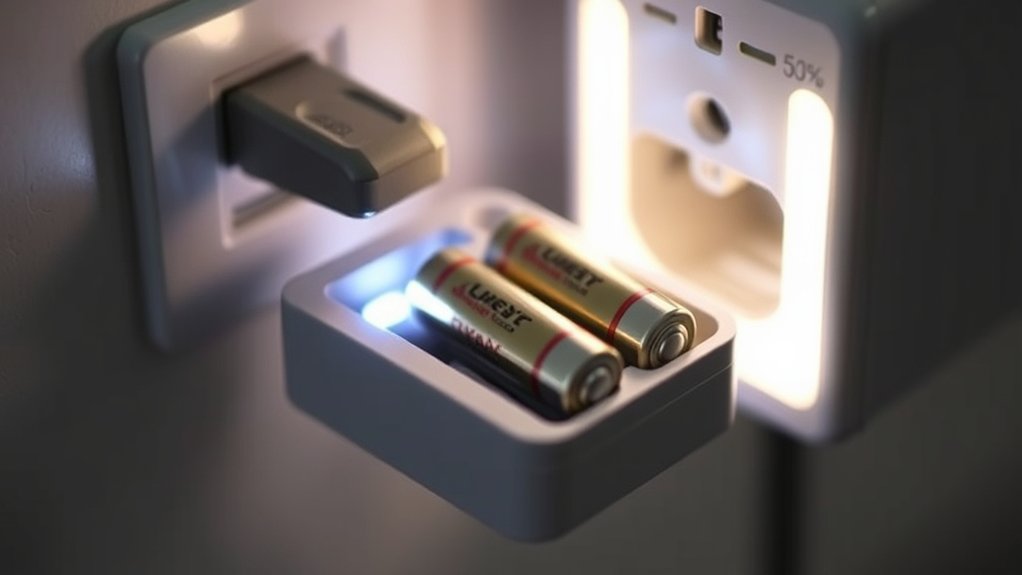
You can tell if your battery charger is working by first checking for a lit LED or active display, indicating power. This is the simplest way to confirm that the charger is receiving electricity and is operational.
Next, use a multimeter set to the correct DC voltage to confirm the output matches the battery’s rated voltage. This step ensures the charger is delivering the proper current needed to charge the battery effectively.
Observe the indicator lights carefully: a solid green light means the battery is fully charged, while a red light signals that charging is in progress or that there may be an issue. Blinking patterns often indicate different charging phases or faults that need attention.
Additionally, inspect the cables for any damage, wear, or corrosion that could affect performance. Understanding these basics ensures safe, effective charging and guides you toward more detailed troubleshooting and maintenance steps.
Key Takeaways
- Check for a lit LED or active display indicating the charger is powered on and functioning.
- Use a multimeter to verify the charger’s output voltage matches the battery’s rated voltage.
- Observe indicator lights: solid green means fully charged, solid red or blinking may indicate charging or faults.
- Monitor charger and battery temperature to avoid excessive heat, which signals malfunction or safety issues.
- Inspect cables and connectors for damage or corrosion to ensure proper electrical contact and charging.
How To Quickly Recognize If Your Battery Charger Is Working
How can you quickly determine if your battery charger is functioning properly? First, check for any immediate signs of power, like a lit LED or an operational display, which indicate the charger is receiving electricity.
Next, ensure the charger matches your battery chemistry, whether lithium-ion, NiMH, or lead-acid, since incompatible chemistry can hinder charging and compromise charging safety.
Use a multimeter to measure the charger’s output voltage; it should align with the battery’s rated voltage. Also, monitor the temperature of both charger and battery during operation; excessive heat can signal malfunction or unsafe conditions.
How To Interpret Your Charger’s Indicator Lights
You’ll need to understand the common colors your charger’s indicator lights use, such as red, green, or amber, to determine its status. Pay close attention to blinking patterns, as they often signal specific conditions like charging, fault, or full battery. Refer to the light meaning guide to accurately interpret these signals and verify your charger’s operation.
Common Light Colors
Why do charger indicator lights vary in color, and what do these differences signify? These colors provide critical feedback on battery safety and charging efficiency, allowing you to assess the charger’s status at a glance.
Here’s how to interpret the most common light colors:
- Red: Indicates the battery is charging or there’s a potential issue needing immediate attention to ensure battery safety.
- Green: Shows the battery is fully charged, optimizing charging efficiency and preventing overcharging.
- Orange/Amber: Signals a slow or trickle charge, often used for maintaining battery health.
- Blue or White: Less common, can indicate power on or a special mode; refer to your charger’s manual for specifics.
Understanding these colors helps you monitor the process reliably and safeguards your battery’s longevity and performance.
Blinking Light Patterns
Building on the meaning behind solid indicator colors, blinking light patterns add another layer of information about your charger’s operational status. These patterns often signal dynamic processes, such as charging phases or error conditions, that solid lights alone can’t convey.
To ensure charger reliability, you need accurate indicator interpretation. For example, a slow blink might indicate a trickle charge mode, while rapid blinking can signal faults like poor connections or battery issues. Understanding these nuances helps you diagnose whether the charger is functioning correctly or requires intervention.
Light Meaning Guide
How can you accurately interpret your charger’s indicator lights to assess its status? Understanding these signals ensures charging safety and maximizes power efficiency. Each light conveys specific information about the charging process or potential issues.
Solid Green: Battery fully charged; power efficiency optimized.
Flashing Red: Charging in progress; maintain connection for safety.
Solid Red: Battery low or charging error; check connections immediately.
Flashing Yellow/Orange: Battery temperature outside safe range; disconnect to prevent damage.
How To Identify Signs Your Battery Charger Is Charging Properly
What indicators confirm that your battery charger is functioning correctly? First, observe the charger’s output behavior aligned with the battery chemistry, whether lead-acid, lithium-ion, or nickel-metal hydride, since each chemistry requires specific voltage and current profiles. A proper charger will maintain these parameters within safe limits, reflecting adherence to established safety protocols.
You’ll notice a stable charging current that gradually tapers as the battery approaches full capacity, indicating effective absorption. Additionally, the charger should not overheat or emit unusual odors, which would signal malfunction or safety hazards.
The presence of status LEDs or digital readouts showing charging progression also confirms proper operation. By systematically monitoring these signs, you ensure your charger charges efficiently, prolongs battery life, and maintains safety.
How To Use A Multimeter To Test Battery Charger Output
To test your battery charger output with a multimeter, start by setting the device to the correct voltage range. Next, measure the voltage across the charger’s terminals carefully to avoid inaccurate readings. Finally, compare the measured voltage to the charger’s specified output to determine if it’s functioning properly.
Setting Multimeter Correctly
Where should you start when testing a battery charger output with a multimeter? First, ensure the multimeter is set to the correct measurement mode to accurately assess charging efficiency relative to the battery chemistry involved. Follow these steps:
- Select DC voltage mode, as chargers output direct current.
- Adjust the voltage range slightly above your battery’s nominal voltage to avoid damage.
- Confirm test leads are securely connected to the multimeter terminals.
- Verify the multimeter’s battery is fully charged for reliable readings.
Setting your multimeter correctly is critical for precise voltage detection, which directly impacts your interpretation of the battery charger’s performance. Incorrect settings can skew results, masking inefficiencies or faults in the charging process.
Understanding battery chemistry allows you to anticipate expected voltage ranges, enhancing diagnostic accuracy.
Measuring Voltage Output
How exactly do you measure the voltage output of your battery charger using a multimeter? First, ensure charger safety by unplugging the device and inspecting for damage. Set your multimeter to the DC voltage range appropriate for the charger’s specifications.
Connect the multimeter probes to the charger’s output terminals, red to positive and black to negative, while the charger is powered on. Read the voltage displayed and compare it with the charger’s rated output.
Accurate measurements confirm proper function and help verify if the charger complies with warranty coverage terms. Avoid touching exposed terminals to prevent electric shock. By following this method, you can precisely determine if your charger is delivering the correct voltage, ensuring reliable performance and preserving both safety and warranty integrity.
Interpreting Test Readings
Once you’ve measured the voltage output of your battery charger, interpreting those readings accurately determines whether the charger functions within its specified parameters. You want the voltage to align closely with the charger’s rated output; a significant deviation indicates potential issues.
Keep these points in mind:
- Voltage too low may signal inadequate charging, risking incomplete recharge.
- Voltage too high can cause overheating, compromising battery safety.
- Fluctuating readings suggest unstable output, violating recharge etiquette.
- Consistent, stable voltage within the expected range confirms proper function.
Why Battery Charger Compatibility Matters For Different Battery Types
Why does charger compatibility play a critical role when dealing with different battery types? You must match the charger to the battery chemistry to ensure battery safety and optimize power efficiency. Using an incompatible charger risks overheating, reduced lifespan, or even hazardous failures.
Different batteries require precise voltage, current, and charging algorithms.
| Battery Type | Required Charger Features |
|---|---|
| Lead-Acid | Constant voltage, low current |
| NiMH/NiCd | Smart detection, trickle charge |
| Li-ion | Precise voltage and current |
| LiFePO4 | Specific voltage cutoff |
| AGM | Controlled voltage regulation |
Understanding these distinctions helps you avoid damage and maintain optimal performance during charging. Compatibility isn’t optional; it’s critical for safe, efficient operation.
How To Diagnose Common Charger Problems That Stop Charging
Matching your charger to the correct battery type reduces risks, but even compatible setups can encounter issues that halt charging. To diagnose common charger problems, focus on these critical factors:
Power source failure: Confirm the outlet delivers consistent voltage; fluctuations can interrupt charging.
Internal charger faults: Components like fuses or transformers may degrade, requiring inspection or replacement.
Charger safety triggers: Overheating or short circuits activate protection circuits, stopping the charge to prevent damage.
Warranty considerations: Identify if faults fall under warranty to avoid unnecessary expenses.
How To Test Battery Charger Cables And Connectors
Start by closely inspecting the charger cables for any visible damage like frays or cuts that could interrupt current flow. Next, verify that all connectors fit securely and make firm contact without looseness or corrosion. These checks help ensure your charger maintains a reliable electrical connection.
Inspect Cable Condition
How can you determine if your battery charger cables and connectors are functioning properly? Begin by thoroughly inspecting the cable condition, focusing on signs of cable wear and insulation damage. These issues can cause poor conductivity or short circuits, impairing charger performance.
Look for:
- Frayed or exposed wires compromising electrical safety
- Cracks, cuts, or brittleness in cable insulation
- Corrosion or discoloration near connection points
- Stiff or kinked cable sections indicating internal damage
Use a magnifying glass if needed to detect subtle defects. Avoid using cables with any visible damage, as this risks further equipment failure or safety hazards.
Check Connector Fit
Where should you focus when verifying the fit of your battery charger connectors? Primarily, ensure the connectors align snugly with the battery terminals, respecting the specific battery design to avoid improper contact.
A loose or ill-fitting connector can compromise charger safety, leading to electrical arcing or incomplete charging.
Use the table below to assess key connector fit parameters:
| Parameter | Ideal Condition | Potential Issue |
|---|---|---|
| Connector Alignment | Flush with battery terminal | Misalignment causing sparks |
| Contact Pressure | Firm, without excessive force | Loose connection, voltage drop |
| Material Integrity | No corrosion or deformation | Oxidation reducing conductivity |
What To Do If Your Battery Charger Isn’t Working Right
Why isn’t your battery charger functioning as expected? First, confirm the power source and connections are secure. If problems persist, consider these steps to troubleshoot effectively:
- Inspect cables and connectors for damage or corrosion that may disrupt portable charging.
- Test the charger with a different battery to isolate the issue.
- Verify the charger’s indicator lights; absence may signal internal faults.
- Ensure you’re following battery safety protocols to prevent hazards during testing.
Addressing these points helps identify whether the charger or battery is at fault. If the charger still doesn’t work right, do not attempt repairs without technical expertise to avoid safety risks. Instead, seek professional evaluation or replacement to maintain reliable portable charging and ensure battery safety.
How To Maintain Your Battery Charger For Reliable Performance
After confirming your battery charger functions correctly or identifying issues, maintaining it properly guarantees consistent, reliable performance over time. Prioritize battery safety by regularly inspecting cables and connectors for wear or corrosion. Keep ventilation ports clear to prevent overheating, which compromises power efficiency.
Use a surge protector to shield against voltage spikes. Clean contacts with isopropyl alcohol for optimal conductivity. Store the charger in a dry, dust-free environment to avoid moisture damage.
| Maintenance Task | Frequency | Benefit |
|---|---|---|
| Visual Inspection | Monthly | Detects wear and corrosion |
| Cleaning Contacts | Quarterly | Enhances conductivity |
| Ventilation Check | Monthly | Prevents overheating |
| Surge Protection Use | Always | Protects against voltage spikes |
Consistent upkeep preserves charger integrity and ensures safe, efficient operation.
When To Replace Your Battery Charger Instead Of Repairing
Although repairing a battery charger can be cost-effective, you should replace it when damage compromises safety or efficiency, or when repair costs approach the price of a new unit. Durability testing outcomes can reveal internal component fatigue or instability that repairs can’t fully resolve.
Repairing a charger is viable until safety or efficiency is at risk, or repair costs rival replacement.
Also, check your warranty coverage; if it’s expired, replacement might be the safer option. Consider replacing your charger if you notice:
- Frequent overheating or unusual odors, indicating electrical faults
- Intermittent charging despite multiple repairs
- Visible physical damage affecting internal circuitry
- Repair costs nearing or exceeding a new charger’s price
Frequently Asked Questions
Can a Battery Charger Damage My Battery if Left Connected Too Long?
Yes, leaving a charger connected too long can reduce battery longevity by causing overcharging. To ensure charging safety, use smart chargers with automatic shutoff features that prevent damage and maintain optimal battery health.
How Long Does It Typically Take to Fully Charge a Standard Car Battery?
You’ll typically need 4 to 24 hours of battery charging to fully restore a standard car battery. Factors like charger type and battery capacity influence time, so precise monitoring ensures optimal charging and prevents overcharging damage.
Are Solar Battery Chargers as Effective as Electric Ones?
Solar battery chargers aren’t as efficient as electric ones due to lower solar efficiency and dependency on sunlight. However, you’ll find solar chargers cost less long-term, making them economically viable despite slower charging performance.
Can Extreme Temperatures Affect Battery Charging Efficiency?
Yes, extreme temperatures markedly reduce your battery’s charging efficiency by altering chemical reactions inside. High heat accelerates degradation, while cold slows ion movement, so you’ll notice slower charging and diminished capacity in such conditions.
Is It Safe to Use a Battery Charger Indoors During Rain?
You might picture rain dripping near your charger, but yes, using a battery charger indoors during rain is safe if you assure no rain exposure occurs.
Prioritize indoor safety by keeping the device dry and well-ventilated, always.
Conclusion
If your battery charger isn’t showing signs of life, don’t panic—it’s not the end of the world, but it might feel like it. You can’t just guess and hope; you need to test those indicator lights, cables, and outputs with precision.
A failing charger can turn your battery into a useless brick faster than you think. Stay sharp, maintain your gear rigorously, and replace chargers that falter before disaster strikes.
Knowing how to tell if a battery charger is working is essential to keep your devices powered and safe.