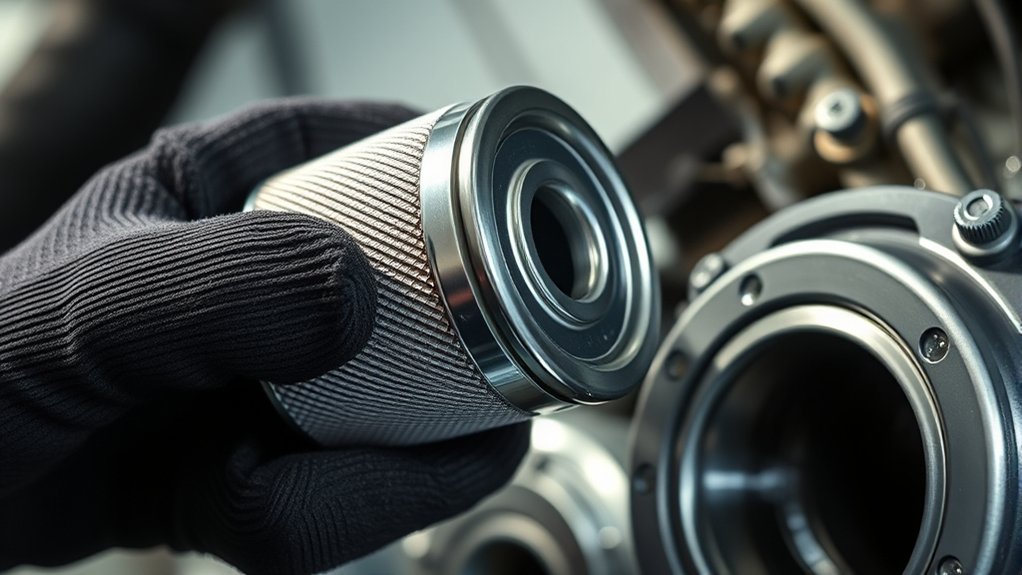
How Tight Should an Oil Filter Be
You should hand-tighten your oil filter until the gasket contacts the mounting surface, then turn it an additional ¾ to 1 full turn by hand. Knowing how tight an oil filter should be is crucial to ensure a proper seal and avoid damage. Avoid using tools that risk over-tightening, which can damage the gasket, threads, or housing.
Under-tightening leads to leaks and engine damage. Always ensure the gasket is clean, lightly oiled, and properly aligned for a secure seal. Understanding these steps helps you maintain engine reliability and avoid common installation pitfalls.
Key Takeaways
- Hand-tighten the oil filter until the gasket contacts the mounting surface, then add ¾ to 1 full turn by hand.
- Avoid using tools to over-tighten, as this can damage the gasket, housing, or threads.
- Follow the vehicle manufacturer’s torque specifications when using a torque wrench for precise tightening.
- Ensure the gasket is clean, lightly oiled, and undamaged before installation to achieve a proper seal.
- After installation, check for leaks and run the engine briefly to verify a secure and leak-free fit.
How Tight Should an Oil Filter Be for a Proper Seal?
How tight should you make an oil filter to guarantee a proper seal without causing damage? When performing oil changes, you need to tighten the oil filter just enough to compress the gasket and create a leak-free seal. Typically, hand-tightening the filter plus an additional three-quarter to one full turn is sufficient.
Over-tightening can damage the gasket or the filter housing, leading to leaks or stripping threads. Under-tightening risks oil leaks and potential engine damage. Be mindful of filter recalls, as defective filters may require special installation attention or replacement.
Always ensure the gasket surface is clean and lightly oiled before installation to improve sealing. Following these practical steps helps you avoid common sealing issues while maintaining engine reliability.
Manufacturer Recommendations for Oil Filter Installation
You need to follow the manufacturer’s torque specifications carefully to ensure a proper seal without damaging the oil filter. Each brand may have specific installation procedures, so reviewing their guidelines is essential. Understanding these variations helps you install the filter correctly and avoid leaks or over-tightening issues.
Torque Specifications Importance
Why do torque specifications matter when installing an oil filter? Simply put, they ensure a proper seal and prevent leaks without causing damage. Ignoring these specs isn’t just an irrelevant topic; it’s a critical oversight that can lead to oil leaks or filter failure.
Over-tightening can strip threads or crush the gasket, while under-tightening risks a loose filter that may detach during operation. Manufacturer torque recommendations are based on precise testing and engineering, so following them isn’t an unrelated concept but a necessity for engine reliability.
Using a torque wrench helps you apply the exact force required, avoiding guesswork. In short, adhering to torque specs protects your engine and extends oil filter life, ensuring optimal performance and safety.
Installation Procedures Overview
Although oil filter installation may seem straightforward, following manufacturer recommendations is critical to ensure a proper fit and seal. Before starting your oil change, inspect the new filter’s gasket and lightly coat it with clean oil to prevent damage and enhance sealing.
Align the filter properly and hand-tighten it according to specified guidelines, which usually suggest turning the filter one to three-quarter turns after the gasket contacts the mounting surface. Avoid over-tightening, as it can deform the gasket and reduce filter capacity.
Proper installation ensures the filter can handle the engine’s oil flow and contaminants effectively. Always consult the vehicle’s manual for exact procedures and torque specifications to maintain optimal engine performance and prevent leaks during operation.
Manufacturer Guidelines Variations
Following general installation procedures, you’ll find that specific recommendations for tightening oil filters vary substantially among manufacturers. While some suggest hand-tightening plus a quarter turn, others specify torque values or simply hand-tighten.
This variation also applies to fuel filters, which may have different sealing requirements. To avoid leaks or damage, always consult the manufacturer’s guidelines for your specific filter model.
| Manufacturer | Recommended Tightening Method | Notes |
|---|---|---|
| Brand A | Hand-tight + 3/4 turn | Standard for oil filters |
| Brand B | Torque 20 Nm | Applies to both oil & fuel filters |
| Brand C | Hand-tight only | Common for spin-on oil filters |
Following these guidelines ensures proper seal and filter longevity.
How to Hand-Tighten an Oil Filter the Right Way
Before you hand-tighten the oil filter, make sure the filter surface and mounting area are clean and free of debris. Apply steady, even pressure as you turn the filter to avoid cross-threading. Finally, check that the rubber gasket forms a proper seal without over-tightening.
Preparing The Filter Surface
When you prepare the filter surface, you guarantee a proper seal and prevent leaks. Start with these key steps to ensure effective techniques for filter surface prep and contamination control during installation:
- Clean the Mounting Base: Use a lint-free cloth to remove old oil, dirt, and debris from the filter mounting surface. Any residue can compromise the seal.
- Inspect the Gasket Area: Check the filter’s rubber gasket for damage or dirt. A compromised gasket can cause leaks, so replace the filter if necessary.
- Lubricate the Gasket: Apply a thin layer of fresh engine oil to the gasket. This reduces friction and helps the filter seat properly without damaging the seal.
These precise steps ensure contamination control during installation and prepare the filter surface for a secure, leak-free fit.
Applying The Correct Pressure
After properly preparing the filter surface and lubricating the gasket, you’ll need to focus on applying the correct pressure to secure the oil filter. Start by screwing the filter onto the mounting surface by hand until the gasket contacts the base.
Then, tighten it an additional three-quarters to one full turn using your hand only. Avoid tools that can over-tighten. Applying this precise hand-tight pressure ensures a secure seal without damaging the gasket or filter.
Proper tightening is crucial during an oil change to prevent leaks and maintain engine performance. Over-tightening can lead to costly repairs, undermining your budgeting efforts.
Checking For Proper Seal
How can you confirm that your oil filter is sealed correctly without risking leaks or damage? Ensuring a proper seal hinges on understanding oil chemistry and filter materials, which affect gasket expansion and sealing efficiency. Follow these steps:
- Inspect the gasket: Verify the rubber gasket is clean, undamaged, and lightly coated with fresh oil to enhance sealing and prevent sticking due to chemical degradation.
- Hand-tighten properly: Turn the filter until the gasket contacts the mounting surface, then tighten an additional 3/4 to 1 full turn by hand, ensuring optimal compression without over-tightening.
- Check for leaks: After installation, run the engine briefly and inspect for oil seepage around the filter base, confirming the filter materials and oil chemistry interact correctly to maintain a reliable seal.
How to Use a Torque Wrench for Your Oil Filter
Why is using a torque wrench essential for installing your oil filter correctly? Proper torque ensures the filter material compresses evenly, preventing leaks and damage. Over-tightening can distort the filter, especially when oil viscosity changes with temperature, affecting seal integrity.
First, check your vehicle’s specifications for the recommended torque setting. Attach the oil filter by hand until the gasket contacts the mounting surface, then tighten using the torque wrench to the specified value. This method avoids uneven pressure that can occur with manual tightening.
Using a torque wrench guarantees consistent clamping force, preserving the filter material’s performance and maintaining optimal oil flow. Always calibrate your torque wrench regularly to ensure accuracy, and avoid guesswork when securing your oil filter.
How Oil Filter Gasket Condition Affects Tightening
What role does the condition of your oil filter gasket play in tightening? It critically influences the seal integrity and tightening torque needed. A worn or hardened gasket, often due to oil filter age, may require less torque to avoid damage or leaks.
Consider these factors:
- Gasket elasticity: A pliable gasket ensures a proper seal without excessive torque.
- Surface condition: Cracks or debris on the gasket demand careful tightening to prevent leaks.
- Oil viscosity impact: Higher oil viscosity can increase sealing pressure, so gasket condition must be optimal to maintain the correct torque.
Always inspect the gasket before installation. Replace if aged or damaged to maintain effective sealing with the recommended tightening torque, ensuring your engine runs smoothly without oil leaks or filter damage.
How Tight Should Your Oil Filter Be for Different Vehicles?
You should always follow the manufacturer’s torque specifications for your specific vehicle to ensure proper sealing without damage. In many cases, hand tightening plus a quarter to half turn with a tool is sufficient, but some engines require precise torque settings. Keep in mind that vehicle types, such as motorcycles versus trucks, often have different filter designs and tightening requirements.
Manufacturer Torque Recommendations
How tight should your oil filter be when installing it on different vehicles? Manufacturer torque recommendations are your best guide to avoid leaks or damage. These specs vary widely depending on the engine design, similar to how maintaining correct auto air and tire pressure varies by vehicle.
Follow these steps to get it right:
- Check the Owner’s Manual: It lists exact torque values for your oil filter, ensuring a proper seal without over-tightening.
- Use a Torque Wrench: Apply the recommended torque to avoid stripping threads or damaging the cartridge.
- Note Variations: Some filters require 15–20 Nm, others up to 30 Nm, depending on vehicle and filter type.
Strictly adhering to these manufacturer specs guarantees optimal performance and prevents costly issues down the road.
Hand Tightening Versus Tools
When deciding between hand tightening and using tools for your oil filter, consider the specific requirements of your vehicle’s engine. Hand tightening is often sufficient for many filters, ensuring the gasket seats properly against the mounting surface without over-compressing the filter media.
Over-tightening with tools can damage the filter media or deform the housing, compromising oil filtration efficiency. However, some filters require a precise torque that hand tightening alone can’t guarantee.
Using an appropriate oil filter wrench or torque tool helps you apply consistent pressure, preventing leaks while protecting the integrity of the filter media. Always follow manufacturer guidelines to balance adequate sealing with avoiding excessive force.
Properly securing your oil filter ensures optimal oil filtration performance and engine longevity.
Vehicle Type Variations
Why does the required tightness of an oil filter vary between vehicle types? It primarily depends on the engine design, operating pressures, and materials used. You need to adjust your approach based on these factors to avoid leaks or damage. Consider these key points:
- Engine Type: Diesel engines often require tighter filters due to higher oil pressure, while lighter gasoline engines tolerate less torque.
- Filter Material: Metal can withstand higher tightening compared to paper or composite filters.
- Vehicle Use: Heavy-duty trucks demand a secure seal for fuel efficiency and reliability, whereas passenger cars benefit from easier filter removal during routine driver training.
Following manufacturer torque specifications ensures optimal sealing without compromising filter integrity or fuel efficiency. Proper driver training on filter installation can prevent common mistakes affecting vehicle performance.
What Happens When You Overtighten an Oil Filter?
What risks do you face if you overtighten an oil filter? Over-tightening can damage the filter’s gasket, causing it to deform or crack, which compromises the seal. This leads to oil leaks, reducing oil pressure and risking engine wear.
Excessive torque may also warp the filter housing or threads, making future removal difficult or causing permanent damage. Reduced oil pressure disrupts proper lubrication, negatively affecting engine performance and fuel economy as the engine struggles to operate efficiently.
Additionally, overtightening increases the chance of cross-threading, which can result in costly repairs. For optimal function and longevity, you should tighten the oil filter according to manufacturer specifications, usually hand-tight plus a quarter turn, to maintain proper oil pressure and preserve fuel economy.
How to Spot a Loose or Leaking Oil Filter
How can you quickly identify if your oil filter is loose or leaking? Catching these issues early prevents contamination of the filter media and maintains oil system integrity. Here’s what to watch for:
- Visible Oil Residue: Check around the filter base for fresh oil drips or wetness, especially after an oil change.
- Oil Pressure Warning: A sudden drop or fluctuation in oil pressure can indicate an improper seal caused by a loose filter.
- Unusual Engine Noises: Listen for knocking or ticking, which may result from oil starvation due to leaks.
If you notice any of these signs, inspect the filter immediately. A loose filter compromises your engine’s lubrication, risking damage and costly repairs.
Tips for Removing a Stuck or Over-Tightened Oil Filter
Dealing with a stuck or over-tightened oil filter can be frustrating and time-consuming. To remove it, first apply penetrating oil around the base and let it sit for 10-15 minutes to loosen the seal.
Use a proper oil filter wrench to maintain grip without damaging the filter housing. Avoid twisting force that could damage the threads.
If the filter remains stuck, tapping gently with a rubber mallet can help break the seal. Avoid unrelated topic discussions or off topic examples, like unrelated automotive repairs, which distract from the task.
Tools for Easier and Safer Oil Filter Installation
Which tools can make oil filter installation both easier and safer? Using the right equipment streamlines your oil change and protects the filter cap from damage. Here are three essential tools:
- Oil Filter Wrench: This tool grips the filter firmly, allowing precise torque application without slipping, crucial for proper tightness.
- Torque Wrench: Use this to apply manufacturer-specified torque, preventing over-tightening that can compromise the filter cap or cause leaks.
- Drain Pan with Spout: It catches residual oil during installation, keeping your workspace clean and reducing the risk of slipping or contamination.
Incorporating these tools into your oil change routine ensures you tighten the oil filter correctly, maintain the integrity of the filter cap, and enhance overall safety.
Common Mistakes to Avoid When Tightening Your Oil Filter
Why do so many people struggle with tightening their oil filter correctly? The main issues are over-tightening, under-tightening, neglecting gasket lubrication, ignoring manufacturer specs, and reusing old filters.
Avoid these mistakes during your oil change to ensure proper filter maintenance and prevent leaks or damage.
| Mistake | Consequence | Solution |
|---|---|---|
| Over-tightening | Stripped threads, hard removal | Tighten by hand + 3/4 turn |
| Under-tightening | Oil leaks | Follow torque specs |
| Dry gasket | Poor seal, leaks | Lubricate gasket with oil |
| Ignoring specs | Improper fit | Consult manual |
| Reusing filter | Contamination risk | Always use new filter |
Stay precise and practical to maintain engine health.
Frequently Asked Questions
How Often Should I Change My Oil Filter?
You should change your oil filter every 3,000 to 7,500 miles, depending on your vehicle’s oil filter lifespan.
Always tighten it to the manufacturer’s torque specification to guarantee proper sealing and avoid damage.
Can I Reuse an Old Oil Filter?
Don’t dance with old oil filters; reusing them risks engine damage. Old filter designs degrade seals and trapping ability.
For safety disposal, always replace filters to ensure optimal performance and prevent contamination or leaks.
What Type of Oil Filter Is Best for My Car?
You should choose an oil filter with high filter material quality and ensure oil filter compatibility with your car’s make and model.
This guarantees optimal filtration, engine protection, and performance without risking damage or leaks.
How Do I Dispose of Used Oil Filters Safely?
You should drain used oil filters completely, then take them to recycling centers or hazardous waste facilities. Proper disposal safety prevents environmental harm; many places offer recycling options that recover metal and oil safely.
Does Oil Filter Brand Affect Engine Performance?
You won’t find oil filter brands that boost engine performance like a rocket, but choosing quality filters ensures proper filtration and flow. Using reliable brands prevents damage and maintains your engine’s efficiency and longevity.
Conclusion
Think of tightening your oil filter like securing a lifeboat before a storm—you want it snug enough to hold fast, but not so tight that you risk damage. Follow manufacturer guidelines and trust your hand’s feel, using a torque wrench if needed.
Remember, the right seal protects your engine’s heartbeat. Avoid over-tightening, watch the gasket’s condition, and ensure a proper fit. This balance is key to keeping your engine running smoothly and safely.
When it comes to how tight should an oil filter be, always aim for a secure fit without excessive force to maintain optimal engine health.