How Do You Change a Fuel Pump
To change a fuel pump, first disconnect your battery and relieve the fuel system pressure to prevent sparks or fuel leaks. This initial step is crucial for safety.
Next, locate and access the pump by removing any necessary panels or seats. Carefully disconnect the fuel lines and electrical connectors attached to the pump.
Then, remove the old pump along with its seals. Install the new pump, ensuring it is oriented correctly, and replace the seals to avoid leaks.
Reattach all fuel lines and connectors securely. Finally, test the pump for proper operation and fuel pressure. Keep following for detailed steps and expert tips.
Signs Your Fuel Pump Needs Replacing
How can you tell if your fuel pump is failing? You’ll notice a drop in fuel efficiency as the pump struggles to deliver consistent fuel pressure. This inconsistency can cause engine hesitation or stalling, especially under load or acceleration.
A failing fuel pump leads to decreased fuel efficiency and causes engine hesitation or stalling under acceleration.
You might also detect unusual whining noises from the fuel tank area, indicating internal wear. A failing pump disrupts emission controls by causing incomplete combustion, which can trigger the check engine light.
Additionally, difficulty starting the engine or frequent engine misfires are clear signs. Monitoring these symptoms allows you to diagnose fuel pump issues early, preventing further damage to your vehicle’s engine and emission systems.
If you observe any of these signs, it’s time to consider replacing the fuel pump promptly.
Tools and Parts Needed to Change a Fuel Pump
Recognizing the symptoms of a failing fuel pump means you’re ready to replace it, but first, you’ll need the right tools and parts to complete the job efficiently. Gather a new compatible fuel pump, fuel filter, and replacement seals or gaskets to maintain fuel efficiency and prevent leaks.
Use a socket set, screwdrivers, pliers, and a fuel line disconnect tool to access and remove components. Ensure you have a jack and jack stands for safe vehicle elevation. A multimeter helps test battery health and electrical connections during the process.
Additionally, wear safety glasses and gloves to protect yourself. Having these tools and parts on hand will streamline the replacement, ensuring your vehicle’s fuel system operates optimally post-installation.
How to Relieve Fuel Pump System Pressure Safely
Why must you relieve fuel system pressure before replacing the fuel pump? Doing so prevents fuel spray, reducing fire risk and injury during the repair.
To relieve pressure safely, locate the fuel system’s relief valve, typically on the fuel rail. Attach a pressure gauge to monitor the system pressure accurately.
First, disconnect the vehicle’s battery to avoid sparks. Next, use the relief valve to release fuel pressure gradually; you may need a specialized tool or a small screwdriver, depending on the valve type.
Slowly open the valve until the pressure gauge reads zero, confirming full depressurization. Dispose of any released fuel properly.
Following these steps ensures the fuel system is safe to work on, protecting both you and your vehicle during the fuel pump replacement.
How to Access and Remove the Fuel Pump
Where exactly is the fuel pump located in your vehicle, and what’s the safest way to reach it? Typically, fuel pumps are inside the fuel tank, accessed via an interior panel or under the vehicle.
Before removal, ensure fuel quality isn’t compromised by contamination; always work in a well-ventilated area and disconnect the battery to protect warranty coverage.
| Step | Tool Needed | Safety Tip |
|---|---|---|
| Locate access panel | Screwdriver | Avoid sparks, disconnect battery |
| Remove fuel lines | Wrench | Use gloves, catch fuel drips |
| Unscrew pump module | Socket set | Keep parts clean, avoid damage |
Follow these methods precisely to access and remove the fuel pump safely and efficiently.
How to Install the New Fuel Pump Correctly
After carefully removing the old fuel pump, you’ll want to prepare the new unit for installation by inspecting all seals and connections for integrity. Verify that the pump matches your vehicle’s specifications, ensuring fuel compatibility to prevent operational issues or damage.
Position the pump precisely in its housing, avoiding misalignment that can cause leaks or performance loss. Secure the retaining ring or bolts evenly to manufacturer torque specifications to maintain a proper seal. Double-check that all gaskets are correctly seated to prevent fuel leaks.
Before installation, review warranty coverage details to confirm compliance with installation procedures, preserving your protection. Following these steps meticulously ensures the new fuel pump functions reliably and safely from the outset.
Reconnecting Fuel Pump Lines and Electrical Components
Reconnect the fuel pump lines carefully, ensuring each hose is securely attached to its corresponding fitting to prevent leaks. When reconnecting lines, verify that clamps or quick-connect fittings are properly seated and tightened to maintain system integrity.
Carefully reconnect fuel pump lines, securing hoses and clamps to prevent leaks and ensure system integrity.
Next, address the electrical components: connect the wiring harness to the fuel pump’s terminals, making sure connectors snap firmly into place. Check for any damaged wires or corrosion before reconnecting to avoid electrical faults.
Secure the wiring away from moving parts or heat sources using zip ties or clips. Double-check all connections for firmness, as loose lines or electrical components can cause fuel delivery issues or pump failure.
Following these steps precisely ensures the fuel pump functions reliably after installation.
How to Test Your New Fuel Pump After Installation
How can you confirm that your new fuel pump is functioning correctly before completing the installation process? Begin by turning the ignition key to the “ON” position without starting the engine. Listen for a humming sound indicating the pump is priming.
Next, check fuel pressure using a gauge at the fuel rail to ensure it meets manufacturer specifications. Verifying pressure is crucial to address concerns about fuel economy and to leverage the benefits of high pressure pumps.
| Step | Action |
|---|---|
| 1 | Turn ignition to “ON” |
| 2 | Listen for pump priming sound |
| 3 | Attach fuel pressure gauge |
| 4 | Compare pressure reading to specs |
| 5 | Confirm steady pressure without drops |
This process ensures reliable fuel delivery and optimal pump performance.
How to Finish Reassembly After Testing
Where do you begin once you’ve confirmed the fuel pump functions correctly? Start by securely reinstalling the fuel pump assembly, ensuring all seals and gaskets are properly positioned to prevent leaks.
Begin by securely reinstalling the fuel pump assembly with all seals and gaskets correctly in place to prevent leaks.
Tighten mounting bolts to the manufacturer’s torque specifications to maintain optimal fuel pressure, critical for fuel economy and performance in diesel engines. Reconnect all electrical connectors and fuel lines, verifying they are free from damage and seated firmly.
Replace any removed protective covers or shields. After reassembly, double-check for leaks and secure all fasteners. Finally, reconnect the battery and perform a brief engine run to verify smooth operation.
Proper reassembly ensures the fuel system maintains pressure integrity, directly impacting fuel economy and the reliability of diesel engines.
Common Mistakes to Avoid When Changing a Fuel Pump
Why do many fuel pump replacements fail to deliver lasting results? Often, it’s because you overlook critical steps or focus on unrelated considerations, such as cosmetic aspects instead of mechanical integrity.
Avoid skipping the inspection of fuel lines and connectors; leaks here compromise system performance. Don’t reuse old seals or gaskets. Always replace them to ensure proper sealing.
When handling the fuel pump, prevent contamination by working in a clean environment. Dirt can cause premature failure.
Another common mistake is neglecting to properly torque fittings to manufacturer specifications, risking leaks or damage.
Lastly, avoid rushing the process; thoroughness outweighs speed. Incorporate discussion ideas from technical manuals or experienced mechanics to enhance your approach and avoid pitfalls commonly missed in DIY repairs.
Frequently Asked Questions
How Long Does a Typical Fuel Pump Last?
A typical fuel pump lasts 100,000 to 150,000 miles. You should perform wiring diagnostics regularly to ensure ideal performance and engine optimization, preventing premature pump failure and maintaining your vehicle’s fuel delivery efficiency.
Can a Failing Fuel Pump Damage the Engine?
Yes, a failing fuel pump can damage your engine by causing inconsistent fuel delivery. Check the failing sensor and electrical connections promptly to prevent misfires, overheating, or poor combustion. These issues stress engine components and reduce performance.
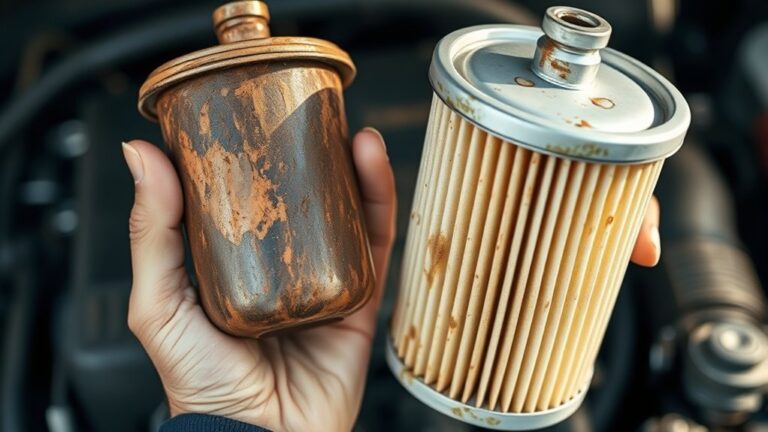
What Causes a Fuel Pump to Fail Prematurely?
Like a withering leaf, a failed component in your fuel pump often results from manufacturing defects or contaminated fuel. You’ll spot premature failure when debris blocks flow or electrical issues disrupt pressure, demanding immediate inspection and replacement.
Are There Different Types of Fuel Pumps for Vehicles?
Yes, you’ll find different fuel pump types, including mechanical and electronic fuel pumps. Electronic fuel pumps use electric motors for precise fuel delivery, improving efficiency, while mechanical pumps rely on engine-driven mechanisms for operation.
How Does a Fuel Pump Affect Fuel Efficiency?
Think of your fuel pump as the heart of your engine, delivering fuel precisely. If it falters, your driving habits worsen fuel efficiency.
Using proper fuel additives can optimize pump function, improving combustion and saving fuel.
Conclusion
Changing your fuel pump might seem like threading a needle in the dark, but with the right tools and careful steps, you’ll get it done smoothly.
Remember to relieve pressure safely, connect everything correctly, and test thoroughly before reassembly. Avoid common pitfalls like improper wiring or loose fittings to keep your vehicle running efficiently.
Follow these precise instructions, and you’ll have your fuel system humming like a well-oiled machine in no time.
With patience and attention to detail, changing a fuel pump can be a straightforward task that ensures your vehicle performs at its best.