How to Put on a Fuel Filter
To put on a fuel filter, first safely relieve fuel system pressure by removing the fuel pump fuse and bleeding residual pressure. This step is crucial to prevent fuel spray and potential hazards.
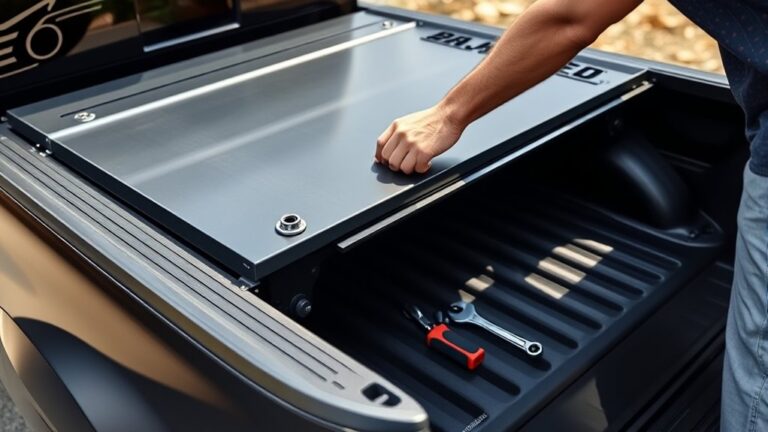
Locate the filter—usually along the fuel line or in the engine bay—and remove the old one carefully to avoid spills. Handle the fuel line connections gently to prevent damage.
Install the new filter with the flow arrow pointing toward the engine, ensuring secure but not overtightened fittings. Over-tightening can cause leaks or damage to the filter.
Finally, check for leaks by starting the engine and inspecting all connections. Keep going to understand essential safety steps and detailed installation tips.
Signs Your Fuel Filter Needs Replacing
How do you know when your fuel filter needs replacing? In diesel engines, a clogged fuel filter restricts fuel flow, causing reduced fuel economy and performance issues. You’ll notice engine hesitation during acceleration or difficulty starting.
A clogged diesel fuel filter reduces fuel flow, causing hesitation and difficulty starting your engine.
Pay attention to inconsistent idling or power loss under load, as these are signs of fuel delivery problems. Additionally, increased exhaust smoke can indicate contamination due to filter inefficiency.
Monitoring fuel economy is crucial; a sudden drop often signals a compromised filter. Regular inspection intervals are essential, especially in harsh operating conditions where particulate buildup accelerates.
Ignoring these signs risks damaging fuel injectors and the engine. By recognizing these symptoms early, you maintain optimal fuel economy and engine reliability, ensuring your diesel engine runs smoothly and efficiently.
Tools and Materials Needed for Fuel Filter Replacement
What tools and materials do you need to replace a fuel filter effectively? First, gather a wrench or socket set to loosen fuel line fittings. You’ll also need safety gloves and eye protection to prevent exposure to fuel.
Have a container ready to catch any fuel spills and clean rags for wiping excess fuel. A new fuel filter, compatible with your vehicle, is essential, but avoid falling for fuel filter myths suggesting expensive filters boost performance. Many performance myths are unfounded.
Lastly, a fuel line disconnect tool may be required for certain models. By assembling these tools and materials beforehand, you streamline the process and reduce risks, ensuring a safe, efficient fuel filter replacement without falling prey to common fuel filter myths or performance myths.
Choosing the Right Replacement Fuel Filter
When selecting a replacement fuel filter, you must ensure compatibility with your vehicle’s make, model, and engine specifications. Check OEM part numbers or trusted aftermarket equivalents to guarantee proper fit and function.
Ensure your replacement fuel filter matches your vehicle’s make, model, and OEM specifications for optimal performance.
Consider the filter’s micron rating, which affects its ability to trap contaminants without restricting flow. If your fuel quality is inconsistent or you regularly use fuel additives, opt for a filter designed to handle chemical exposure and maintain filtration efficiency.
Some filters feature enhanced media resistant to degradation from additives. Avoid generic filters that might compromise fuel flow or allow particulate bypass.
Selecting the right filter maintains optimal engine performance, protects fuel injectors, and prolongs system longevity. Always verify specifications against your vehicle’s manual and source filters from reputable suppliers to ensure reliability.
How to Safely Relieve Fuel System Pressure
Before replacing the fuel filter, locate and remove the fuel pump fuse to cut power to the system. This prevents fuel from flowing while you work. Then, carefully relieve pressure in the fuel lines by opening the fuel rail or using the pressure relief valve according to your vehicle’s specifications.
Locate Fuel Pump Fuse
How do you safely relieve fuel system pressure before working on your fuel filter? Locating the fuel pump fuse is a critical step. Ignoring this can lead to a wrong approach or focusing on an irrelevant topic, like disconnecting the battery alone.
Here’s how to find the fuse precisely:
- Consult your vehicle’s owner manual to identify the fuse box location, commonly under the dashboard or in the engine compartment.
- Use the diagram on the fuse box cover or manual to pinpoint the fuel pump fuse, often labeled “FUEL PUMP” or “EFI.”
- Remove the fuse carefully with a fuse puller or needle-nose pliers to cut power to the fuel pump.
This step ensures the fuel system is safe to work on without unintended fuel pressure hazards.
Depressurize Fuel Lines Safely
Although cutting power to the fuel pump reduces pressure, you still need to safely relieve residual pressure in the fuel lines to prevent fuel spray or injury. Avoid irrelevant discussion or off-topic ideas; focus strictly on proper depressurization steps.
First, locate the fuel pressure relief valve or use the manufacturer’s recommended method. Wear safety glasses and gloves. Slowly open the valve or disconnect the fuel line at a designated point, catching fuel in a container. Never force the process.
| Step | Action | Safety Tip |
|---|---|---|
| 1. Cut power | Remove fuel pump fuse | Prevents pump activation |
| 2. Locate relief valve | Identify pressure release point | Use manual or tool as needed |
| 3. Release pressure | Open valve or disconnect line | Wear protective gear |
| 4. Contain fuel | Use container to catch fuel | Avoid spills and ignition risk |
How to Locate the Fuel Filter in Your Vehicle
You’ll typically find the fuel filter along the fuel line, near the fuel tank, or under the hood. Check your vehicle manual for the exact location and fuel filter type used in your model. Identifying the filter correctly ensures proper removal and installation.
Common Fuel Filter Locations
Where exactly is the fuel filter located in your vehicle? Knowing its common locations helps maintain fuel economy and ensures diesel engines run smoothly.
Typically, you’ll find the fuel filter in one of these spots:
- Along the fuel line under the vehicle: Often near the fuel tank or along the frame rail, accessible for routine replacement.
- Inside the engine bay: Mounted on the firewall or close to the fuel injectors, especially in gasoline engines.
- Integrated with the fuel pump assembly: Common in modern vehicles, especially diesel engines, where the filter is inside the fuel tank.
Identifying your filter’s position allows you to efficiently replace it, maintaining optimal fuel flow and protecting the engine from contaminants that could reduce fuel economy or cause damage.
Using Your Vehicle Manual
How can you quickly identify the exact location of your vehicle’s fuel filter? Start by consulting your vehicle manual. The manual provides a precise diagram and description of the fuel system, including the filter’s location tailored to your specific make and model.
Using this resource prevents guesswork, saving time and ensuring accuracy. This is crucial for maintaining optimal fuel efficiency, as a clean, correctly installed filter supports proper fuel flow.
Additionally, referencing the manual helps you plan maintenance budgeting effectively by understanding when and how to replace the fuel filter. It also outlines any special tools or safety precautions needed during replacement.
Identifying Fuel Filter Types
When locating your vehicle’s fuel filter, understanding the different types is essential. Identifying filter types helps you pinpoint their location and select the right replacement based on fuel filter materials. Most filters fall into these categories:
1. Inline Fuel Filters
Positioned along the fuel line, typically before the engine. They often use paper or synthetic media for filtration.
2. Canister Fuel Filters
Housed in a metal or plastic case, usually mounted near the fuel tank or engine bay. They use pleated filter materials for durability.
3. Cartridge Fuel Filters
Inserted inside a housing, requiring you to remove the cover to access the filter element. They commonly use cellulose or synthetic fibers.
Knowing these types and their materials makes locating and replacing your fuel filter efficient and accurate.
Removing the Old Fuel Filter Without Spills
Why does removing the old fuel filter without spills require careful preparation? Fuel is highly flammable and toxic, so controlling leaks is critical to workshop safety.
Before you begin, ensure you have all necessary spare parts and tools ready to minimize downtime and prevent accidental spills. Start by relieving fuel system pressure to avoid sudden fuel spray.
Use a drip pan or absorbent mat beneath the filter to catch any residual fuel. Wear protective gloves and goggles to shield yourself.
When disconnecting the fuel lines, do so slowly and carefully to reduce fuel leakage. Immediately cap or plug open lines and filter ports to prevent contamination and spills.
Proper preparation maintains a safe environment and protects both you and the vehicle’s fuel system integrity.
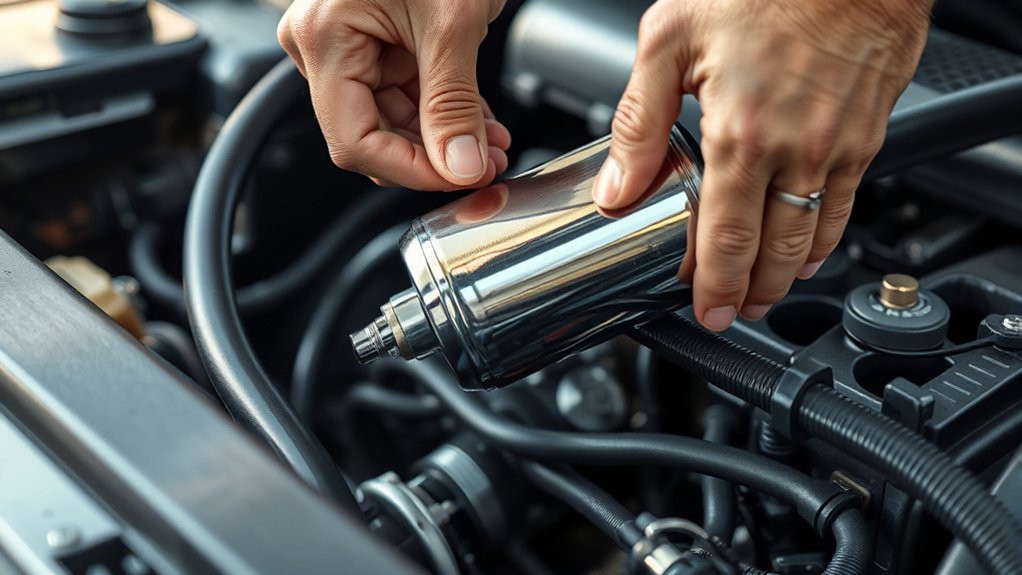
How to Install the New Fuel Filter Correctly
Several key steps guarantee you install the new fuel filter correctly and maintain the fuel system’s integrity. Avoid treating this process like an unrelated topic or a random pairing of tasks; precision is crucial.
- Orient the filter properly: Ensure the flow arrow on the filter points toward the engine. Incorrect orientation disrupts fuel flow and causes damage.
- Secure fittings tightly: Attach fuel lines using manufacturer-specified torque to prevent leaks and maintain pressure. Avoid overtightening, which can crack fittings.
- Check compatibility: Confirm the new filter matches your vehicle’s specifications exactly. Using an incorrect filter is like a random pairing; it compromises performance and safety.
How to Check for Leaks After Installation
After installing the fuel filter, start with a careful visual inspection for any signs of wetness or fuel drips around the connections. Then, run the engine and observe the filter area closely to catch any leaks under pressure. Finally, trust your senses by checking for any unusual fuel odors that indicate a hidden leak.
Visual Inspection Techniques
How can you quickly identify leaks following a fuel filter installation? Visual inspection is your first and most reliable step to ensure fuel line integrity. Focus on these key techniques:
- Check Connections: Examine all hose clamps and fittings for tightness and proper seating. Look for any visible gaps or misalignments.
- Look for Moisture: Inspect the filter and lines for fresh fuel droplets or wetness, which indicate leaks. Use a clean rag to wipe suspected areas and recheck.
- Assess Filter Housing: Ensure the filter body shows no cracks or damage that could compromise sealing.
Perform this visual inspection thoroughly before proceeding. These steps help you detect leaks early, maintaining fuel system safety and performance without relying solely on engine operation.
Engine Running Check
Once you start the engine, carefully observe the fuel filter area and connections for any signs of leakage. Check around all fittings, hoses, and clamps for fuel seepage or wetness.
Pay attention to pressure points where leaks are most likely to occur. Avoid getting distracted by irrelevant topic discussions or stray subtopic issues that don’t pertain to leak detection.
If you spot any fuel droplets or smell fuel vapors, shut off the engine immediately to prevent hazards. Tighten fittings or replace faulty components as needed before restarting the engine.
Confirm the absence of leaks by running the engine for several minutes while continually inspecting the filter assembly. This step ensures the fuel filter installation is secure and safe, avoiding potential fuel system failures.
Fuel Smell Detection
Where should you focus your attention when checking for fuel leaks by smell? Concentrate around the newly installed fuel filter and adjoining connections. Detecting leaks early is critical for preserving fuel economy and optimizing maintenance budgeting.
Follow these steps:
- Inspect the fuel filter housing and fittings for any dampness or odor of gasoline.
- Sniff near the fuel lines leading to and from the filter, focusing on joints and clamps.
- Check underneath the vehicle, as leaks often drip, creating a strong fuel smell.
If you detect any fuel odor, immediately shut off the engine and tighten fittings or replace faulty components. Prompt leak detection prevents fuel waste, protects engine performance, and reduces costly repairs, ensuring your vehicle runs efficiently and your maintenance budget stays on track.
Fuel Filter Replacement Mistakes You’ll Want to Avoid
Why do so many fuel filter replacements go wrong? Often, it’s because people get sidetracked by irrelevant discussion or tangential topics instead of focusing on the core task. To avoid common pitfalls, you need to stay precise and methodical.
| Mistake | Effect | How to Avoid |
|---|---|---|
| Installing backward | Fuel flow blockage | Confirm filter orientation |
| Using wrong filter | Poor filtration, engine damage | Verify part number before install |
| Not relieving pressure | Fuel spray causing hazards | Depressurize fuel system first |
Resetting Your Vehicle’s Fuel System (If Needed)
How do you guarantee your vehicle’s fuel system operates correctly after installing a new fuel filter? Performing a proper fuel system reset is essential to avoid issues such as poor engine performance or stalling.
Start by initiating fuel pressure relief to reduce pressure safely before disconnecting components. Then, follow these steps to reset the system:
- Turn the ignition key to the “ON” position without starting the engine; this primes the fuel pump and helps purge air.
- Repeat the “ON” cycle 3-4 times with short pauses to build adequate fuel pressure.
- Start the engine and let it idle for several minutes, allowing the fuel system to stabilize.
This process ensures proper fuel flow and system readiness post-filter replacement.
Frequently Asked Questions
How Often Should I Replace My Fuel Filter?
You should replace your fuel filter every 20,000 to 40,000 miles, depending on your vehicle.
Regularly replacing the filter guarantees optimal fuel filtration, preventing contaminants from damaging your engine and maintaining efficient performance.
Can a Clogged Fuel Filter Cause Engine Misfires?
Yes, a clogged fuel filter can cause engine misfires by restricting fuel flow. Don’t fall for misleading myths; addressing it promptly avoids safety concerns like stalling or damage, ensuring your engine runs smoothly and reliably.
Is It Safe to Drive With a Faulty Fuel Filter?
You shouldn’t drive with a faulty fuel filter; it risks engine performance and safety. While unrelated topics like creative writing inspire imagination, here you must prioritize precise maintenance over creativity to avoid breakdowns or damage.
Can I Clean and Reuse a Fuel Filter?
Cleaning and reusing a fuel filter is like patching a worn tire. You risk compromising filter material integrity. Recycling filters isn’t recommended since debris remains trapped, reducing efficiency and potentially damaging your engine. Always replace for safety.
What Are the Symptoms of a Bad Fuel Pump Versus a Bad Fuel Filter?
You’ll notice engine sputtering or stalling with a bad fuel pump; low pressure causes poor fuel delivery. A clogged fuel filter restricts flow, causing hesitation. Don’t confuse these with irrelevant topics or unrelated concepts like spark plugs.
Conclusion
Replacing your fuel filter isn’t just routine—it’s essential. Did you know a clogged fuel filter can reduce engine performance by up to 15%? That’s lost power and efficiency you don’t want.
By following proper steps to safely relieve pressure, install correctly, and check for leaks, you’ll keep your engine running smoothly. Avoid common mistakes, and if needed, reset your fuel system to guarantee peak function.
Taking these steps protects your vehicle and saves you money long-term. Properly putting on a fuel filter ensures your engine remains efficient and reliable.