How to Repair Ripped Leather Car Seat
To repair a ripped leather car seat, start by assessing the size and location of the damage to determine the best repair method. Clean the area gently to remove any dirt or oils that could affect adhesion.
For small tears, use leather glue to bond the edges together. Larger rips may require applying multiple layers of filler to rebuild the surface.
If the damage is severe, choose a durable and flexible patch that closely matches the seat’s color and texture. Carefully smooth and blend the edges of the repair to create a seamless appearance.
Proper maintenance after the repair helps extend its life and prevents further wear. Follow detailed steps and tips to achieve the best results for your leather car seat repair.
How to Assess Leather Car Seat Damage
Anyone dealing with a ripped leather car seat should start by carefully examining the extent and nature of the damage. Identify whether the rip is superficial or has compromised the padding beneath.
Begin repairing a ripped leather car seat by thoroughly assessing the damage’s depth and impact.
Check for discoloration, brittleness, or peeling, as these signs affect repair choices. Avoid common upholstery myths, like assuming all leather tears require full replacement; many can be effectively repaired with proper techniques.
Use care tips such as cleaning the area gently before assessment to avoid further damage. Measure the rip’s size accurately and note its location, as stress points can worsen damage over time.
This precise evaluation sets the foundation for efficient repair and prevents unnecessary expenses, ensuring you handle the problem with the correct approach.
Tools You Need to Repair Leather Car Seats
You’ll need specific tools to repair your leather car seat effectively, including a leather repair kit, adhesive, and cleaning supplies. Choosing the right leather patch material is essential to match texture and color for a seamless fix. Let’s review the essential items you should have on hand before starting the repair.
Essential Repair Tools
Every effective leather seat repair starts with having the right tools at hand. To restore your ripped leather car seat with precision, you’ll need equipment that supports colored stitching and guarantees aroma preservation, maintaining the seat’s original look and feel.
Here are the essential repair tools:
- Leather needle and colored thread: Match your car seat’s stitching to blend repairs seamlessly.
- Leather adhesive: Provides strong bonding without compromising aroma preservation.
- Scissors and tweezers: For precise trimming and positioning of threads or patches.
- Leather conditioner and cleaner: Prepares the surface and maintains leather texture post-repair.
Using these tools guarantees a durable repair while preserving the seat’s aesthetic and scent integrity. Avoid skipping any to achieve professional results.
Leather Patch Materials
Selecting the right leather patch material is essential for a seamless and durable repair of your car seat. You need to choose a patch that closely matches the original leather’s color variation to ensure the repair blends naturally.
Synthetic leather patches offer consistent color options and high material durability, making them a practical choice for most repairs. Genuine leather patches, while offering superior texture and appearance, may display slight color variation that requires careful selection.
Additionally, consider the patch’s thickness and flexibility to match your car seat’s leather, preventing future cracks or peeling. Prioritize patches with adhesive backings designed for leather repair, as they enhance bonding strength and longevity.
Cleaning and Preparing the Leather Surface
First, remove all dirt and debris from the ripped area using a soft brush or microfiber cloth to guarantee a clean surface. Next, apply a leather cleaner specifically designed for automotive seats to eliminate oils and contaminants. Finally, condition the leather to restore flexibility and prepare it for effective repair.
Removing Dirt and Debris
How do you guarantee a strong bond when repairing a ripped leather car seat? Effective dirt removal and debris elimination from the damaged area are essential. Any residual particles can weaken adhesion and compromise the repair’s durability.
Follow these precise steps for optimal cleaning:
- Use a soft-bristle brush to gently dislodge loose dirt and debris from the rip edges.
- Apply a leather-specific cleaner with a microfiber cloth to dissolve embedded grime without damaging the surface.
- Wipe the area with a damp cloth to remove cleaning residues completely.
- Allow the leather to air dry thoroughly before proceeding to the next repair stage.
Conditioning Leather Surface
A properly conditioned leather surface guarantees better adhesion and longevity for your repair. After removing dirt and debris, apply a specialized leather conditioner evenly using a soft cloth. This conditioning leather step rehydrates the material, restoring flexibility and preventing future cracking.
Avoid over-saturating the surface, as excess moisture can weaken the repair bond. Let the conditioner absorb fully, usually 15 to 30 minutes, before proceeding. Conditioning also enhances the surface’s receptiveness to leather color matching products, ensuring consistent tone and texture.
If necessary, lightly buff the area with a microfiber cloth to remove residue. Proper preparation at this stage is critical; it stabilizes the damaged area and optimizes the adhesion of adhesives, fillers, or dyes used later in the repair process.
Fixing Small Rips With Leather Glue
Small tears in leather car seats can be effectively repaired using leather glue, which restores the material’s integrity without the need for extensive patching. Before applying glue, avoid distractions like unrelated topics or random brainstorming that might lead you to skip essential prep steps.
Small tears in leather seats can be repaired with glue, restoring integrity without extensive patching.
Follow these precise actions:
- Clean the tear and surrounding area with isopropyl alcohol to remove oils.
- Gently lift the leather edges and insert a backing fabric if the rip is deep.
- Apply a thin layer of leather glue evenly inside the tear.
- Press the edges together firmly and hold until the glue sets, typically 10–15 minutes.
This method ensures a strong bond and maintains the seat’s appearance without bulky patches or stitches. Avoid rushing to preserve the leather’s durability and finish.
Using a Leather Repair Kit for Bigger Tears
When dealing with larger tears in your leather car seat, a leather repair kit provides the necessary tools and materials to restore both strength and appearance. Begin by cleaning the damaged area thoroughly to ensure adhesion.
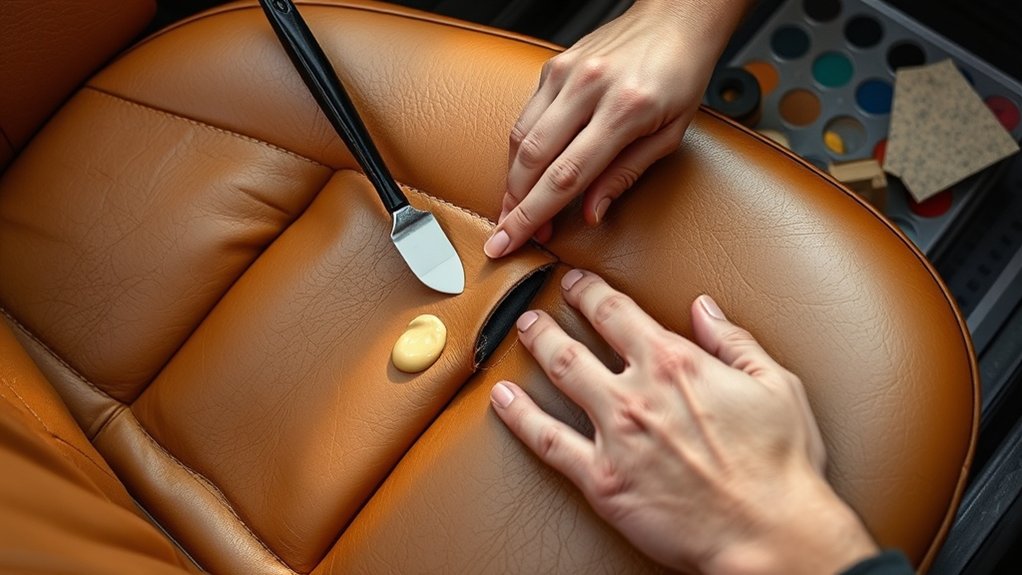
Use the filler compound included in the kit to rebuild the torn section, applying it in thin layers and allowing each to dry. Follow color matching tips carefully to blend the repair seamlessly with your seat’s original shade, mixing pigments as needed.
For enhanced patch durability, choose kits with flexible compounds that resist cracking. After curing, apply the finishing coat to protect the repair and match the leather’s texture. By following these steps precisely, you’ll achieve a professional-quality fix that maintains both the seat’s function and aesthetic.
When to Use a Leather Patch for Tough Damage
You should use a leather patch when the damage is too large or deep for a standard repair kit to fix effectively. Patches provide durable coverage, reinforcing the area and preventing further tearing. Choose a patch that closely matches your seat’s leather type and color to ensure a seamless repair.
Identifying Severe Leather Damage
How can you determine if a tear in your leather car seat requires a patch rather than a simple repair? Identifying severe leather damage is essential for effective restoration. You’ll want to assess the extent and nature of the damage carefully.
Look for these indicators when identifying severe leather damage:
- Tears longer than 2 inches or with jagged edges
- Areas where the leather backing is exposed or missing
- Deep cracks that penetrate beyond the surface layer
- Multiple adjacent rips compromising the seat’s structural integrity
If any of these conditions apply, a leather patch becomes necessary to restore both appearance and durability. Simple filler or adhesive repairs won’t hold up for severe damage, so recognizing these signs guarantees you choose the right method for lasting results.
Benefits of Using Patches
Evaluating the severity of leather damage helps determine the most effective repair approach, and tough tears often call for a leather patch. Patches reinforce the damaged area, providing structural support that adhesive or filler alone can’t achieve.
When you select patch options, consider durability and flexibility to ensure the repair withstands daily wear. A well-applied patch prevents the tear from expanding, extending the seat’s lifespan. Color matching is critical; mismatched patches create visible repairs that detract from your car’s interior aesthetics.
Using patches also allows targeted repairs, reducing the need for complete seat reupholstery. Overall, leather patches offer a practical, cost-effective solution for significant damage, combining strength and visual continuity to restore function and appearance efficiently.
Choosing The Right Patch
When should you opt for a leather patch to repair your car seat? Use a patch when the damage is too extensive for simple filler or adhesive repair, especially if you want to avoid irreversible damage. Improper patching can worsen the tear, so selecting the right patch is essential. Consider these points:
- Size of the rip: Larger tears often require patches for stability.
- Location: High-stress areas benefit from durable, flexible patches.
- Leather type and color: Match texture and shade to maintain aesthetics.
- Damage depth: Deep cuts or holes need backing patches to reinforce the area.
Choosing the right patch prevents further damage and guarantees a clean, lasting repair. Always prepare the surface properly to avoid improper patching that could compromise the seat’s integrity.
Matching Leather Color and Texture
A precise match of leather color and texture is essential for a seamless repair that blends with the original seat. To avoid a texture mismatch, closely examine the grain pattern and finish of your car seat’s leather under good lighting.
Use a color swatch kit designed for automotive leather to identify the closest matching color. Test your chosen color on a hidden area or scrap piece to confirm accuracy before applying to the repair site.
Keep in mind that leather can vary slightly due to wear, so aim for a tone that complements the surrounding area rather than an exact replica. Addressing both color and texture simultaneously prevents noticeable differences, ensuring your repair looks professional and maintains the seat’s aesthetic integrity.
Smoothing and Blending the Repair Area
How do you guarantee the repaired section of your leather seat blends seamlessly with the surrounding area? Focus on precise smoothing and texture blending after color matching. Start by gently sanding the repair to remove excess filler and create a uniform surface. Then, use a leather conditioner to soften the area and restore pliability.
To perfect the blend, follow these steps:
- Apply a thin layer of leather filler, feathering edges to avoid ridges
- Match texture by pressing a grain stamp or textured cloth onto the filler before it dries
- Use airbrushing or sponge dabbing for gradual color matching
- Let each layer dry completely before applying the next
These techniques ensure your repair looks natural and integrates flawlessly with the original seat.
Protecting and Maintaining Your Repaired Leather Seats
Once you’ve achieved a seamless repair with proper smoothing and color blending, maintaining the integrity of the restored leather becomes your next priority. To prevent color fading, apply a UV-protective leather conditioner every three months, ensuring even coverage without saturating the material.
Avoid harsh chemicals that can degrade the finish and stitching patterns, weakening the repair’s durability. Regularly inspect stitching patterns for any loosening or wear, addressing issues immediately to avoid further damage.
When cleaning, use a soft cloth with a mild leather cleaner, and avoid excessive water exposure, which can cause the adhesive beneath the repair to weaken. By following these precise maintenance steps, you’ll extend the life of your repaired leather seat, preserving both its appearance and structural integrity.
Troubleshooting Common Leather Seat Repair Problems
Even the most carefully executed leather seat repairs can encounter issues over time, requiring prompt troubleshooting to maintain functionality and appearance. When you spot problems, act quickly to prevent further damage or irreversible discoloration.
Timely troubleshooting is essential to preserve the look and function of leather seat repairs.
Common issues include:
- Peeling or cracking leather: Often due to inadequate adhesive curing; reapply suitable leather glue.
- Color mismatch or fading: Avoid using incompatible dyes that cause irreversible discoloration; test on a hidden spot first.
- Weak seams or loose patches: Reinforce stitching or bonding with professional-grade thread or adhesive.
- Squeaky hinges or seat mechanisms: Lubricate moving parts with appropriate grease to ensure smooth operation.
Frequently Asked Questions
Can Leather Car Seat Repairs Be Done on Synthetic Leather?
Yes, you can repair synthetic leather, but leather vs faux materials differ in texture and durability. Avoid maintenance myths; use products designed for faux leather to ensure proper adhesion and flexibility during repairs on your car seat.
How Long Does a Typical Leather Car Seat Repair Last?
You’ll love hearing that repaired leather seats last “forever” if only durability myths held true. Realistically, expect six months to a year. Focus on two-word discussion ideas: maintenance and environment, which greatly influence repair longevity.
Are Professional Leather Repair Services Worth the Cost?
You’ll find professional restoration worth the cost benefit when precision, durability, and color matching matter. Experts use specialized materials and techniques, ensuring a longer-lasting repair that maintains your leather’s appearance and value efficiently.
Can Repaired Leather Seats Affect Car Resale Value?
Yes, repaired leather seats can impact resale value. If the repair is high-quality and seamless, it minimizes negative effects.
Poor repairs, however, can lower resale value by signaling neglect or damage to potential buyers.
Is It Safe to Use Homemade Leather Repair Solutions?
It’s not always safe to use homemade solutions for leather repairs, as they may compromise long term durability. You’ll find DIY versus professional methods differ considerably. Professionals guarantee precise, lasting results, while homemade fixes risk further damage.