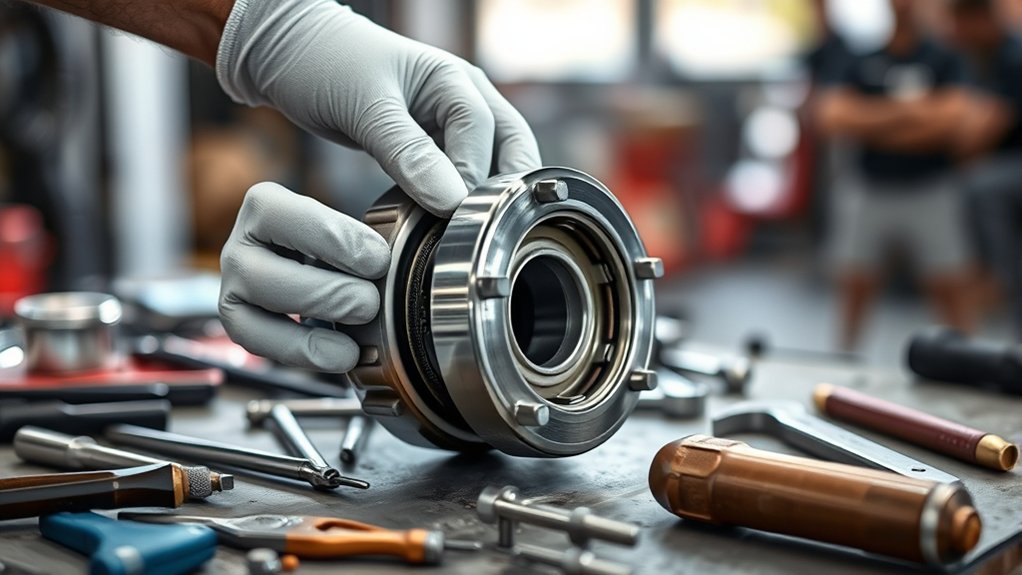
How to Replace Wheel Bearing
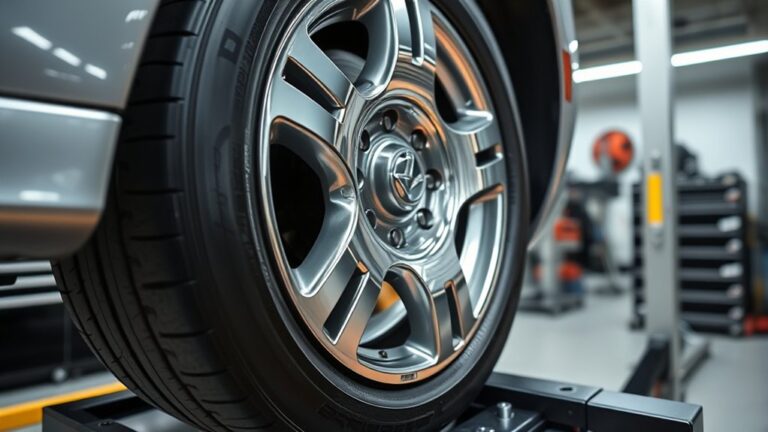
To replace a wheel bearing, first safely lift your vehicle using a hydraulic jack and secure it with jack stands.
Removing the wheel, brake caliper, and rotor will give you access to the hub.
Next, extract the old bearing with a bearing puller, then clean and inspect the hub for any damage.
Press in the new bearing evenly, ensuring proper alignment and seal integrity.
Finally, reassemble all components with the correct torque.
Test carefully for any noise or play.
Following these detailed steps ensures safety and accuracy throughout the process.
Signs Your Wheel Bearing Needs Replacing
How can you tell if your wheel bearing needs replacing? Pay attention to specific symptoms that indicate wear or damage. A common sign is a grinding or humming noise that intensifies with speed or when turning.
You might also notice uneven tire wear or a slight wobble in the wheel during a test drive. Avoid confusing these signs with an unrelated topic like brake issues or suspension faults, as they form an irrelevant pair to wheel bearing problems.
To confirm, lift the vehicle and manually check for play by shaking the wheel side-to-side and top-to-bottom. Excessive movement or roughness signals bearing failure.
Detecting these signs early helps prevent further damage and ensures your vehicle’s safety on the road.
Tools Needed for Wheel Bearing Replacement
You’ll need specific tools to safely and effectively replace your wheel bearing. Gather essential hand tools like a socket set, bearing puller, and torque wrench, along with safety equipment such as gloves and eye protection. Preparing these items beforehand ensures a smooth and secure repair process.
Essential Tools Overview
Typically, replacing a wheel bearing requires a specific set of tools to guarantee accuracy and safety throughout the process. Proper tool ergonomics not only enhances efficiency but also reduces fatigue during this critical car maintenance task.
Ensure you have well-designed tools that fit comfortably in your hands for precise control.
Here are the essential tools you’ll need:
- Socket Set with Ratchet for removing lug nuts and securing bolts.
- Bearing Puller or Slide Hammer to extract the old bearing without damaging the hub.
- Torque Wrench to tighten components to manufacturer specifications, ensuring safe operation.
Using these tools correctly is vital for a successful wheel bearing replacement and maintaining your vehicle’s overall performance.
Safety Equipment Checklist
Where should you start to ensure safety when replacing a wheel bearing? Begin with the proper safety equipment. Always wear safety goggles to protect your eyes from debris and gloves to prevent cuts and exposure to harmful lubricants.
Use a quality jack stand to secure the vehicle, addressing durability concerns. Never rely solely on a hydraulic jack. Avoid the lubrication myths; improper lubricant handling can cause slippage or contamination, so wear gloves resistant to chemicals.
Additionally, use a dust mask to prevent inhaling brake dust. Ensure your workspace is well-lit and free of clutter. This checklist minimizes injury risks and mechanical errors, allowing you to focus on precise wheel bearing replacement without compromising safety or component integrity.
How to Safely Lift Your Vehicle for Wheel Bearing Replacement
Start by selecting a jack rated for your vehicle’s weight to guarantee safe lifting. Position the jack under the manufacturer’s recommended lift points to avoid damage. Always use jack stands to secure the vehicle and prevent any movement before beginning work on the wheel bearing.
Choosing The Right Jack
How do you guarantee your vehicle is lifted securely for a wheel bearing replacement? Choosing the right jack is crucial to avoid accidents and ensure stability. Avoid confusing this with unrelated subtopic details or topic ideas about lifting methods.
Focus on these three technical criteria:
- Weight Capacity: Select a jack rated above your vehicle’s gross weight to handle the load safely.
- Type of Jack: Use a hydraulic floor jack for smooth lifting and control. Scissor jacks or bottle jacks often lack precision and stability for wheel bearing work.
- Lifting Range and Contact Points: Ensure the jack’s lifting range matches your vehicle’s ground clearance, and the saddle fits securely under designated lift points to prevent slippage.
This precise selection prevents damage and prepares you for the next step in your wheel bearing replacement.
Securing Vehicle Stability
Why must you prioritize securing your vehicle firmly before lifting it for a wheel bearing replacement? Proper stability prevents unintended movement, ensuring safety and precise work. Start by engaging the parking brake and placing wheel chocks opposite the wheel being replaced.
Conduct a friction analysis of the contact surfaces between the jack and vehicle frame to select the optimal lifting points. This reduces slippage risk and maintains alignment tolerance critical for bearing installation.
Use a jack rated for your vehicle’s weight and position it under manufacturer-specified lift points. Once lifted, support the vehicle with sturdy jack stands placed symmetrically to distribute load evenly and maintain frame alignment. Never rely solely on the hydraulic jack.
Securing vehicle stability is essential to avoid accidents and ensure the wheel bearing’s proper fit within tight tolerances.
Removing Wheel and Brake Components for Bearing Access
Where do you begin when removing the wheel and brake components to access the bearing? Start by safely lifting the vehicle and removing the wheel to expose the brake assembly. Be mindful that unrelated topics like tire pressure or suspension adjustments don’t confuse this process.
Focus strictly on components directly involved in bearing access.
Follow these steps:
- Remove Brake Caliper: Use the appropriate wrench to unbolt the caliper, then suspend it with a wire to avoid stress on the brake line.
- Detach Brake Rotor: Slide the rotor off the hub; if stuck, gently tap with a rubber mallet.
- Disconnect Wheel Hub Assembly Components: Remove any dust caps, cotter pins, or retaining nuts securing the hub.
This method ensures precise access to the bearing without mixing unrelated topics or two word ideas that complicate the task.
Removing the Old Wheel Bearing From the Hub
Once you’ve removed the wheel, brake caliper, rotor, and any securing components from the hub, you’re ready to extract the old wheel bearing. Begin by unfastening the bearing retaining nut with the appropriate socket, ensuring you hold the hub steady to prevent rotation.
Use a bearing puller or press to carefully remove the bearing from the hub assembly; avoid applying uneven force that could damage the hub. It’s important to note that discussing an unrelated topic, like engine tuning or suspension alignment, would be a random tangent here. Stay focused on the bearing removal process.
After extraction, inspect the hub bore for damage but don’t proceed to cleaning or prepping. That’s for the next step. This precise removal sets the foundation for a proper bearing replacement.
Cleaning and Preparing the Hub Assembly for Installation
Start by thoroughly removing any old debris and corrosion from the hub assembly using a wire brush or suitable cleaner. Next, inspect the hub surface for damage or irregularities that could affect bearing seating. Ensuring a clean, smooth surface is critical for proper installation and bearing performance.
Removing Old Debris
How do you guarantee the hub assembly is properly prepared for the new wheel bearing? Removing old debris is critical to ensure a smooth installation and optimal bearing performance. Avoid unrelated topic or off topic discussion; focus strictly on debris removal.
Follow these steps precisely:
- Use a wire brush or scraper to eliminate rust, hardened grease, and dirt from the hub surface.
- Apply brake cleaner or a suitable solvent to dissolve residual grease and contaminants, then wipe clean with a lint-free cloth.
- Inspect for remaining particles and ensure the hub assembly is completely dry before proceeding.
Thorough debris removal prevents premature bearing failure and ensures proper seating. Stay focused on these tasks; avoid distractions that lead to incomplete cleaning.
Inspecting Hub Surface
Why is inspecting the hub surface essential before installing a new wheel bearing? A clean, smooth hub surface ensures proper seating of the bearing, which directly affects wheel alignment and performance.
Begin by thoroughly cleaning the hub assembly with a wire brush and brake cleaner to remove corrosion, dirt, and old grease. Next, inspect for any nicks, grooves, or pitting that could cause uneven pressure or misalignment.
Such imperfections can lead to premature tire wear and imbalance, negatively impacting balancing tires efforts. Use a straightedge or feeler gauge to check for warping or irregularities.
If damage is present, address it by resurfacing or replacing the hub. Proper preparation prevents vibration and extends bearing life, ensuring optimal wheel function and safety.
Installing the New Wheel Bearing Correctly
Where should you position the new wheel bearing to ensure optimal performance and safety? You must seat it flush against the hub surface, avoiding any gaps or misalignment. Proper installation prevents premature wear and ensures smooth rotation.
Follow these steps:
- Align the bearing evenly with the hub bore, avoiding tilting or skewing.
- Use a press tool to apply steady, even force, driving the bearing fully into place without damaging seals.
- Verify the bearing’s fit by checking for free rotation and absence of play.
Avoid two word discussion ideas or unrelated topics like brake pads or suspension components here; focus solely on bearing placement. Correct installation is critical before moving to subsequent steps to maintain vehicle safety and performance.
Reassembling Brake and Wheel Components
When do you start reassembling the brake and wheel components after installing the new bearing? Begin immediately once the bearing is securely in place and torqued to specifications.
First, reinstall the brake rotor, ensuring it sits flush without compromising the paint finish on surrounding parts. Next, position the caliper and secure it with the correct bolts, checking brake fluid levels to avoid air pockets in the system.
Once the brake assembly is complete, mount the wheel and hand-tighten lug nuts in a star pattern to maintain proper wheel alignment. After lowering the vehicle, perform a final torque on lug nuts.
Testing Your Wheel Bearing Replacement Safely
A critical step after replacing your wheel bearing is to test it under controlled conditions to confirm proper installation and function. Begin by ensuring your cockpit ergonomics allow precise control and feedback during testing. Next, consider tire chemistry, as different compounds affect grip and feedback, influencing the bearing’s performance perception.
Testing wheel bearings requires precise ergonomics and attention to tire chemistry for accurate performance feedback.
Follow these steps to test safely:
- Conduct a low-speed drive on a flat, clean surface to detect abnormal noises or vibrations.
- Gradually increase speed, monitoring for unusual heat buildup or looseness in the wheel assembly.
- Perform controlled turns to assess bearing stability and responsiveness, noting any irregular resistance.
Common Wheel Bearing Problems and How to Avoid Them
Why do wheel bearings fail prematurely, and how can you prevent these issues? Most failures stem from contamination, improper installation, or insufficient lubrication. To avoid these problems, always ensure correct distance calibration during installation; improper spacing can cause excessive load and early wear.
Use manufacturer-specified torque settings to prevent over-tightening, which compromises bearing integrity. Regularly inspect for signs of damage or noise. Unusual sounds often indicate bearing wear and affect noise reduction efforts.
Keep seals intact to prevent dirt and moisture intrusion, which accelerate failure. When replacing bearings, clean surrounding components thoroughly and apply proper grease amounts to maintain optimal lubrication.
Following these steps helps extend bearing life, ensures smooth operation, and maintains vehicle safety by reducing noise and vibration caused by faulty wheel bearings.
Frequently Asked Questions
What Is the Average Lifespan of a Wheel Bearing?
You can expect a wheel bearing to last between 85,000 and 100,000 miles. Avoid unrelated discussion; focusing on maintenance prevents failures. Don’t confuse this with unrelated topics, as accurate data guarantees proper vehicle performance.
Can a Bad Wheel Bearing Affect Fuel Efficiency?
You might think a bad wheel bearing doesn’t affect fuel efficiency, but it does. It increases friction, causing bad braking and uneven tire wear.
This forces your engine to work harder, reducing fuel economy noticeably over time.
How Much Does Professional Wheel Bearing Replacement Cost?
You’ll typically pay $200 to $400 for professional wheel bearing replacement. Don’t settle for cheap repair without detailed inspection, since hidden costs like damaged hub assemblies can increase your total expense considerably.
Are Wheel Bearing Noises Always Dangerous?
Wheel bearing noises aren’t always dangerous, but you shouldn’t ignore them. They often indicate mechanical issues unrelated to aesthetic upgrades or unrelated maintenance.
Diagnose promptly to prevent further damage and ensure safe, reliable vehicle performance.
Can I Drive With a Damaged Wheel Bearing Temporarily?
You can drive with a damaged wheel bearing temporarily, but it’s unsafe and risks further damage. Don’t treat this as an irrelevant topic or unrelated concern; address it promptly to maintain vehicle safety and performance.
Conclusion
Now that you’ve swapped the old bearing for a fresh one, imagine your wheel spinning smoothly, free of that stubborn hum. Just as a clock’s gears mesh perfectly to keep time, your precise installation ensures safe, silent driving.
By following each step carefully—lifting, removing, replacing, and testing—you’ve restored your wheel’s reliability. Keep an eye on wear signs, and your vehicle will thank you with steady, confident turns every time you hit the road.
With proper care and maintenance, your wheel bearing replacement will provide lasting performance and safety for miles to come.