Can I Change My Own Oil
Yes, you can change your own oil if you have the right tools and follow your vehicle’s specifications carefully. Changing your own oil is a manageable task with some basic knowledge and preparation. You’ll need a wrench set, oil drain pan, new filter, and proper oil type.
Make sure the engine is cool, but warm it briefly before draining the oil to help it flow out smoothly. Avoid common mistakes like over-tightening or reusing filters, which can cause damage. Proper disposal of used oil and filters is essential to prevent environmental harm.
Knowing these basics helps you maintain your car safely and efficiently. Exploring further will enhance your skills and confidence in performing routine maintenance.
Should You Change Your Oil Yourself or Go to a Shop?
When deciding whether to change your oil yourself or take your vehicle to a shop, consider your mechanical skills and available tools. Performing your own oil change reduces oil change cost significantly, especially if you maintain the recommended maintenance frequency, typically every 3,000 to 7,500 miles depending on your vehicle.
However, if you lack experience or proper equipment, you risk improper installation, which can damage your engine. Shops provide professional service, ensuring correct oil type and filter installation, but at a higher cost.
Evaluate your comfort with vehicle maintenance tasks and time investment. If you prefer convenience and guaranteed accuracy, a shop is ideal. Conversely, if you want cost savings and have basic mechanical knowledge, changing your own oil is feasible and efficient.
Essential Tools and Materials for Changing Your Oil
What tools and materials do you need to change your oil safely and efficiently? To perform a proper DIY oil change, you’ll require specific items to handle the oil filter and drain plug securely while avoiding spills or damage.
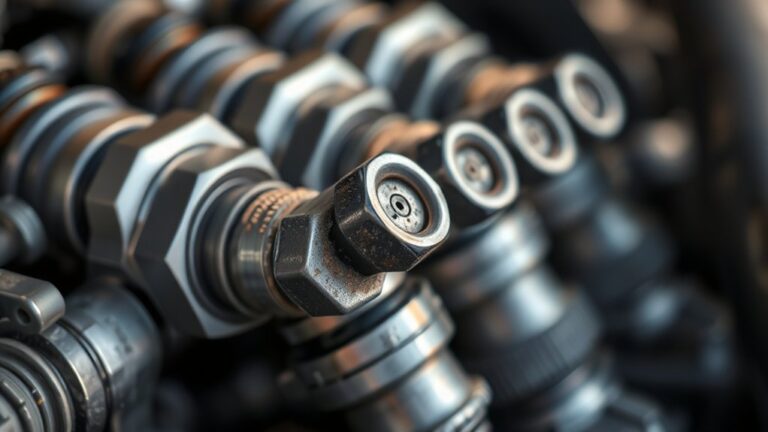
Wrench set: Essential for loosening and tightening the drain plug and oil filter; a socket wrench or oil filter wrench ensures a snug fit.
Oil drain pan: Collects the old oil when you remove the drain plug, preventing mess and environmental contamination.
New oil filter and correct engine oil: Use a manufacturer-approved oil filter and the appropriate grade of engine oil for your vehicle.
Having these tools and materials ready guarantees a smooth, effective oil change process.
Preparing Your Car for a DIY Oil Change
Before you start, make sure you have all the necessary tools within reach to streamline the process. Always check that the engine is completely cool to avoid burns and ensure accurate oil drainage. Proper preparation sets the foundation for a safe and effective oil change.
Gather Necessary Tools
A successful DIY oil change hinges on having the right tools at hand. Before you begin, gather all necessary equipment tailored to your vehicle’s specifications, particularly considering the correct oil viscosity and oil capacity. Using improper tools or oil can compromise engine performance.
Essential tools include:
- Wrench set: For removing the drain plug and oil filter.
- Oil catch pan: To collect used oil safely.
- Funnel: To pour the new oil without spills.
Make sure you also have the correct replacement oil filter and gloves for protection. Confirm the oil grade by referencing your owner’s manual to match the recommended viscosity, ensuring optimal engine lubrication. Accurate oil capacity knowledge helps avoid overfilling or underfilling, maintaining engine health.
Ensure Engine Is Cool
Once you’ve gathered the proper tools and selected the correct oil and filter, ensure the engine is completely cool before starting the oil change. Working on a hot engine poses significant coolant risks, as the coolant system remains pressurized and can cause burns if disturbed prematurely.
Additionally, hot oil can spray unexpectedly, increasing injury risk. Waiting until the engine is cool also prevents engine noise interference, allowing you to better detect leaks or irregularities during the process. A cool engine ensures oil has settled, providing an accurate oil level reading after the change.
Typically, waiting at least 30 minutes to an hour after shutting off the engine is sufficient. Prioritizing a cool engine safeguards your safety and ensures precise, effective oil replacement.
How to Change Your Oil Step-by-Step
You’ll need specific tools like a wrench, oil filter remover, and a drain pan before starting. The procedure involves draining the old oil, replacing the filter, and adding new oil to the engine. Follow each step carefully to ensure a proper and safe oil change.
Required Tools Preparation
How do you guarantee a smooth oil change process? Proper preparation of your tools is essential. Before starting, gather everything you need to avoid interruptions. This includes selecting the right oil based on your car’s recommended oil viscosity and trusted oil brands to ensure optimal engine performance.
Make sure you have:
- A quality oil filter wrench designed for your vehicle’s filter type.
- A drain pan with adequate capacity to catch all used oil without spills.
- A reliable socket set or wrench to remove the drain plug securely.
Having these tools ready ensures efficiency and safety during the oil change. Double-check your vehicle’s manual for specific oil viscosity and recommended oil brands to maintain engine integrity throughout the process.
Oil Changing Procedure
Where do you begin when changing your own oil? First, warm up the engine briefly to ensure the oil flows smoothly. Park your vehicle on a level surface, engage the parking brake, and place oil catch pans beneath the drain plug.
Carefully remove the drain plug, allowing all old oil to drain completely. Replace the drain plug securely, then remove the oil filter with an oil filter wrench. Before installing the new filter, apply a thin layer of new oil to its gasket for a proper seal.
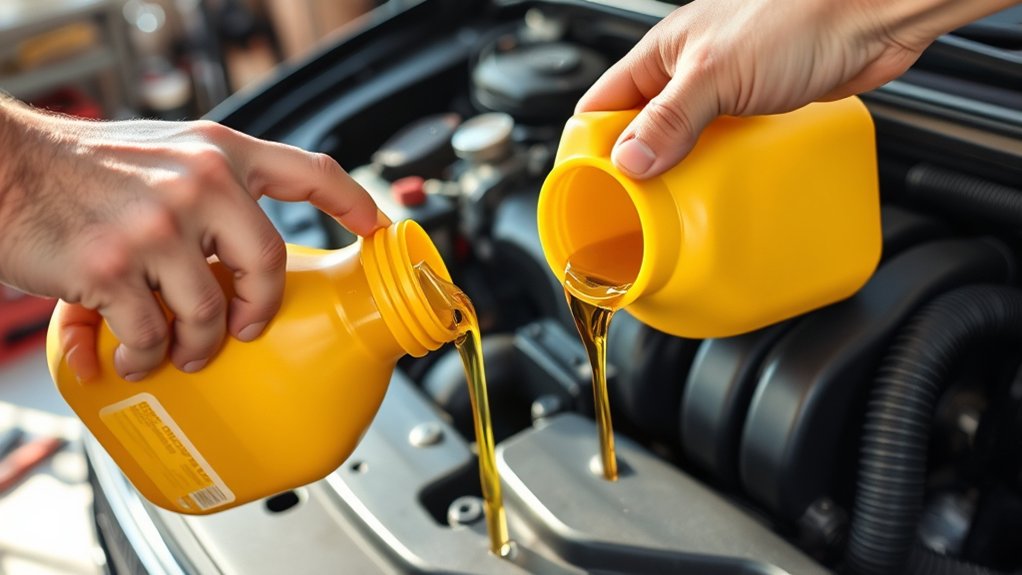
Pour the new oil, selecting the correct oil viscosity specified in your owner’s manual to maintain engine performance and safeguard your engine warranty. Finally, check the oil level with the dipstick and inspect for leaks. Dispose of used oil responsibly.
Disposing of Used Oil and Filters Responsibly
Why is it essential to dispose of used oil and filters responsibly? Improper disposal contaminates soil and water, posing serious environmental and health risks. You must follow precise steps when disposing responsibly to minimize these hazards.
Proper disposal of used oil and filters is crucial to prevent environmental contamination and health risks.
After draining the oil, store it in a sealed, labeled container to prevent leaks. Used oil filters contain residual oil that requires filter recycling to avoid pollution. Many service centers and recycling facilities accept both used oil and filters.
Key points to remember:
- Collect used oil in clean, leak-proof containers immediately after draining
- Drain oil filters thoroughly before disposing or recycling
- Locate authorized recycling centers or hazardous waste facilities for proper drop-off
Common DIY Oil Change Mistakes to Avoid
When tackling your own oil change, what common errors should you watch out for to ensure the job is done correctly? First, avoid under-tightening or over-tightening the drain plug and oil filter. This can cause leaks or damage.
Don’t fall for oil filter myths, like reusing old filters or neglecting to lubricate the new filter’s gasket. Skipping the step of warming up your engine can lead to incomplete oil drainage.
Also, don’t forget to check the oil level after refilling; overfilling or underfilling both cause engine issues. While changing oil humor might make you smile, taking shortcuts risks costly damage.
Stay precise: use the recommended oil type and quantity, properly secure all components, and responsibly dispose of used oil and filters to maintain your vehicle’s health.
Frequently Asked Questions
How Often Should I Change My Oil?
You should change your oil every 3,000 to 5,000 miles, depending on oil viscosity and driving conditions.
Two-word discussion ideas include “maintenance schedule” and “oil viscosity” to ensure optimal engine performance and longevity.
Can Using the Wrong Oil Damage My Engine?
Using the wrong viscosity oil can act like thick syrup clogging your engine, causing oil contamination and poor lubrication. This damages engine components, reduces efficiency, and accelerates wear, so always use the manufacturer’s recommended oil type.
What Are the Signs of Low Oil Levels?
You’ll notice low oil levels through oil pressure warnings on your dashboard, engine noise, or overheating.
Signs of contamination include dark, gritty oil and sludge buildup, which can further reduce oil effectiveness and harm engine performance.
Is Synthetic Oil Better Than Conventional Oil?
Synthetic oil’s superior stability and strength outperform conventional oil, offering longer-lasting lubrication and extended oil change frequency.
When weighing synthetic vs conventional, consider your engine’s needs and driving conditions for optimal performance and protection.
Can I Drive Immediately After an Oil Change?
Yes, you can drive immediately after an oil change. The new oil flows quickly, ensuring proper lubrication.
Ignore irrelevant ideas like “two word” distractions; focus on the oil change procedure for optimal engine performance and safety.
Conclusion
So, you want to save money and time by changing your own oil—sounds simple, right? Just grab a wrench, drain the oil, swap the filter, and you’re done. Except, if you forget a step or spill a quart, your car (and driveway) might disagree.
But hey, if you enjoy playing mechanic and handling hazardous waste, DIY oil changes are your perfect weekend hobby. Otherwise, the pros are only a shop away.
If you’re unsure about the process or want to avoid potential messes, it’s best to leave it to the experts. Can I change my own oil? Absolutely, but knowing when to call a professional can save you headaches down the road.