Is Red Positive on Jumper Cables
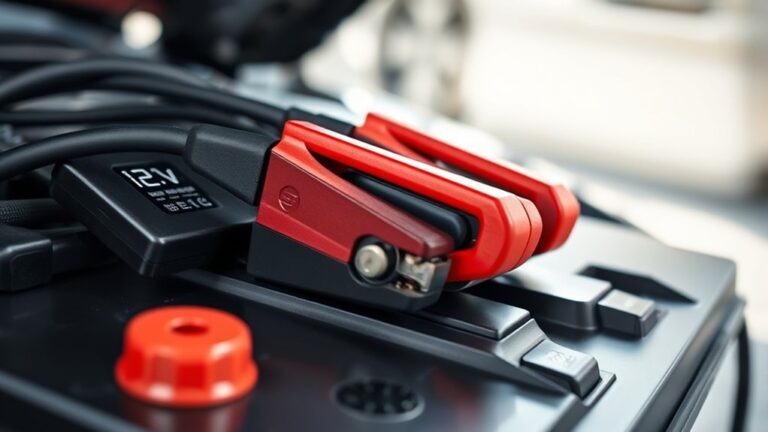
Yes, Red Positive on jumper cables is standard practice and should be treated as the positive connection to ensure safe use. The red clamp is designed to connect to the positive terminal of the battery, which helps with quick identification and reduces the chance of mistakes.
Always double-check the polarity by looking at the battery markings or using a multimeter, especially if the cable colors are faded or unclear. Incorrectly connecting the clamps can cause sparks and damage the electrical system.
Properly identifying the terminals and following the correct connection sequence is crucial for safety. Understanding these basics helps prevent costly errors and potential electrical hazards when jump-starting a vehicle.
Is the Red Clamp Always Positive?
How can you be sure the red clamp on jumper cables is always positive? While red typically indicates the positive terminal, relying solely on color can lead to color ambiguity and mistakes.
Manufacturers usually design red clamps for positive connections, but variations exist, especially in non-standard or older cables. Connecting clamps incorrectly results in wrong polarity, which can damage vehicle electronics or cause sparks.
Always verify by checking the cable markings or the vehicle’s battery terminals before connecting. If the clamp lacks clear indicators, use a multimeter to confirm polarity.
Don’t assume red always means positive; confirm physically to avoid wrong polarity. Prioritize safety by double-checking clamps and terminals to ensure proper, damage-free connections when jump-starting a vehicle.
Why Is Red Usually Used for Positive Terminals?
Since confirming the red clamp’s polarity is necessary, understanding why red is commonly assigned to positive terminals can help you recognize established standards. The use of red for positive terminals stems from two word ideas: visibility and consistency.
Red is highly visible in various lighting conditions, reducing connection errors. Manufacturers standardized red for positive to create uniformity across automotive applications, simplifying identification and minimizing risk.
This convention also counters safety myths suggesting color choice is arbitrary. Misidentifying polarity can cause electrical damage or injury, so the red-positive standard serves as a critical safety measure.
Can the Red Clamp Ever Be Negative?
You usually associate the red clamp with the positive terminal because of standard color coding. However, there are rare exceptions where red might connect to a negative post, especially in specialized or older vehicles. Understanding these cases is essential to avoid safety hazards and guarantee correct connections.
Standard Color Coding
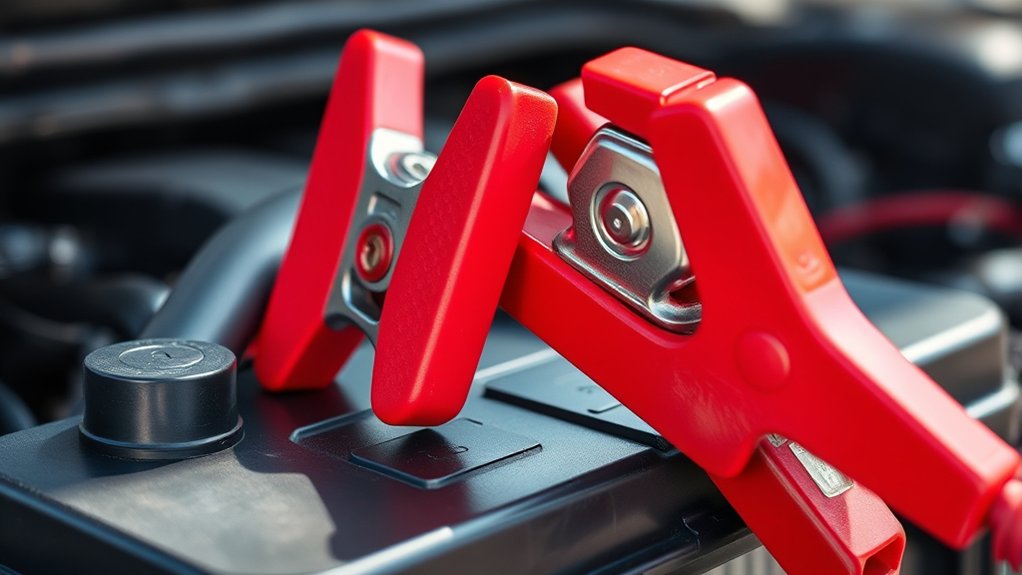
Why is the red clamp traditionally associated with the positive terminal in jumper cables? This standard color coding stems from clear color symbolism. Red universally signals danger or power, making it an intuitive choice for positive voltage.
The unlikely pairing of red with negative could cause confusion and safety hazards; therefore, manufacturers adopt red exclusively for positive terminals. You’ll find the black clamp designated for the negative terminal, reinforcing a consistent, intuitive system.
This approach minimizes user error during jump-starting by providing immediate visual cues. While you might encounter exceptions, the standard remains: red equals positive.
Exceptions To The Rule
Can the red clamp ever represent a negative terminal? In standard automotive practice, no, it’s always positive. However, exceptions exist in specific industrial or custom electrical setups where red might denote negative due to unique wiring conventions.
These cases are rare and highly specialized, not related to typical jumper cable use. Discussing such exceptions in detail would be an unrelated topic, veering into an off topic idea, as it deviates from automotive norms.
For typical vehicle jump-starting, you should always treat the red clamp as positive to avoid confusion or damage. While technically possible, red representing negative is nonstandard and uncommon, so stick to the established color coding unless you’re dealing with specialized, clearly documented systems beyond typical automotive contexts.
Safety Implications
How often does the red clamp on jumper cables represent a negative terminal? Practically never in standard automotive use. Confusing this can lead to dangerous mistakes. You must never treat the red clamp as negative; doing so risks sparks, battery damage, or injury.
Any off topic discussion about unrelated uses of clamps distracts from this critical safety point.
| Clamp Color | Typical Terminal | Safety Risk if Misused |
|---|---|---|
| Red | Positive (+) | High (sparks, damage) |
| Black | Negative (-) | Moderate (reverse polarity) |
| Red (rare) | Negative (-) | Severe (special cases, avoid without expertise) |
Stick to standard connections. The red clamp should always connect to the positive terminal to ensure safe and effective jump-starting.
How to Identify Positive and Negative Battery Terminals
Determining which battery terminal is positive or negative is essential before connecting jumper cables. You’ll find the positive terminal marked with a plus sign (+) and often covered by a red plastic cap or insulation to prevent insulation failure.
The negative terminal usually bears a minus sign (–) and lacks the red cover, sometimes appearing corroded due to exposure. Inspect both terminals for corrosion and clean if necessary, as corrosion impairs electrical contact and can lead to insulation failure.
Proper identification ensures you connect cables correctly, avoiding short circuits or damage. Always confirm terminal polarity visually and by checking manufacturer labels on the battery to maintain corrosion prevention and system integrity. This step is fundamental for safe, efficient jump-starting without risking electrical faults.
How to Safely Connect Jumper Cables Step-by-Step
Where should you start when connecting jumper cables to guarantee safety and effectiveness? First, ensure both vehicles are off with keys removed. Identify the positive terminal, typically marked with a “+” and connected to the red cable, reflecting color psychology and branding aesthetics for immediate recognition.
Attach the red clamp to the dead battery’s positive terminal, then to the donor battery’s positive terminal. Next, connect the black clamp to the donor battery’s negative terminal. Finally, attach the remaining black clamp to an unpainted metal surface on the dead car’s engine block, away from the battery, to ground the circuit safely.
This step-by-step method minimizes risk and aligns with the intuitive color coding designed to prevent errors during jump-starting. Always follow this sequence for a secure connection.
What Happens If You Connect Jumper Cables to the Wrong Terminals?
If you connect jumper cables to the wrong terminals, you risk causing a short circuit that can damage both batteries and electrical systems. This mistake can lead to sparks, battery explosions, or permanent harm to your vehicle’s electronics. You need to follow proper procedures closely to avoid these serious safety hazards and costly repairs.
Effects Of Incorrect Connections
What happens when you connect jumper cables to the wrong terminals? Incorrect connections reverse the current flow, causing immediate electrical faults. You risk damaging the vehicle’s electrical system, including the alternator, battery, and onboard computers.
The reversed polarity can lead to blown fuses and disrupted circuits. For discussion ideas, consider how jumper cables rely on correct polarity to safely transfer power; reversing the cables interrupts this process, preventing the jump start from working.
Additionally, the vehicle’s sensitive electronics may short-circuit, leading to costly repairs. Using jumper cables incorrectly can also cause the dead battery to discharge further instead of charging. Understanding these effects emphasizes the importance of proper cable placement to ensure efficient and safe power transfer between vehicles.
Safety Risks And Damage
Although jumper cables seem straightforward, connecting them to the wrong terminals can cause serious safety risks and damage. Misconnecting cables reverses electric polarity, leading to sparks, battery damage, or even explosions.
The color coding, red for positive and black for negative, exists to prevent such errors. If you ignore color coding and attach red to a negative terminal or black to a positive terminal, you risk short circuits that can fry the electrical system in both vehicles.
Additionally, reversed polarity may damage sensitive onboard electronics, causing costly repairs. To avoid these hazards, always identify the battery terminals clearly, confirm the color coding, and connect red clamps to positive and black clamps to negative terminals. Following these steps ensures safe and effective jump-starting without risking injury or damage.
Common Jumper Cable Mistakes That Cause Damage
Why do jumper cables sometimes cause more harm than good? One common mistake is reversed polarity, connecting the red clamp to the negative terminal and the black clamp to the positive. This error can cause severe electrical damage to both vehicles’ systems.
Another frequent issue is insulation damage, often overlooked when cables are frayed or cracked. Damaged insulation exposes wires, increasing the risk of short circuits and electrical shocks.
You should also avoid clamping onto corroded or loose terminals, as this reduces conductivity and may cause sparking. Finally, don’t let the clamps touch each other during use; this creates a direct short and can damage your battery.
Proper inspection and correct connections prevent these damaging mistakes effectively.
What If Your Jumper Cables Don’t Match Colors?
If your jumper cables don’t match standard colors, you need to identify polarity carefully before use. Confusing positive and negative terminals can cause serious electrical damage. Always verify connections with a tester or markings to ensure safe jumper cable usage.
Identifying Cable Polarity
How can you determine cable polarity when jumper cables don’t match the standard red and black colors? First, examine the cables for polarity indicators such as plus (+) and minus (–) symbols embossed or printed near the clamps. These markings provide definitive polarity information regardless of color deviations.
If the cables lack symbols, use a multimeter to test continuity and voltage direction; connect the probes to the clamps and observe the reading to identify positive and negative leads. Additionally, inspect clamp design. Some manufacturers use textured grips or different metal finishes to denote polarity.
Avoid assuming polarity based solely on color when deviations exist. By relying on polarity indicators and electrical testing instead of color alone, you ensure correct cable connection and avoid potential damage from reversed polarity.
Risks Of Color Confusion
What happens when jumper cables don’t follow the standard red and black color scheme? You risk misidentifying polarity, which can cause short circuits, damage to electrical systems, or even battery explosions.
Color coding challenges become critical, especially if you have color blindness or limited ability to distinguish hues. Without consistent colors, you must rely on alternative indicators like polarity markings or cable design.
Improper connections due to color confusion increase the likelihood of reversed polarity, leading to costly repairs. To mitigate these risks, verify cable labels or use a multimeter before connecting.
Ensuring accurate polarity identification is essential for safe and effective jump-starting, particularly when the cables’ color scheme deviates from the universal red-positive, black-negative standard.
Safe Jumper Cable Usage
When your jumper cables don’t follow the standard red and black color scheme, you’ll need to take extra steps to ensure correct polarity. First, identify the positive and negative terminals on both batteries clearly. Use a multimeter or battery voltage tester if the cable colors are ambiguous.
Maintain strict isolation awareness to prevent accidental contact between terminals or cables, as incorrect connections can cause sparks or damage. Inspect the cables for insulation wear before use; compromised insulation increases the risk of short circuits and electric shock.
Always connect positive terminals first, followed by negative, and disconnect in reverse order. If unsure, label the cables temporarily with tape or markers to avoid confusion. Prioritizing these safety measures ensures effective and secure jumper cable usage despite nonstandard colors.
How to Spot Good, Safe Jumper Cables
Why should you prioritize cable thickness and clamp quality when selecting jumper cables? Cable thickness directly affects current flow; thicker cables reduce resistance, ensuring efficient power transfer and minimizing heat buildup.
Prioritize thick cables and quality clamps for efficient power flow and safe, reliable jump-starts.
Clamps with strong springs and solid metal construction maintain a secure, corrosion-free connection, preventing sparks or disconnections. Avoid cheap cables with flimsy clamps or thin wires, as these pose safety risks.
Also, beware of random pairing of cable colors or clamps, which can cause confusion and lead to incorrect connections. Don’t treat jumper cables as an unrelated topic or a simple accessory; their quality impacts both safety and effectiveness.
Look for cables rated for your vehicle’s amperage, with insulated handles and heavy-duty clamps. This approach ensures reliable, safe jump-starts without risking damage or injury.
Why Do Some Vehicles Have Different Battery Terminals?
How do battery terminal configurations vary across different vehicles? You’ll find that different terminals result from variations in battery designations and vehicle electrical systems. Automakers select terminals based on size, current capacity, and design compatibility.
For instance, some vehicles use top-post terminals, while others employ side-post or L-shaped terminals. This affects jumper cable connection points.
| Vehicle Type | Terminal Type | Battery Designations |
|---|---|---|
| Passenger Cars | Top-Post | Group 24F, 35, 48 |
| Trucks/SUVs | Side-Post | Group 65, 94R |
| European Models | L-Shaped | DIN 54454, DIN 72553 |
Understanding these differences helps you connect jumper cables correctly and avoid damage or poor connections.
Tips for Storing and Maintaining Your Jumper Cables
Where should you keep your jumper cables to guarantee they remain functional and ready for use? Store them in a dry, cool compartment inside your vehicle, avoiding extreme temperatures that degrade insulation. Always coil cables loosely to prevent internal wire damage.
Inspect cables regularly for wear, corrosion on clamps, and compromised insulation. Understanding polarity myths is crucial; never rely solely on color coding when connecting clamps. Verify positive (red) and negative (black) terminals before use.
Clean clamps with a wire brush to maintain conductivity. Avoid kinking or bending cables sharply to preserve internal wiring. Proper storage and maintenance ensure reliable performance when you need them most and prevent potential damage caused by improper handling or misidentifying terminals.
Following these tips extends jumper cables’ lifespan and supports safe, effective use.
Frequently Asked Questions
Can Jumper Cables Be Used on Electric Vehicles?
You can’t use jumper cables to jump-start most electric vehicles due to EV charging compatibility and complex battery management.
Prioritize jump start safety by consulting the manufacturer and using approved charging or towing methods instead.
How Long Should You Leave Jumper Cables Connected?
You should leave jumper cables connected for about 3 to 5 minutes after starting the engine to guarantee proper jump start timing. This allows the dead battery to gain enough charge before disconnecting safely.
Are There Alternatives to Using Jumper Cables?
Looking for alternative charging methods? You can use portable jump starters or solar chargers.
These options follow proper battery jumpstart etiquette, letting you avoid traditional jumper cables while safely restoring your vehicle’s power efficiently and effectively.
Can Cold Weather Affect Jumper Cable Performance?
Yes, cold weather reduces battery chemistry efficiency, lowering voltage and current output. You’ll notice slower jump starts and weaker cable performance.
What Should I Do if My Car Won’T Start After Jump-Starting?
If your car won’t start after jump-starting, check for a dead battery or faulty connections. Avoid unsafe jump starts by ensuring proper cable placement.
Consider professional help to diagnose alternator or electrical system issues promptly.